Idaptive Integration
- Login to the Idaptive SSO platform.
- Navigate to Apps > WebApps > Select SAML Web.
-
Select SAML Web.
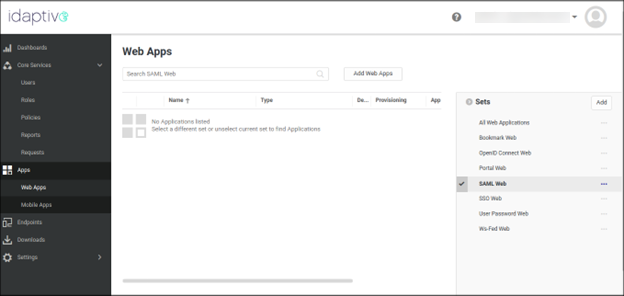
- Click Add Web Apps.
-
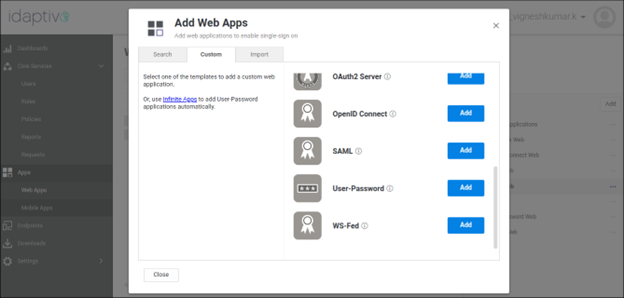
In the Add Web Apps window, under the
Custom tab, click Add for
SAML.
 SAML app is added to the Web Apps Inventory.
 - Select the SAML app in the Web Apps Inventory and proceed with the configuration.
-
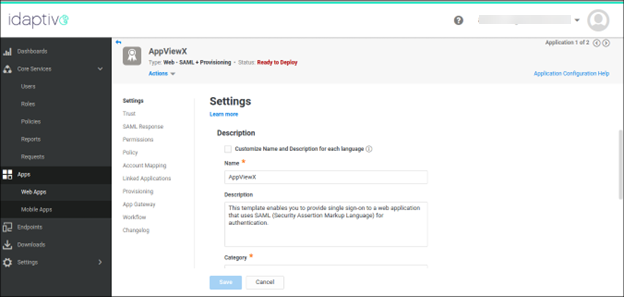
In the Settings tab, enter AppViewX as the app
name and save the configuration.
-
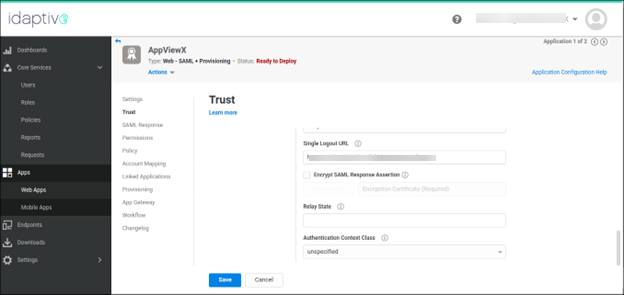
In the Trust tab, click Download Metadata
File.
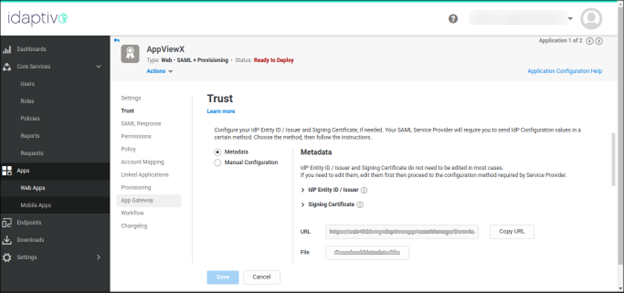
- Select the Manual Configuration option.
-
Copy the Entity ID URL from AppViewX and paste it into
the SP Entity ID field within the Idaptive portal.
Similarly, copy the Service URL from AppViewX and paste
it into the ACS URL field in the Idaptive portal.

-
Verify whether the Recipient checkbox matches the ACS URL. Retain the default
settings for the remaining fields. Configure the Single Logout URL field with
the copied value from the SLO URL in AppViewX. Finally,
Save the configuration.
-
In the SAML response tab, add the below assertion
attributes with the same format.
FirstName > LoginUser.FirstName, LastName > LoginUser.LastName, NameID > LoginUser.Email, EmailId > LoginUser.Email, Roles > LoginUser.RoleNames (This should be the user associated User Groups or Security Groups).
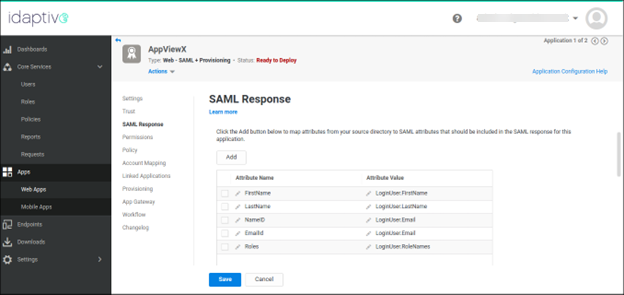
- Click Save.
- Assign the application to the respective Role and the Role to the respective Users.
- After configuration of role is done, proceed to set up the same role within AppViewX under the Account > User Group module. Assign the respective AppViewX role permissions to the User Group.
- Access AppViewX with the help of External login using SAML.