ADFS Integration
Prerequisite
To enable ADFS based single sign-on, the ADFS service should be installed and configured with the respective Active Directory Domain.Note: The steps are performed on the Windows 2012 R2 server
with AD enabled in the same domain.
-
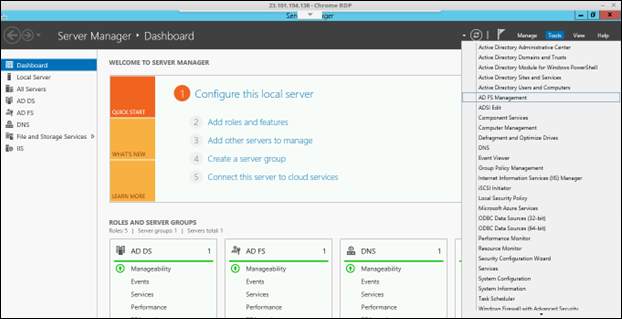
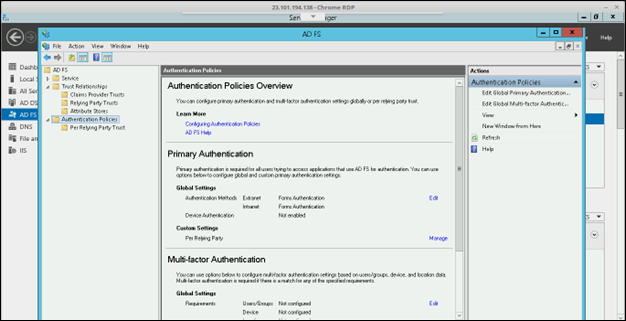
Navigate to Server Manager > Tools > AD FS Management.
-
In the AD FS window, under
Actions select Add Relying Party
Trust.
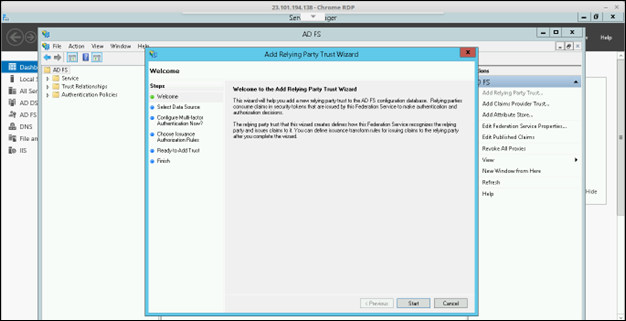
- Click Start to Add Relying Party Trust wizard.
-
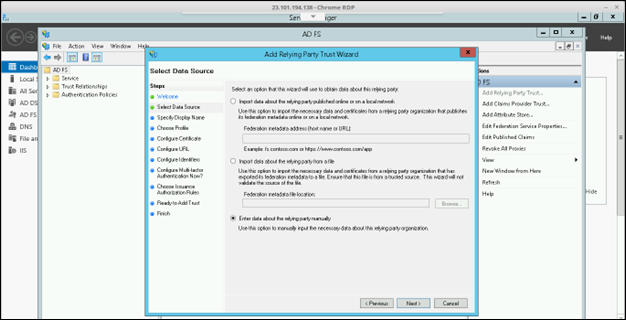
Under the Select Data Source section, select the
Enter data about the relying party manually option,
and then click Next.
-
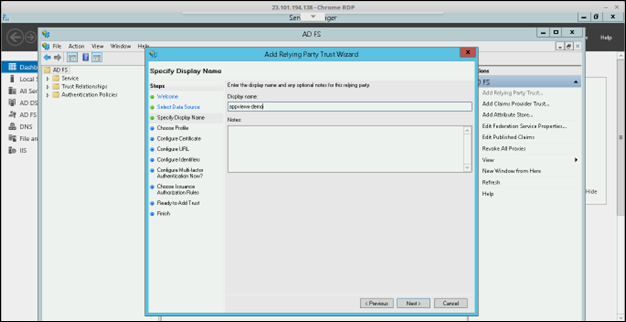
Enter a Display Name and click
Next.
-
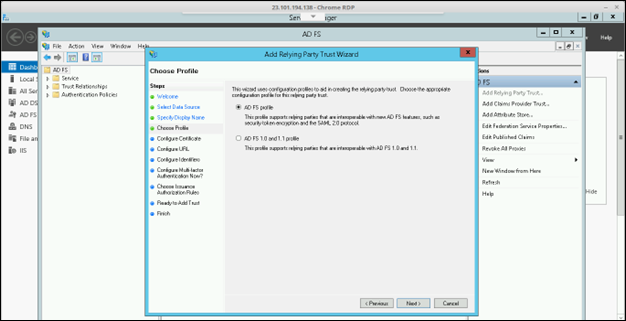
Under the Choose Profile section, select the
AD FS profileoption and click
Next.
-
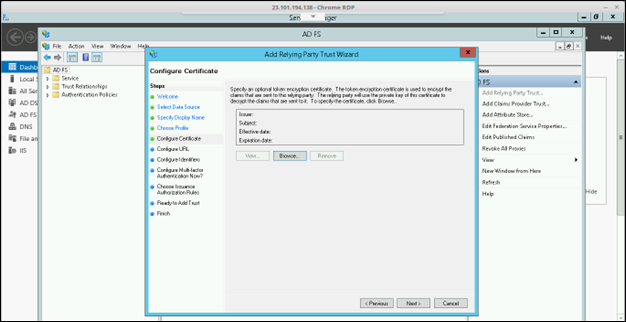
Add a new token encryption certificate if needed or leave it with the default
setting and click Next.
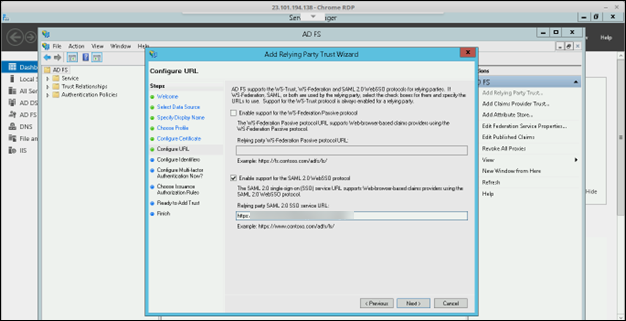
- Under the Configure URL section, select the Enable support for SAML 2.0 WebSSO protocol option.
-
Enter the AppViewX Service URL which was copied in the previous step of
Enabling SSO in AppViewX and click Next.
-
Under the Configure Identifiers section, enter the
AppViewX Entity ID which was copied in the previous step of Enabling
SSO in AppViewX and click Add.
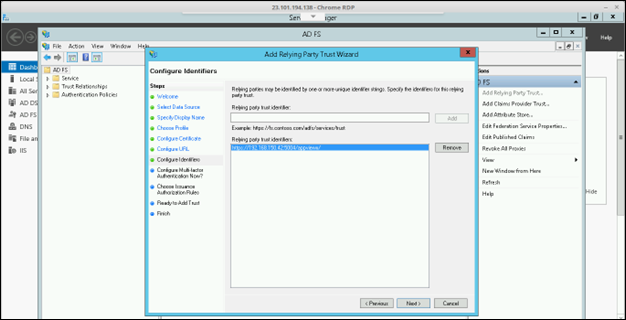
- Click Next.
-
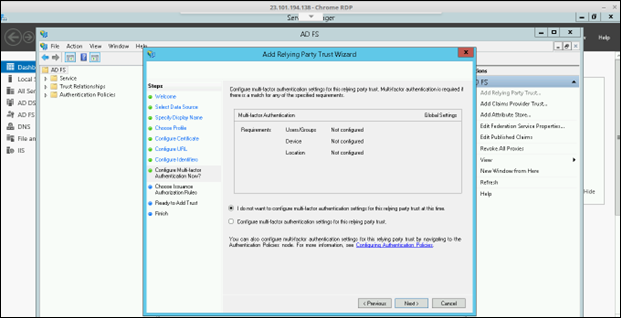
Under the Choose Multi-factor Authentication section,
select the I do not want to configure multi-factor authentication
settings at this time option. If the organization has a
multi-factor authentication setting, enable it and click
Next.
-
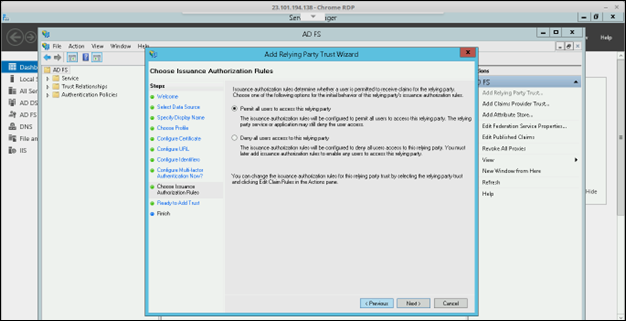
Under the Choose Issuance Authorization Rules section,
select Permit All Users to access this relying party and
then, click Next.
- Under the Ready to Add Trust section, review the configuration done in the wizard and click Next.
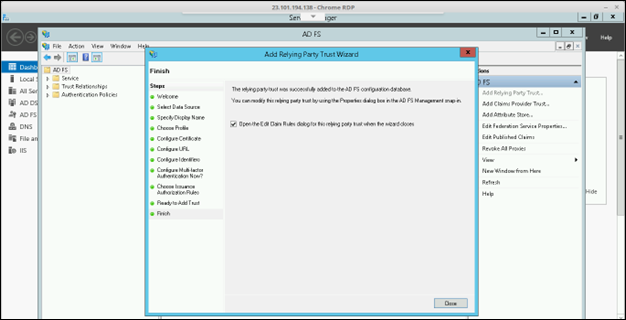
-
Under the Finish section, select the Open the Edit
Claims checkbox and click Close.
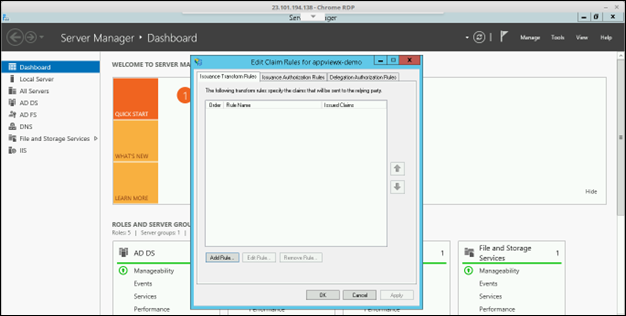
Add Claim Rules
To configure attributes or claims to be passed as an assertion Claim Rules should be created in ADFS.
-
In the Edit Claim Rules pane, click Add
Rule.
-
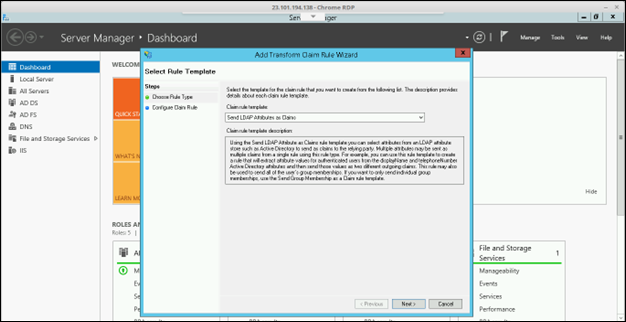
Under the Select Rule Template section, select
Rule Type as Send LDAP attributes as
Claims and click Next.
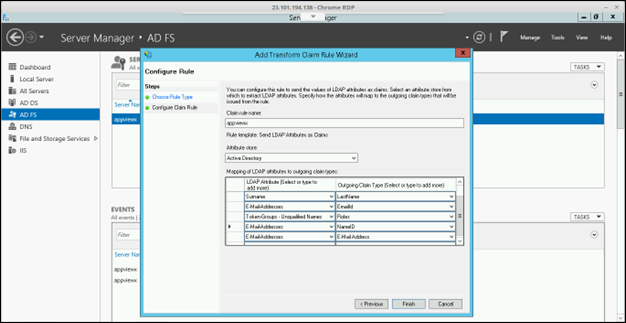
- Enter a Rule name and select the Attribute store as Active Directory.
-
Enter the claim types as below, and then click
Finish.
Display-Name > FirstName, Surname > LastName, E-Mail-address > EmailId, Token-Groups-Unqualified Names > Roles, E-Mail-address > NameID, E-Mail-address > E-Mail-address.
-
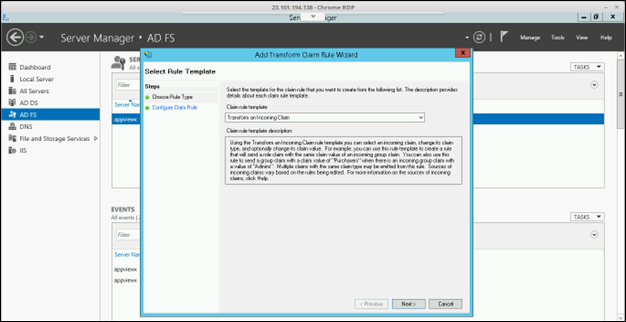
Create another rule to transform the incoming claim by clicking Add
Rule > Rule Template (Transform an Incoming Claim), and then
click Next.
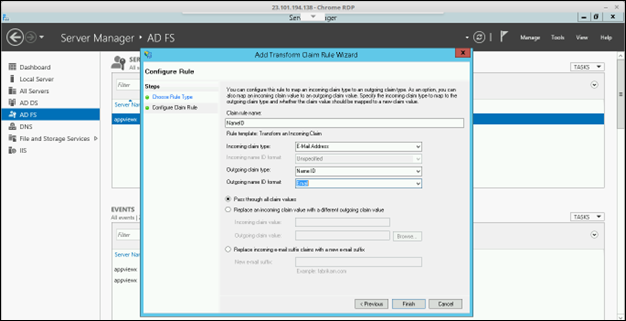
-
Enter a Rule Name and select the Incoming Claim Type as
E-Mail-Address, Outgoing Claim Type as Name ID, and
Outgoing Name ID Format as Email, and then click
Finish.
-
In the Edit Claims pane, click Apply, and then OK.
Enable Form-Based Authentication
Now AD FS is configured with all necessary details for SSO based authentication. To Export AD FS IDP metadata and upload in AppViewX SSO settings, export the metadata using the IDP URL and save it as an XML file.
Sample URL:
https://appviewx.westus.cloudapp.azure.com/federationmetadata/2007-06/federationmetadata.xml
Note: Role name
passed in as a part of the SAML assertion should be configured in AppViewX on
the Accounts > UserGroup and assign a role for accessing the application. For an
IDP initiated SSO the following structure like URL should be used.
Sample IDP initiated URL: https://appviewx.westus.cloudapp.azure.com/adfs/ls/idpinitiatedsignon