Microsoft Server
Prerequisites
- You must be a local admin user
- You must have read and write permissions for the folder specified as the discovery path and the push location.
- You must have the access permissions to the drive, and the drive must be configured in sharing mode to allow discovery and push operations.
- You must have Read and write access to the trust store to discover and push certificates to the store,.
- If the Gateway type is selected as WMI, ensure that WMI is properly configured.
- The iisreset.exe file is expected at the default location. (C:\Windows\System32) to support IIS Service restart
Microsoft Server Discovery
The discovery process for Microsoft servers can leverage multiple sources as outlined:
- File System Discovery: Requires at least one file path to be specified during device addition.
- Microsoft Certificate Store Discovery: Automatically scans the server’s certificate store for available certificates.
- Port Scan Discovery: Identifies certificates by scanning specified ports on the server.
The AppConnector is created dynamically based on the discovery method used.
Connector Behavior
- For certificates discovered from the File System, a Push-only/Default Connector is created by default.
- Profile Naming Convention:
- deviceName
- deviceName::StoreName
- You can only push certificates to the Certificate store or Centralized File System.
- If the customer wants to perform custom operations (such as validations, service-related activities, backup, etc) before the push or after a successful push operation, they need to configure and use the Pre-Script and Post-Script Execution options.
- One or more Store profiles can be selected to push the certificate to the respective store.
Custom Certificate Order for Microsoft Server (PEM Format Push)
When pushing certificates in the PEM format to a Microsoft Server, the certificate chain order is controlled through metadata stored in the database.
- The default format is server:inter:root.
- If a non-standard certificate order is required, this can be enabled and
defined via
metadata:
db.cert_metadata.update({_id:"CERT_VENDOR_BASED_CONDITIONS"},{"$set": {"map.server_microsoft_server_push_certificate_order" : "server:root:inter"}})
Supported Certificate types for File System Push
- JKS
- Default JKS (creates the JKS file with default password changeit in the Catalina basepath)
- PEM (*.pem, *.cer and *.crt)
- DER (*.der and *.cer)
- PKCS#12 (*.p12 and &.pfx)
- PKCS#7 (*.p7b and *.p7c)
Onboarding Microsoft Server
-
Go to
 (Menu) > CERT+ >
ADMINISTRATION > Device
Management.
By default, the ADC tab opens.
(Menu) > CERT+ >
ADMINISTRATION > Device
Management.
By default, the ADC tab opens. - Click the Server tab.
-
Click the
 (Add) icon.
The Device details page is displayed.
(Add) icon.
The Device details page is displayed. - Select Microsoft Server logo from the Vendors list. The following screen is displayed.
-
In the Server Details section button, enter details
as mentioned below.
Table 1. Server Details - Fields Description Table Field Name Description Server Type Select Server Type as Microsoft Server. *Server name Enter the name of the designated Microsoft server. Data center Choose the desired data center. Onboarding Group Select the onboarding group to assign the device. Note: Devices without an assigned group are automatically mapped to the Default group during migration, onboarding, and when edited without existing group mappings.Communication mode Select the Gateway or SSM protocol to be used for communication between the AppViewX node and the Microsoft server. Gateway is the preferred communication mode. Host name Enter the hostname of the server to be onboarded. Note: If the Microsoft Server is configured for the integrated Windows Gateway mode, ensure that the hostname used is resolvable in the cloud connector. The usage of FQDN is preferred.Cert sync Choose from the any of the following: - Managed - AppViewX performs the config fetch operations and the certificates are discovered and managed in the inventory. CLM actions (push & bind, rollback etc.) can be performed on them.
- Monitored - AppViewX performs the config fetch operations and the certificates are downloaded in the inventory in the read-only state. CLM actions cannot be performed on them.
- Ignored - AppViewX only performs the config fetch operations for the devices. There is no certificate discovery performed.
*: Mandatory fields -
In the Credentials section, enter the details as
follows.
If Communication mode = Gateway the fields are as follows:
Table 2. Credentials - Field Description Table Field Name Description Credential Type Select the type of credential from the dropdown list. - Manual entry
- Gateway credentials
- Credential List - AppViewX
AppViewX also supports the following external credential types:
- HashiCorp
- CyberArk
- BeyondTrust
- Thycotic
- Credential list - cloudAccount
- IAM ROLE ACCESS
 : An IAM role-based
approach is used for authentication instead of
direct access keys.
: An IAM role-based
approach is used for authentication instead of
direct access keys.This field is displayed only when Communication mode = SSM.
Access is provided based on IAM roles. To enable this feature in your SaaS environment:- Create a role in one of your AWS accounts that trusts the AppViewX AWS account.
- From AppViewX, assume the role created in your account.
- Using the assumed role from the above step, assume the roles created in the respective child accounts to perform the required CLM actions.
*Username This field is displayed only if Credential Type = Manual Entry. Enter the username for authentication. *Password This field is displayed only if Credential Type = Manual Entry. Enter the password for authentication. *Credential List This field is displayed only if Credential Type = Credential List - AppViewX. Select the configured credentials value or Default from the dropdown list. Download Cloud Formation Template (CFT) For Credential type = IAM ROLE ACCESS, to download the CloudFormation template, click the Download Cloud Formation Template link that is displayed below the Credential Type dropdown list. 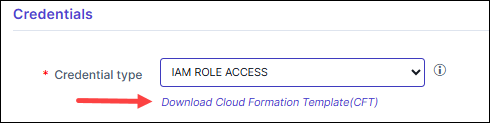 The downloaded CloudFormation template is pre-configured with the AppViewX AWS account details that need to be trusted. Ensure that you:
- Use the downloaded template to create a role in any of your AWS accounts.
- Provide a unique string as the External ID for the role you are creating.
*Master Account Role This field is displayed when Credential type = IAM ROLE ACCESS. Enter the Amazon Resource Name (ARN) of the AWS IAM role.
The IAM role input for this field can be:- a simple name (as a alpha-numeric string)
- an identifier in a full path format (e.g.,
/service-prefix/role-name)
AWS allows roles to be created within paths to help manage large numbers of roles and delegate permissions. With path support, users can onboard resources where the IAM Role is nested.
*External Id This field is displayed when Credential type = IAM ROLE ACCESS. Enter the unique identifier generated to establish a secure trust relationship between AWS and AppViewX.
*: Mandatory fields If Communication mode = SSM the fields are as follows:Table 3. Credentials - Field Description Table Field Name Description Credential Type Select the type of credential from the dropdown list that will be entered in the username and password field. - Manual entry
- Gateway credentials
- Credential List - cloudAccount
Note: If Credential list - cloudAccount is selected, the *Account name dropdown field is displayed. Select any of the preconfigured credential values.*Access key Enter the access key to login to the EC2 instance of the AWS cloud machine. *Secret key Enter the secret key to login to the EC2 instance of the AWS cloud machine. *Region Enter the geographic region of the AWS instance. Example: us-east-2
*Instance id Enter the unique identifier for an EC2 instance in AWS. It is required to perform actions or execute commands on a specific EC2 instance
Example: i-02573cafcftext
Note: Click the (Settings) icon next to
the field to configure the ARN Advanced
Settings.
(Settings) icon next to
the field to configure the ARN Advanced
Settings.*S3 bucket name Enter the S3 bucket name used to store command output or logs executed in the EC2 instance. Example: avxdiscoverydocument-c2
Note: Click the(Settings) icon next to
the field to configure the S3 Advanced
Settings.Proxy required Select the checkbox to enable the secure proxy service. *: Mandatory fields -
Enter the Windows gateway details.
Note: This section is displayed only when Communication mode = Gateway.
Table 4. Windows Gateway Details - Field Description Table Fields Description *Windows Gateway Mode For communicating with Windows-based devices, from the following options, select the gateway agent mode to be used: - External
This mode will use the AppViewX Windows Gateway Agent that is set up on a Windows device.
- Integrated

This mode will use the prepackaged gateway that is integrated in the AppViewX Cloud Connector (enabled only in the SaaS and Managed Kubernetes installations).
Prerequisites for using the Integrated Windows Gateway mode
Note: The integrated gateway functionality is not compatible with the following feature:- Server addition using the import feature
*Gateway type From the following options, select the required gateway type: - PowerShell
- WMI
Note: The integrated gateway uses only the PowerShell gateway command execution mode and therefore, this field is not displayed when Windows Gateway Mode = Integrated.*Gateway location From the following options, select the gateway location: - Remote
Note: By default, the integrated gateway is remotely located. and therefore, this field is not displayed when Windows Gateway Mode = Integrated.*Select gateway From the following options, select the gateway: - New
- Existing
*Windows gateway name For Windows Gateway Mode = External and Select gateway = New, enter a name for the Windows Gateway. For Windows Gateway Mode = Integrated, this field is auto-populated with the value integrated-gateway and is non-editable.
*Windows gateway URL Note: This field is displayed only when Windows Gateway Mode = External.Enter the URL of the Windows Gateway endpoint.Client authentication certificate Note: This field is displayed only when Windows Gateway Mode = External and Select gateway = New.Upload the client certificate used while installing Windows Gateway. You can use the default client certificate (ClientCertificateGateway.pfx) or a custom certificate.*Windows gateway Note: This field is displayed only when Select gateway = Existing.From the dropdown list, select an existing Windows gateway.*: Mandatory fields - External
-
In the Vendor Specific Details section, select/enter the details as
follows.
If Communication mode = Gateway the fields are as follows:
Table 5. Vendor Specific Details - Field Description Table Fields Description *Services Select checkbox values as MS Server, or Exchange Server, or Windows Gateway or all. The default value is MS Server. Note:- Selecting all of the services will discover the certificates from MS Server, Exchange Server, and Windows Gateway.
- If no services are selected, the service implementation will default to MSServer and CSR generation will be disabled.
- The Exchange Server option is not supported for Windows Gateway Mode = Integrated and SSM.
- Windows Gateway service can be used to enable the CLM support for the Windows GW certificate.
*: Mandatory fields If Communication mode = SSM the fields are as follows:Table 6. Vendor Specific Details - Field Description Table Fields Description *Services For SSM the default services enabled is MS Server. (Exchange Server is not supported in the cloud). *Region Enter the geographic region of the AWS instance. Example: us-east-2
*Instance Id Enter the unique identifier for an EC2 instance in AWS. It is required to perform actions or execute commands on a specific EC2 instance Example: i-02573cafcftext
Note: Click the (Settings) icon next to the field to configure the ARN Advanced Settings.*S3 bucket name Enter the S3 bucket name used to store command output or logs executed in the EC2 instance. Example: avxdiscoverydocument-c2
Note: Click the (Settings) icon next to the field to configure the S3 Advanced Settings.Proxy Required Select the checkbox to enable the secure proxy service. *: Mandatory fields -
In the Certificate details section, select/enter the
details as follows.
Note: The Certificate details section will not be displayed if Communication mode = Gateway and Services = Exchange Server (in the Vendor specific details)
Table 7. Certificate Details - Field Description Table Fields Description *Keystore Credential Type Select the type of credential from the dropdown list. - Manual entry
- Credential List - Thycotic
Note: If Credential list - Thycotic is selected, the *Keystore Credential Name dropdown field is displayed. Select any of the preconfigured credential values.Certificate location Enter the directory/path where the application is installed. Example: C:\Microsoft\ADFS\
Certificate Password Enter the certificate password. This field is only displayed for Keystore Credential Type = Manual entry) *: Mandatory fields -
Click Add.
Once the server is added successfully, the path will be listed in the table.
- (optional step) Click the (Delete) icon, if you want to delete the server path from the list.
-
Click Save
The device is onboarded successfully.
Onboarding ADFS Server
-
Go to
(Menu) > CERT+ >
ADMINISTRATION > Device
Management.
By default, the ADC tab opens.
- Click the Server tab.
-
Click the
(Add) icon.
The Device details page is displayed.
- Select Microsoft Server logo from the Vendors list. The following screen is displayed.
-
In the Server Type radio button, select/enter the
details below.
Table 8. Server Details - Fields Description Table Field Name Description Server Type Select Server Type as ADFS Server. *Server name Enter the name of the designated Microsoft ADFS server. Data center Choose the desired data center. It holds all the SSL What can you do next? that is to be retrieved from the Microsoft ADFS server. Communication mode Select the Gateway or SSM protocol to be used for communication between the AppViewX node and the Microsoft server. Gateway is the preferred communication mode. (SSM is disabled by default) Host name Enter the hostname Cert sync Choose from the any of the following: - Managed - AppViewX performs the config fetch operations and the certificates are discovered and managed in the inventory. CLM actions (push & bind, rollback etc.) can be performed on them. (This option is disabled by default).
- Monitored - AppViewX performs the config fetch operations and the certificates are downloaded in the inventory in the read-only state. CLM actions cannot be performed on them.
- Ignored - AppViewX only performs the config fetch operations for the devices. There is no certificate discovery performed.
*: Mandatory fields -
In the Credentials section, select/enter the details
as follows.
Table 9. Credentials Section - Field Description Table Field Name Description Credential Type Select the type of credential from the dropdown list that will be entered in the username and password field. - Manual entry
- Gateway credential
- Credential List - AppViewX
*Username This field is displayed only if Credential Type = Manual Entry. Enter the username for authentication. *Password This field is displayed only if Credential Type = Manual Entry. Enter the password for authentication. *Credential List This field is displayed only if Credential Type = Credential List - AppViewX. Select the configured credentials value or Default from the dropdown list. *: Mandatory fields -
In the Windows gateway details section, select/enter
the details as follows.
Table 10. Windows Gateway Details - Field Description Table Field Name Description *Gateway type Select to use the PowerShell or WMI commands as the gateway communication mode. *Gateway location The value Remote is selected by default. *Select gateway Select the New or Existing gateway to be used. The below fields are enabled/disabled according to the selection. *Windows gateway name Enter the new gateway name. (Enabled when New is selected as gateway) *Windows gateway URL Enter the URL for the new gateway. (Enabled when New is selected as gateway) Client authentication certificate Click Browse and upload the client authentication certificate for the new gateway. (Enabled when New is selected as gateway) *Windows gateway Select any of the existing configured gateways from the dropdown list. (Enabled when Existing is selected as gateway) *: Mandatory fields -
Click Save
The device is onboarded successfully
The ADFS Server device can also be onboarded by the import functionality using the standard .xlxs and .csv templates available.
To onboard the ADFS server into the AppViewX inventory using the import functionality:
- Go to
(Menu) > CERT+ >
ADMINISTRATION > Device
Management.
- Click the Server tab.
- Click the Import button. The Import details page is displayed.
- Click on the CSV or XLSX icons in the Uploader Info section. The sample templates are downloaded and saved at the default file location.
- Open the CSV or XLSX templates, enter the relevant information for
onboarding the ADFS server, and save the file.Note: Ensure all the mandatory and relevant fields are entered in the .csv or .xlsx template.
- Click the upload icon in the Import section, and select the .csv or .xlsx file from the file dialog box. The status of the uploaded file is displayed in the File Histories section.
Validating the Device
-
Go to ADMINISTRATION > Device
Management.
By default, the ADC tab opens.
-
Click the Server tab.
The Server Inventory page is displayed.
-
Check that the device name appears in the inventory (Name column) with the
specified CertSync status (Status Column).
The status column will have the value Managed/Monitored/Ignored based on the CertSync status if the connection is successful or displays Failed/Unresolved in case of failure.
-
From the Status column, click the Managed/Monitored.
Device Status Log pop-up is displayed.
- Expand each value in the pop-up to know the Device communication, Device Version, Instance Information, and Certificate Discovery From Device.
Limitation
What's Next
- If you want to discover certificates from the onboarded device, see Managed Devices Scan.
- If you want to enroll a new server certificate, see Enrolling a Server Certificate.