Certificate Reports
SMTP Configuration
To get the certificate reports sent as a mail, we will have to first configure SMTP
- Log in to the AppViewX application with valid credentials.
-
Click on the menu button.
The left navigation pane is displayed.
-
Click Settings.
The Settings page is displayed.
-
Expand the General menu and then click SMTP.
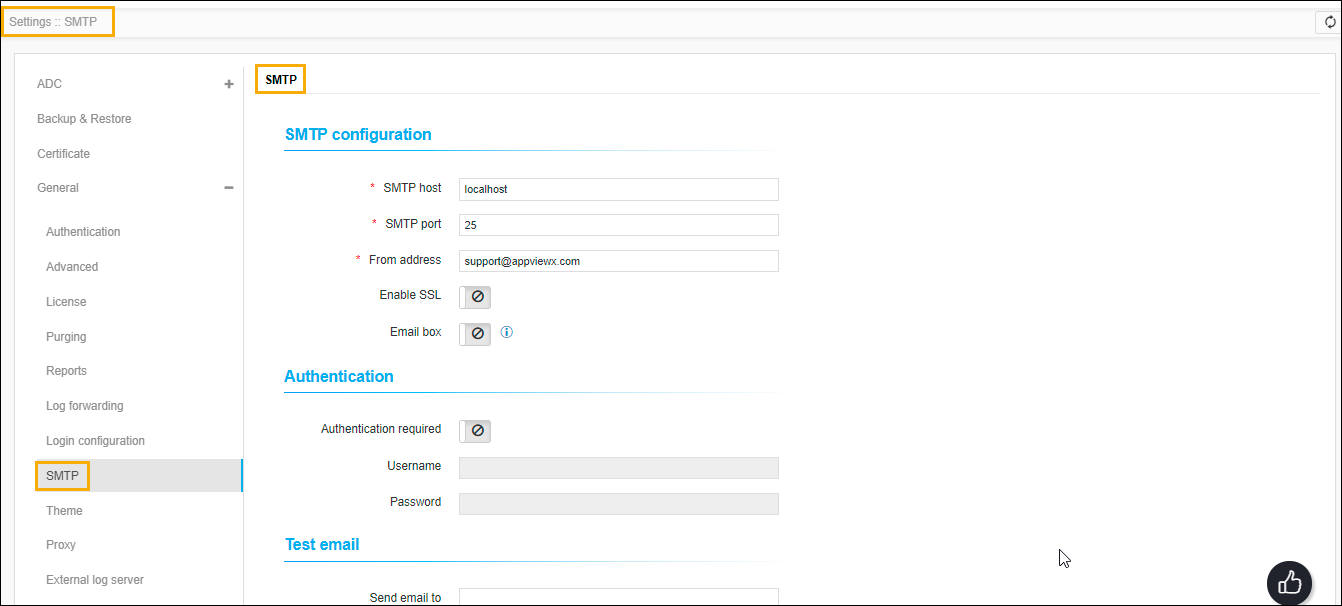
- Refer to the fields in the table below to update the information on the SMTP page.
| Name | Type | Description | Error Message |
|---|---|---|---|
| * SMTP host | Text | The server that will send the email. | Enter valid Hostname/ IP address <x.x.x.x>. |
| * SMTP port | Text | Port to connect to the email server. |
|
| * From address | Text | Mail address from which mail is to be received by the user. |
|
| Enable SSL | Toggle button | To enable/disable SSL while sending mail. | NA |
| Email box | Toggle button | Enabling this setting will use IMAP for the mailbox. | NA |
| Text | Email for IMAP. Mandatory if Email box is enabled. |
|
|
| Password | Text | Password for IMAP. Mandatory if Email box is enabled. |
This field is mandatory. |
| * Hostname | Text | The hostname for IMAP. Mandatory if Email box is enabled. |
|
| Authentication required | Toggle button | To enable/disable Authentication required. | NA |
| * Username | Text | The username if authentication required. Mandatory if Authentication required is selected as true. |
NA |
| * Password | Text | Mandatory if Authentication required is selected as true. | NA |
| * Send email to | Text | Test email to check if able to send mail after configuring
the above settings. Mandatory if you want to test. |
Enter a valid email. |
|
Note: The asterisk (*) symbol indicates a
mandatory field.
|
|||
Troubleshooting SMTP
| Error Message | Possible Cause | Possible Solution |
|---|---|---|
| Please provide a valid value. | Anyone of the mandatory fields is invalid or is missing. | Provide valid values for all mandatory fields. |
| E-Mail sending was unsuccessful. |
|
|
| Service unavailable. Try after some time. | avx_subsystems or avx_platform_gateway is not running. | Restart the plugin. |
Fetch All Default Reports
-
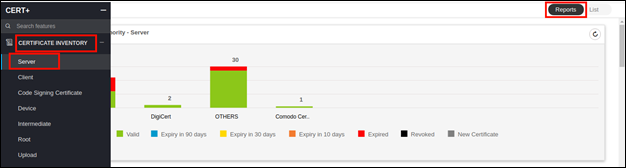
Go to
 (Menu) > CERT+ >
CERTIFICATE INVENTORY >
Server or Client or
Code Signing Certificate.
(Menu) > CERT+ >
CERTIFICATE INVENTORY >
Server or Client or
Code Signing Certificate.
-
In the top right corner, click Reports tab.
The respective report page is displayed.
Working with the Job Scheduler
Report Routing
- Validation report
- Vulnerability report
- CAA report
-
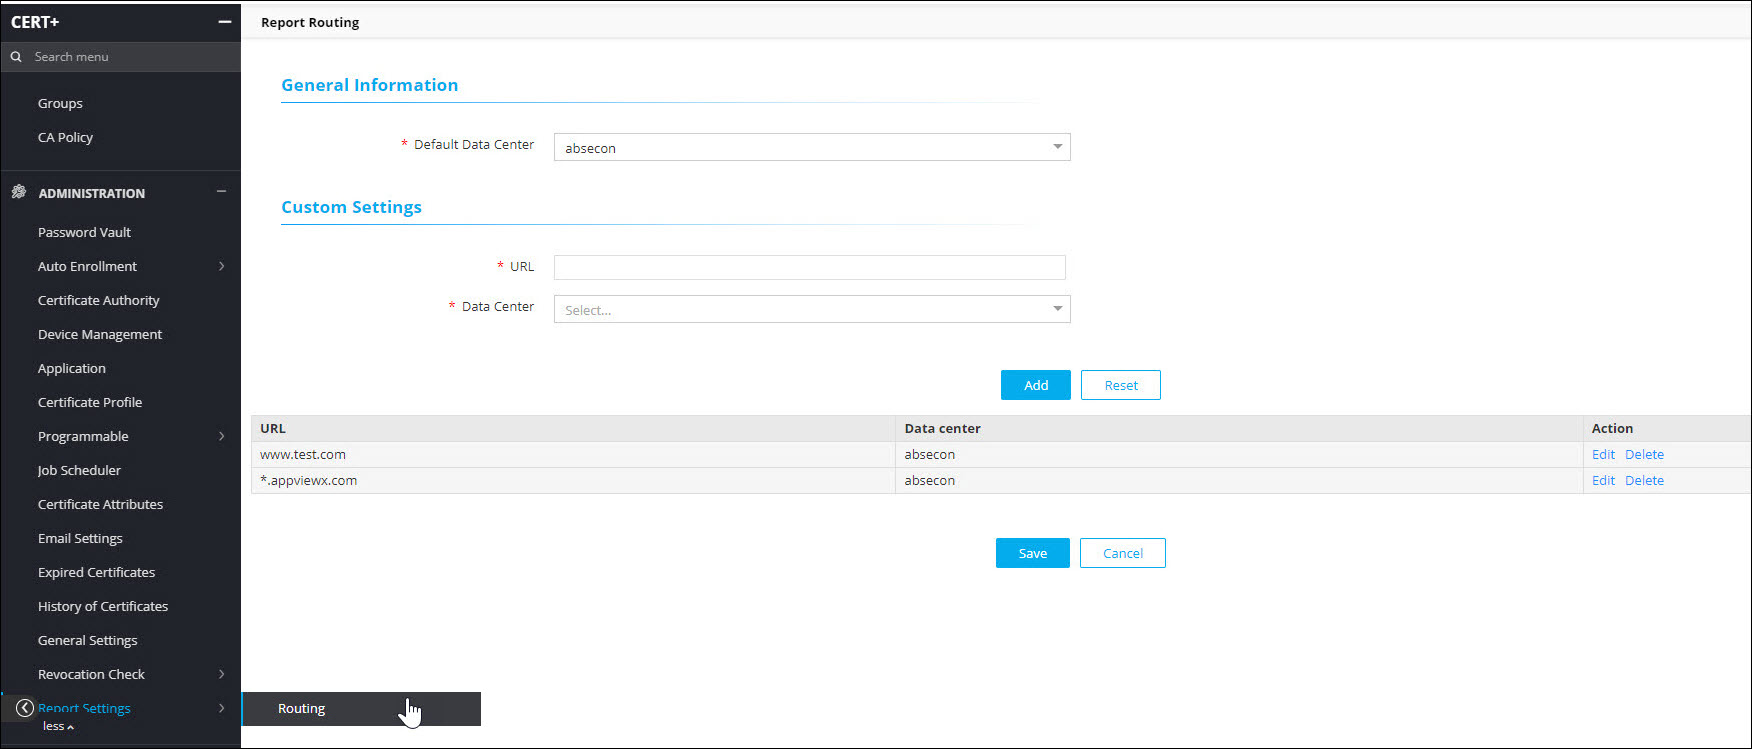
Go to
(Menu) > CERT+ >
ADMINISTRATION > Report
Settings > Routing or Code
Signing.
The Report Routing page is displayed.
-
Enter the following fields:
Table 2. Revocation Routing Page - Fields Description Fields Description General Information Default Data Center This is the default data center through which all validation requests are routed. Custom Settings URL Type the URL of the certificate for which you want to perform the revocation check. Data Center Select the data center of the URL from the dropdown list. Selecting this value will overwrite the default data center. Note: The asterisk (*) symbol indicates a mandatory field. -
Click Add.
The table is refreshed with a row entry of the newly added URL and the data center.
-
Click Save.
- A message that certificate report settings routing is saved successfully is displayed.
- On saving, any report validation such as validation checks or CAA record check is routed through the data center configured on this page.
Note: To perform a bulk operation on certificate URLs, you can specify a wild card character with their domain name, for example, if you want to specify a data center to all the AppViewX certificates at one go, then use wild card character as in *.appviewx.com and select the data center from the dropdown list. - Click Add.
- To edit the certificates, then use the Edit option.
Validation Settings
-
Go to
(Menu) > CERT+ >
CERTIFICATE INVENTORY >
Server or Client or
Code Signing.
- Click the Common Name link to view the certificate in the holistic view.
-
Hover the mouse over the
 (More) icon of the application connector and
click Edit.
(More) icon of the application connector and
click Edit.
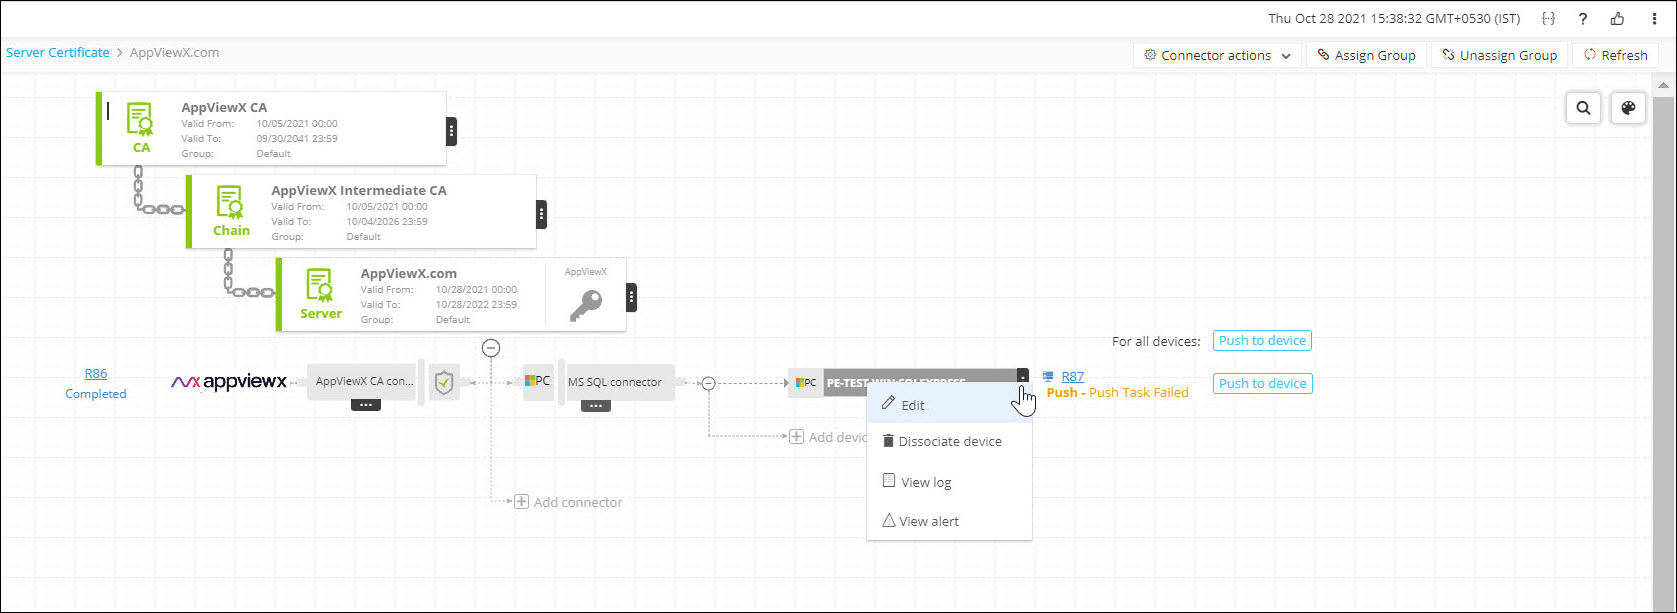
The Edit Application Connector page is displayed.
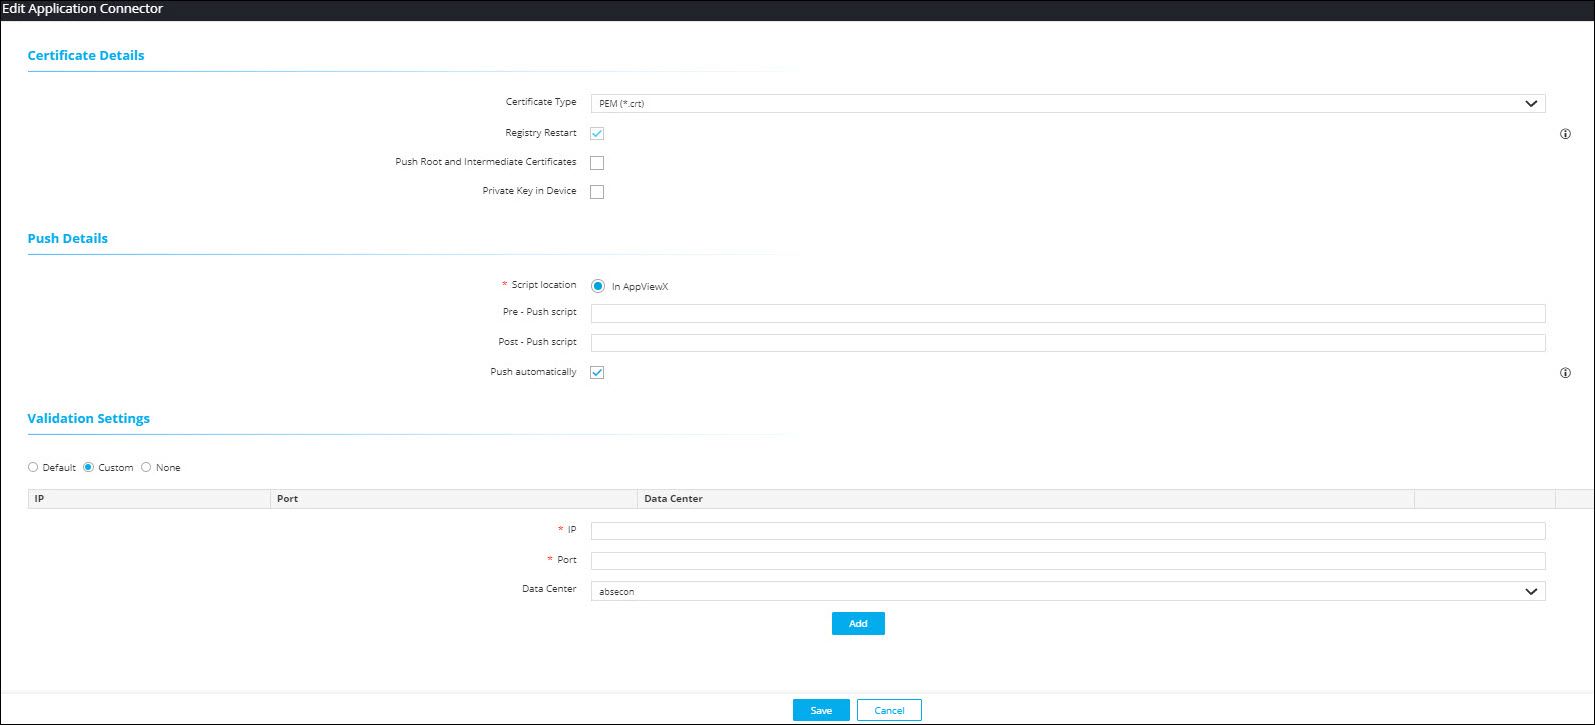
- Select Custom option.
-
In the Validation Settings section, select the
data center from the dropdown list.
This ensures that for any validation check, this is treated as high priority.
Revocation Check Routing
- Revocation check job
- On demand revocation check
-
Go to
(Menu) > CERT+ >
ADMINISTRATION > Revocation
Check > Routing .
The Revocation Routing page is displayed.

-
Enter the following fields:
Table 3. Revocation Routing Page - Fields Description Fields Description General Information *Default Data Center This is the default data center through which all validation requests are routed. Custom Settings *URL Specify the URL for which you want to run the revocation check job or the on-demand revocation check by selecting the certificate from the holistic view. To run the revocation check job, copy and paste the URL from the CRL distribution points field of the Certificate details window.
To run the on demand revocation check, copy and paste the URL with ocsp extension from the Authority information access field of the Certificate details window.
Note: For on demand revocation checks, if you have configured two URLs with .crl and .ocsp extensions and for any reason the job fails on .ocsp, then the revocation check is triggered on the URL with .crl extension.
If the job is successful and the certificate is revoked, then the certificate is displayed on the Certificate Inventory page with a black icon against it.
If the job failed, then go to Administration > Logging > Certificate and check the log message.
*Data Center Select the data center of the URL from the dropdown list. Selecting this value will overwrite the default data center. Note: The asterisk (*) symbol indicates a mandatory field. -
Click Add.
The table is refreshed with the added URL and the data center.
-
Click Save.
- A message that certificate revocation check routing is saved successfully is displayed.
- The table is refreshed with a row entry of the newly added URL and the data center.
Securing CERT+
Typically, the private keys are stored by the devices handling SSL termination, and an SSL management tool retrieves them during certificate renewal. The tools and devices store them in their storage in the original format, which can be reused. If there is an attack on the device or tool storage, the private keys will be given away, which can be used to host an array of attacks.
AppViewX stores the private keys discovered in a secure part of the database, which is encrypted using the AES-256 algorithm. It encrypts each private key with independent keys and stores the encrypted independent keys in the database with a randomly generated key.
Thus, even if the hackers get the database, they will not be able to get the private keys. Only a maze of jumbled up characters will be visible to them, which does not make any sense and hence, rendering the attack useless.