Onboarding Devices from Policy Engine
You can now enable onboarding of devices discovered through network scans by matching them against predefined device group rule policies.
To onboard a device policy:
-
Go to
 (Menu) icon > Policy Engine > POLICY MANAGEMENT >
Policies.
The Policy Inventory page is displayed.
(Menu) icon > Policy Engine > POLICY MANAGEMENT >
Policies.
The Policy Inventory page is displayed. -
On the Policy Inventory page, click + Create Policy.
The Create Policy popup window is displayed.
- Select Device Policy from the Policy Type dropdown.
-
Enter the following details to configure the policy.
Field Description *Policy Name Enter a policy name. It can be alphanumeric and can contain underscore (_), dash (-), or space. Description Enter the description for the policy. *Select a Tag Select an existing tag from the dropdown or create a new one. Note: Selecting the appropriate policy type allows you to group policies logically, simplifying organization and management based on specific criteria.*Fields marked with red asterisk (*) symbol are mandatory. -
Click Configure Policy.
Once the policy is created successfully, a confirmation message will appear, and you will be directed to the Action page.
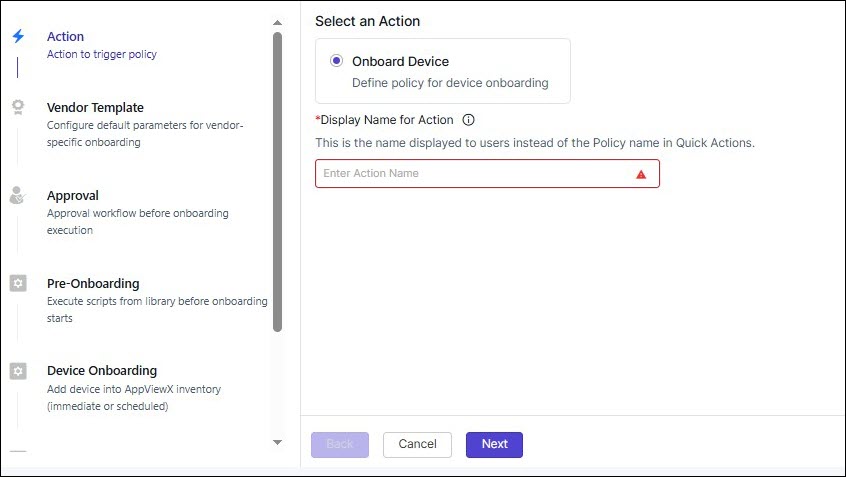
- Select the Onboard Device option (default).
- Enter an action name in the Display Name for Action text box. The action name can be alphanumeric and can contain underscore (_), dash (-), or space.
-
Click Next.
The Vendor Template page is displayed. This page displays the vendor templates to configure default parameters for vendor-specific onboarding.Note:
Currently, the following vendors are supported:
- Linux Server
- Microsoft Server (MSServer, Exchange Service, Windows Gateway)
- IIS
- MS SQL
- F5 (ADC)
- Apache (Linux and Windows)
- Tomcat (Linux and Windows)
- Nginx (Server)
- Select a vendor template for the device you want to onboard by clicking the right panel of the page. The vendor template is loaded.
-
Enter field information as described
here. Click Preview to view the
information.
Note:
- When selecting multiple values for certain fields, you can set one
value as default by clicking the Set as Default button
against the value. The default value is indicated with a star
against it
 .
. - Only one template per vendor can be added to a policy. You cannot add multiple templates from the same vendor to the same policy.
- Supports generation of private keys directly on endpoint systems
(Linux and Windows) during enrollment via Policy Engine for the
following vendors:
- ADC:
- AVI
- Array
- Citrix
- F5
- HAProxy
- NginxPlus
- Server:
- ABAP
- AkamaiCPS
- Apache
- Cisco CallManager
- CiscoUCS
- IBMClient
- IIS
- ILO
- JBoss
- Java
- LinuxServer
- MQServer
- MS SQL
- Microsoft PC
- Microsoft Server
- MySQL
- Nginx
- PingFederate
- RabbitMQServer
- Tomcat
- VMWare vCenter
- Web Dispatcher
- Websphere
- Windows Apache
- Windows IBMClient
- Windows MQClient
- Windows MQServer
- Windows Tomcat
- Windows Weblogic
- Windows Websphere
- iDRAC
- iPlanet
- On selecting GlobalSignAtlas CA, Vendor is populated with ABAP and Web Dispatcher.
- ADC:
- The Windows Gateway Mode field will be set as External
as integrated gateway is not supported for the following vendors:
- IIS
- Windows Apache
- Windows Tomcat
- MS SQL
- MSServer
- When selecting multiple values for certain fields, you can set one
value as default by clicking the Set as Default button
against the value. The default value is indicated with a star
against it
- Click Next to go to the Approval page.
- Turn on the Auto Approve toggle button to skip approval. To add new approval level, click the + Add New Approval Level link.
- Click Next to go to the Pre-Onboarding page to execute scripts from the library before onboarding begins. The Device Availability Check checks if the IP address of the device being onboarded is available with the vendor or not, else onboarding will fail.
- [Optional] Define additional tasks that run after main action completes by clicking any of the tasks appearing on the right panel or simply click Next to go to the Device Onboardingpage.
- Click Next to go to the Post-Onboarding page.
- [Optional] Define additional tasks that run after main action completes by clicking any of the tasks appearing on the right panel or simply click Next to go to the Notifications page.
-
[Optional] Define additional tasks that run after main action completes by
clicking any of the tasks appearing on the right panel or simply click
Finish.
The Submit Policy window is displayed with a message, Are you sure you want to submit the policy?
-
Click Confirm to save the policy or click Save and Enable Policy
to activate the policy.
The configured policy is displayed with the Status toggle button enabled as shown. Saved policies will have the Status toggle button disabled.
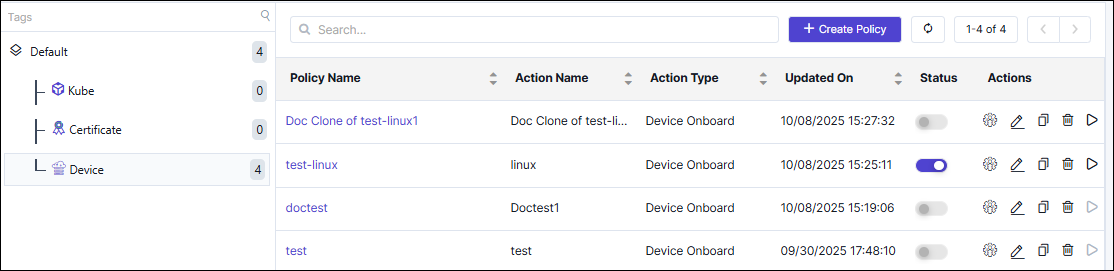 You can edit, delete, or execute the policy by clicking any of the icons in the Actions column.Note: To edit or delete a policy, you need to first disable the status.
 -
To execute the policy, click
 (Execute Policy) icon in the Actions column. Policy can be
executed only if the policy is in the enabled status.
The vendor template is displayed prompting you to fill the mandatory fields.
(Execute Policy) icon in the Actions column. Policy can be
executed only if the policy is in the enabled status.
The vendor template is displayed prompting you to fill the mandatory fields. -
Fill the mandatory fields and click Submit.
A message, Device Onboard request submitted with id : xxx, appears.
You can view the status of the onboarded device under Policy Requests.
You can view the onboarded device from (Menu) icon > CERT+ > ADMINISTRATION > Device Management >
Server as shown:
(Menu) icon > CERT+ > ADMINISTRATION > Device Management >
Server as shown: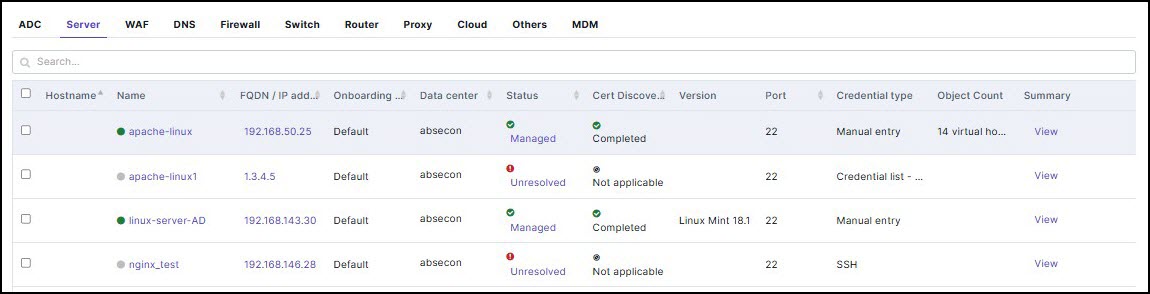
-
Go to POLICY MANAGEMENT > Policy Requests to check the status of the
enrollment request.
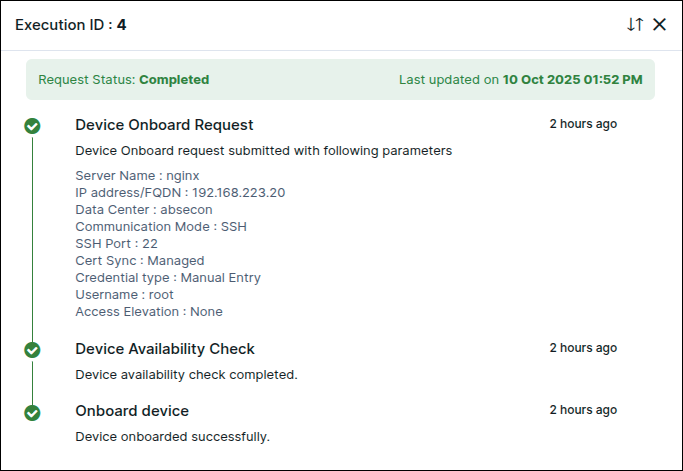
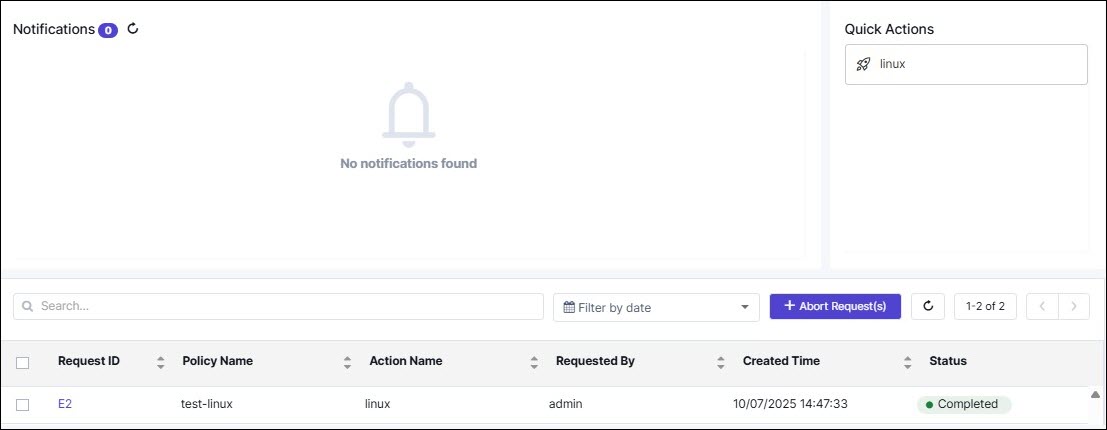 When the onboarding of device is successful, the Status changes to Completed. If it fails, check the error message, address it, and then click Retry. Click the Request ID link to open a staged execution log view as shown.