Configuring Email Template
- Design a workflow.
- From the Notificationsection, drag and drop the Email task.
-
In the Email task window, under
Properties, in the General
section, enter the relevant field information and turn on the
Configure Template toggle.
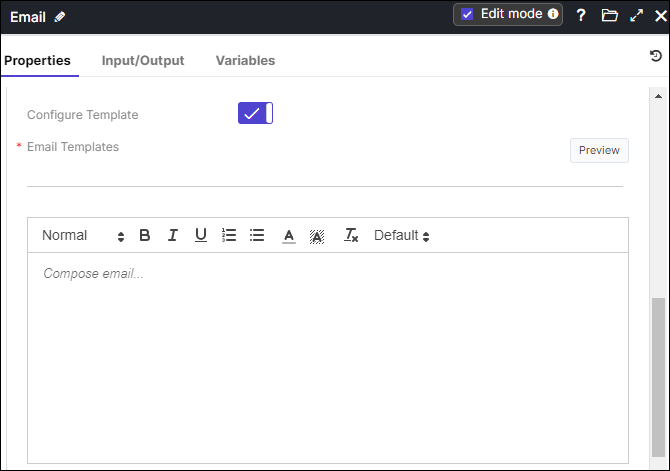 On enabling the toggle, *Email Templates field appears with the list of available email templates and Enable custom email header field disappears.
 -
Choose the necessary Email Template from the dropdown, then click
Preview.
The Email Template Preview popup for the selected email template appears.Note: For more details on Creating a New Email Template, click here.
- Enter custom email content.
-
Click Save.
You can use this task within your workflow to send email using your customized email template.Note: If you turn OFF the Configure Template toggle button, the current features of the email palette will remain unaltered.
- When attaching a file to an email palette using the "attach by file" option, the maximum allowable size is 5 MB, and all file formats are supported.
- For attaching a file via a global variable ("attach by variable"), the maximum size permitted within the form task is 20 MB. Only PDF, CSV, and TXT formats are supported.
- If the configured template is unavailable, an exception will be thrown from the platform.
- When using a global variable with HTML content in the body, and if the same
content is sent as an email with an email template configured in the platform,
users must adjust the width accordingly. Failure to do so may result in
misalignment of the logo and footer content from the platform.
The "Send test mail" functionality and "Auto-reply" functionality remain unchanged.