Configuring Windows Auto-Enrollment Proxy
- Log onto the AppViewX application using your credentials.
-
Go to
 (Menu) icon > CERT+.
The CERT+ left navigation pane appears.
(Menu) icon > CERT+.
The CERT+ left navigation pane appears. -
Expand the Administration menu and select Auto Enrollment >
WAEP.
The Windows AEP auto-enrollment page is displayed.
-
Click +New Setting to add a WAEP auto-enrollment request.
The Windows AEP : New Setting page is displayed.
-
Enter the following fields:
Table 1. Field Description for Windows AEP : New Setting page Field Description Endpoint Details *Name Provide a unique name for the WAEP setting. Note: Only alphanumeric and the following special characters are allowed: period (.), hyphen (-), and underscore (_). The name cannot begin with a special character.*Cloud Connector Select the hostname based on the domain. *Data Center Field is auto-populated based on the Cloud Connector hostname. Active Directory Configuration *Policy Server Provide the IP address or the hostname of the Certificate Enrollment Policy Web Service (CEP)/ Certificate Enrollment Web Service (CES) or policy server used to execute the remote Windows PowerShell scripts. *LDAP Server Select or enter the hostname of the AD/LDAP server. *Service Account with Base Provide the service account created for bind. For example: cn=test_service, ou=Kerberos_accounts, dc=avxtest, dc=com *Service Account Password Provide the service account password. Active Directory Sync This field is optional for manual import of templates.Enable this toggle button to fetch all the global catalog servers in your forest. Note: Auto fetch and AD sync are present only for SaaS setup.Global Catalog Configuration *Global Catalog Server IP If Active Directory sync is enabled, then this field lists all the global catalog servers in your forest as a dropdown list. *Port Port 3268 is the MS default port for global catalog. *LDAP Base DN If AD sync is enabled, the LDAP base DN is auto-populated based on the IP address of the global catalog server selected from the dropdown list. Validate Account Click the button to validate connection of the global catalog server with your service account credentials. If the validation is successful, you see Success displayed next to the button. If it fails, then check the service account credentials, or permissions to the global catalog server, or verify the global catalog server IP and try again. Import Templates *Type By default, Manual is selected. It is recommended that you select the Auto option to automatically fetch your templates from your AD. If you have selected Manual, then drag and drop your template that you created or browse to the location it is saved.
Auto-fetch is only supported in SaaS environment.
Fetch Templates The templates are fetched and populated in the Certificate Templates screen. Note: Fields marked with red asterisk (*) symbol are mandatory. -
Click Next. A message that templates are imported successfully appears.
The Certificate Templates page appears along with all the fetched templates along with the details populated in the table as shown.
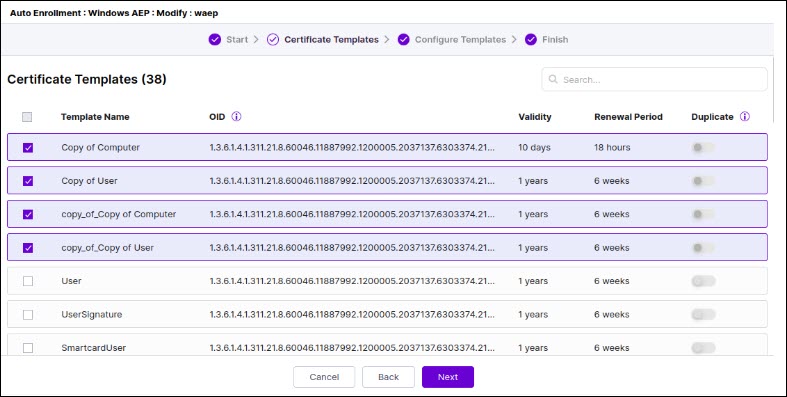
-
Select the templates you want to configure and click Next.
The Certificate Templates Configuration page appears.
-
Click the template you want to configure and fill out the details in the
Configuration page that appears on the RHS of the page.
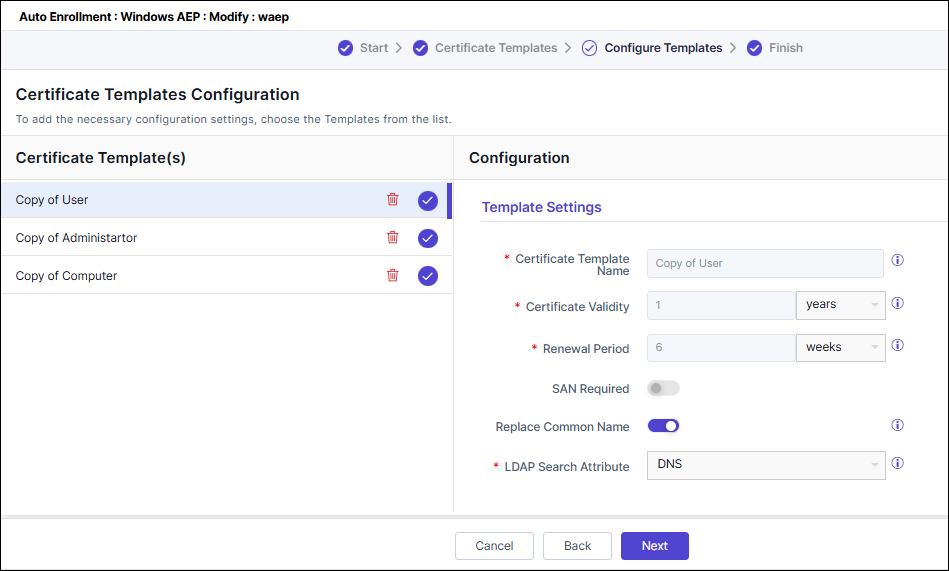
-
Enter the following fields:
Table 2. Field Description for Certificate Template Configuration page Field Description Template Settings *Certificate Template Name Value is populated based on the auto-fetched or uploaded data. *Certificate Validity Enter the expiry time limit for certificates. *Renewal Period Enter the renewal time limit for the template. SAN Required This is disabled by default. Replace Common Name This is disabled by default. If enabled, the issued certificate's Common Name will be replaced with the value retrieved from the specified LDAP field name. *LDAP Search Attribute This field appears only on enabling the Replace Common Name toggle. You can search the LDAP attribute by DNS, which is populated by default. This value will replace the Common Name in the issued certificate. Subject Alternative Names This field appears only when you select the SAN Required checkbox. Select from the following values:- DNS
- User Principal Name
- Service Principal Name
Note: You can either choose DNS/Email or both, or customized SAN such as User Principal Name/Service Principal Name or both. For example, if you select DNS/Email or both, you cannot select User Principal Name/Service Principal Name and vice versa.*Certificate Profile This field will not appear for PKIaaS Native CA. Select the profile configured to set the Key Usage and EKU. Note: This profile must match the Key Usage values and EKU as seen in the actual on-prem Microsoft template in case of manual fetch.CA Configuration *Certificate Group Select the certificate group for managing the certificates. *CA Name Select a CA for WAEP to communicate for certificate enrollment. *CA Account The field values are listed only when the account is added to CA settings. *CA Certificate Select issuer certificate. It is recommended to select intermediate CA certificates to sign all the client certificates. *Issuer Name Select the issuer name for the certificate. *Issuer Location This field will not appear for PKIaaS Native CA. Select the issuer location for the certificate. *Template This field appears only for PKIaaS Native CA. Select from the dropdown list. On completion, you get a message that the template is saved successfully and a blue tick mark appears across the configured template.Note:- You can select or clear the templates by going back to the previous page.
- You cannot click Next until all the selected templates are configured.
- Click the
 (Delete) to delete a selected
template.
(Delete) to delete a selected
template.
-
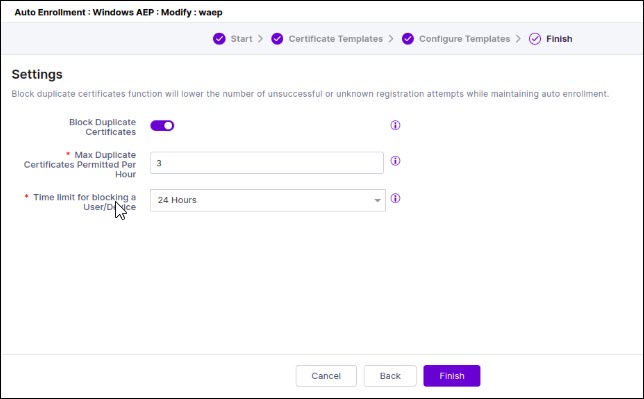
Click Next.
The Settings page appears. By default, the Block Duplicate Certificates toggle button is disabled. If you enable it, you can customize the values for blocking the maximum number of duplicate certificates in an hour and the time limit to block a user/device issuing the certificates.Note: By default, the time limit for a user/device is 24h. If you change this value, ensure to update the Occurrence Type by navigating to CERT+ > Administration > Job Scheduler and selecting Pkiaas AEP Purge log Job. If you have set the time limit as 12h or 24h, then choose Occurrence Type as Daily. For values more than 24h, choose Occurrence Type as Weekly.
-
Click Finish.
A message that the WAEP settings is saved successfully appears.
- [Applicable only if you have chosen automatic upload of template] Click Download to download the entire set of configured certificate template scripts and the runnable files to publish on your active directory.
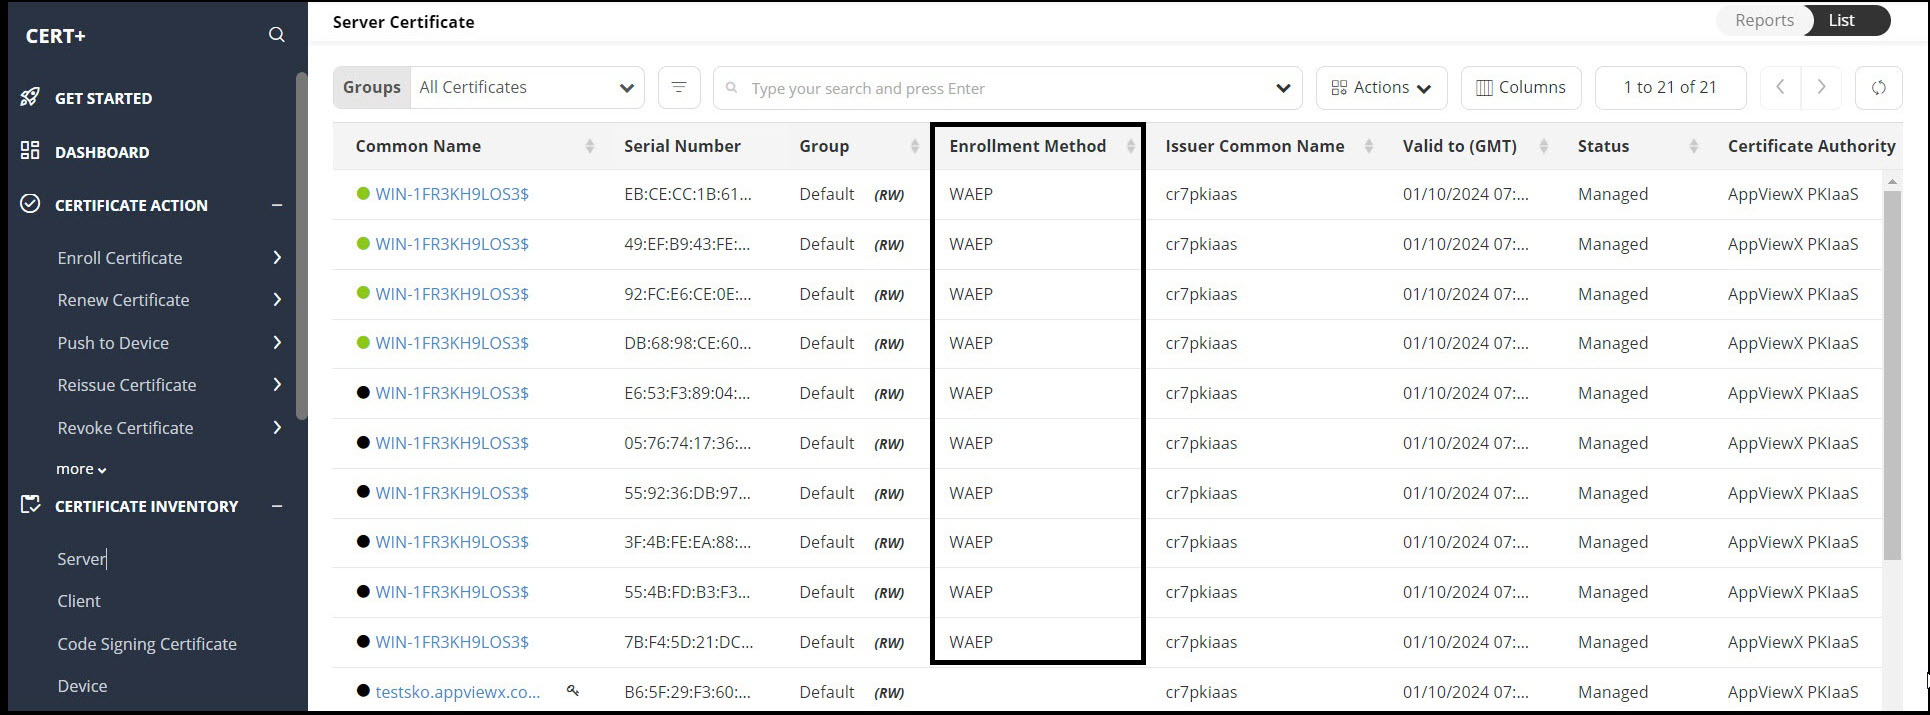
- Click Go to Inventory to view the added WAEP setting on the dashboard.
- Click the Endpoint Setting hyperlink on the dashboard to view details of
the configured certificate template.
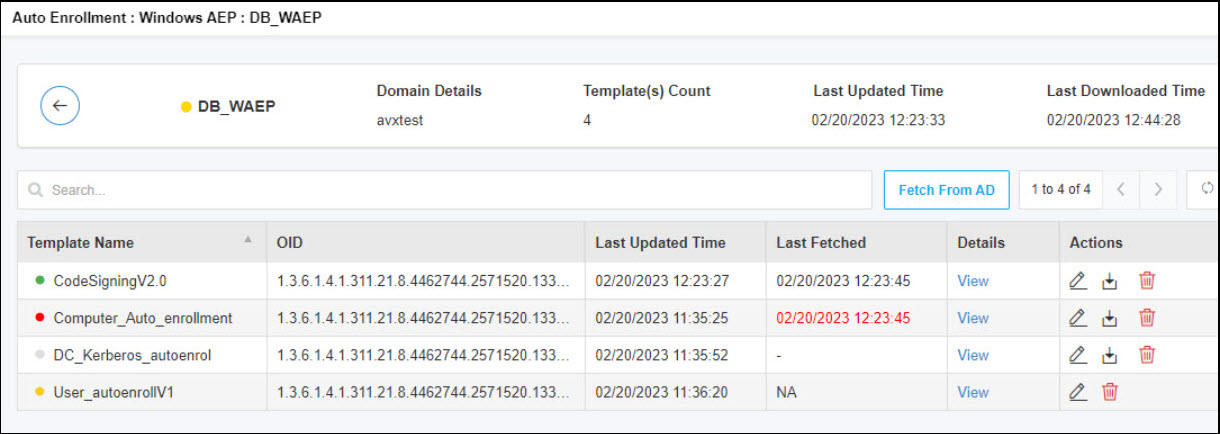
- Once the templates are fully configured, click Fetch from AD to
fetch the templates from the active directory. A message, Template
sync triggered successfully, appears. Here are the color codes
against the templates:
- Green: indicates the templates were fetched successfully along with the last fetched time.
- Amber: indicates the templates are partially configured. The last fetched time will be NA.
- Gray: indicates the templates were not found in the AD or the templates not yet published. The last fetched time will be empty for these.
- Red: indicates the templates were deleted along with the last fetched time.
- Click View to get the certificate template details.

- Click the
 (Edit) icon to edit configuration of
the certificate template.
(Edit) icon to edit configuration of
the certificate template. - Click the
 (Download) icon to download a
selected template, or click the (Delete) to
delete a selected template.
(Download) icon to download a
selected template, or click the (Delete) to
delete a selected template.
- Once the templates are fully configured, click Fetch from AD to
fetch the templates from the active directory. A message, Template
sync triggered successfully, appears. Here are the color codes
against the templates: