
Microsoft Copilot Studio
This integration requires several setup steps across multiple Microsoft portals. Read this entire topic before you begin.
Agent Identity Security uses ROPC (Resource Owner Password Credentials) OAuth to authenticate. This requires a dedicated service account and an Azure AD app registration.
Prerequisites
- A Microsoft 365 administrator who can create users and configure Azure app registrations.
- Access to the Azure Portal (
portal.azure.com). - Access to the Power Platform Admin Center
(
admin.powerplatform.microsoft.com). - Disable MFA for this account, or configure a Conditional Access exclusion to allow non-interactive sign-in.
Creating the Integration User
Agent Identity Security signs in as a dedicated service account using the ROPC flow. This account must have MFA disabled.
- In Microsoft 365 Admin Center (
admin.microsoft.com), go to Users > Active users > Add a user. - Create a dedicated account. Example:
[email protected]. - Assign a license that includes Power Apps access. Examples: Power Apps Per User Plan, or Microsoft 365 E3/E5.
- Disable MFA for this account, or configure a Conditional Access exclusion to allow non-interactive sign-in.
- Note the username and password. You will need them when you configure the integration in Agent Identity Security.
Assigning Power Platform Roles
- Go to Power Platform Admin Center > Environments and select your target environment.
- Go to Settings > Users + permissions > Users.
- Find the service account you created, then select Manage security roles.
- Assign the System Administrator role, then select Save.
Registering the Application
- In Azure Portal, go to Azure Active Directory > App Registrations and select New registration.
- Enter a name such as
Agent Identity Security-CopilotStudio. Set Supported account types to Accounts in this organizational directory only. Select Register. - On the Overview page, copy the Application (client) ID and the Directory (tenant) ID.
- Go to Certificates & secrets > New client secret. Set a description and expiry, then select Add.
- Copy the Value immediately. It is shown only once.
- Go to Authentication, then enable Allow public client flows.
Adding MS API Permissions
- In the app registration, go to API permissions > Add a permission.
- Add the following application/delegated permissions:
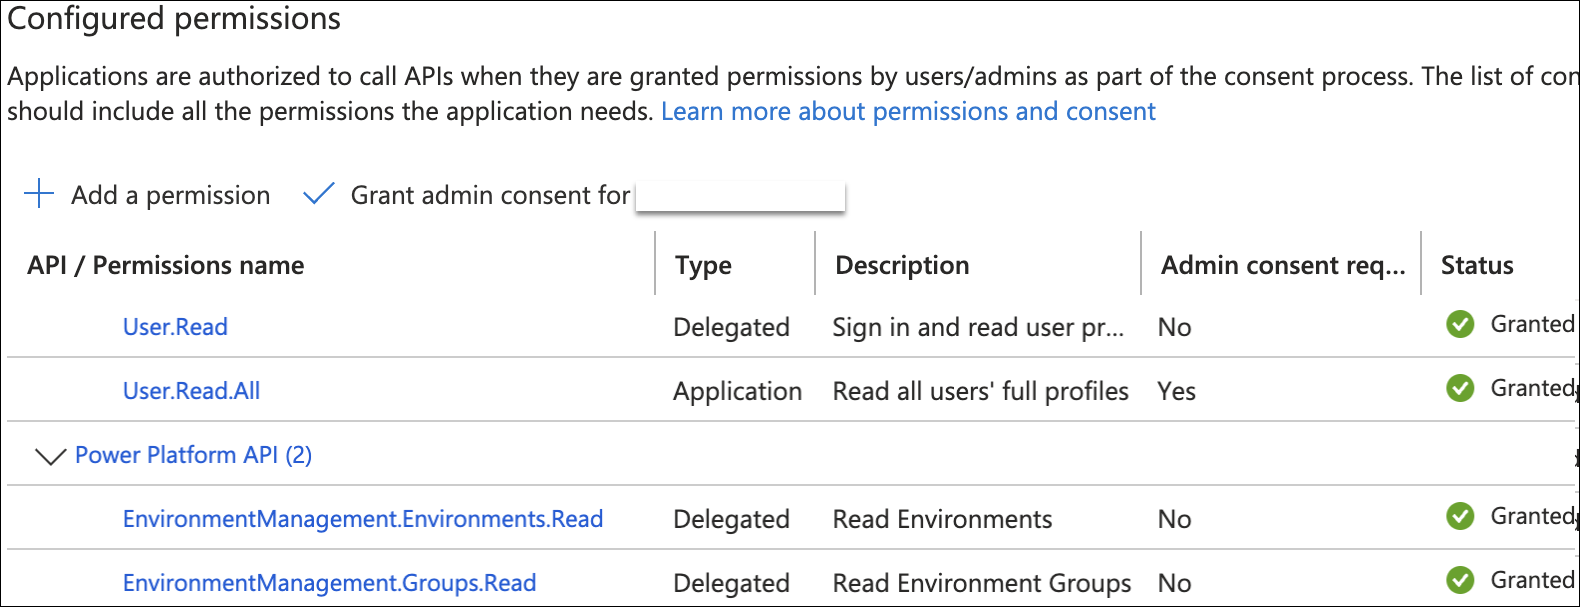
API Permission Microsoft Graph User.Read.All (Applications) Power Platform API EnvironmentManagement.Environments.Read (Delegated) EnvironmentManagement.Groups.Read (Delegated)
- Select Grant admin consent for [your organization] and confirm.
Enabling Business App Platform Access
- Go to Power Platform Admin Center > Settings > User management > Application users.
- Select + New app user.
- Select + Add an app and search for the registered application by name or client ID.
- Select the target Business unit and select Create.
Configuring the Application User
- Go to Power Platform Admin Center > Environments > [Your Environment] > Settings > Users + permissions > Application users.
- Select + New app user.
- Select + Add an app, then choose the application you registered.
- Assign the System Administrator security role, then select Create.
Integrate Microsoft Copilot Studio
- On the Integrations page, select + Add Integration.
-
In the Integration Catalog, select Microsoft Copilot
Studio.
The Microsoft Copilot Studio configuration page opens.
-
Under Instance Details, enter the following
information:
Field Description *Instance Name A unique name for this integration. Example: Production Copilot Studio. Description An optional description to identify the purpose or environment of this integration. -
Under Credentials, enter the following
information:
Field Description *Client ID The Application (client) ID of the Azure AD app registration. Find this on the Overview page of your app registration. *Client Secret The client secret you created under Certificates & secrets in the Azure AD app registration. *Tenant ID The Directory (tenant) ID of your Azure AD tenant. Find this on the Overview page of your app registration. *Username The email address of the dedicated service account you created. Example: [email protected].*Password The password for the service account. *: Mandatory field -
Select Test Configuration.
Agent Identity Security validates the credentials. A checkmark indicates success.
-
Select Create Instance.
Agent Identity Security creates the integration, runs an initial sync, and returns you to the Integrations list.
