
Microsoft Purview Integration
Agent Identity Security integrates with Microsoft Purview to extend enterprise data protection controls to AI agent file access.
The integration enables File-based runtime policies to use Microsoft Purview sensitivity information when evaluating files accessed by AI agents. This allows organizations to apply agent access controls based on the data classification and protection policies already established within their enterprise.
Prerequisites
Make sure you have the following before starting this procedure:
- Access to your organization's Microsoft Entra tenant.
- A role of Application Developer or higher in Microsoft Entra ID. This role is required to create app registrations.
- Access to the AppViewX Agent Identity Security portal with Administrator privileges.
- At least one sensitivity label published in Microsoft Purview for your organization.
Step 1: Register an application in Microsoft Entra ID
Create a dedicated app registration that Agent Identity Security will use to read sensitivity labels. Using a dedicated app — rather than a shared one lets you control and audit access independently.
-
Go to the Microsoft Entra admin center and sign in with an account that has Application Developer (or higher) permissions.
-
If your account has access to multiple tenants, select the Settings icon at the top of the page and switch to the correct tenant.
-
In the left navigation pane, go to .
-
Select + New registration.
-
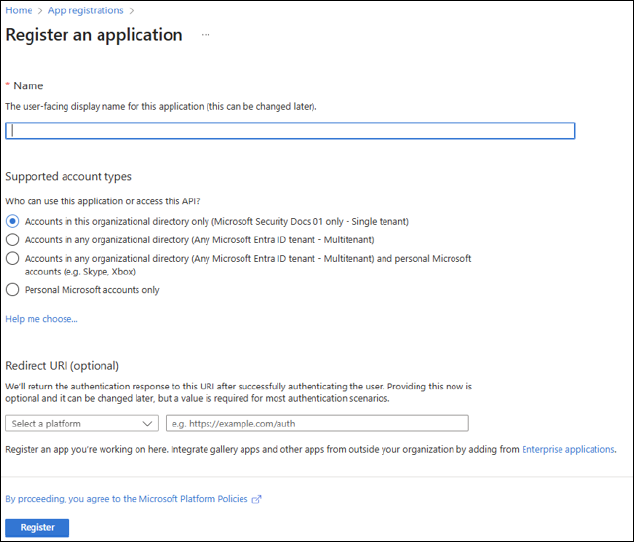
Fill in the registration form:
- Name Enter a meaningful name, such as AppViewX-Agent-Identity-Security-Purview.
- Supported account types Select Accounts in this organizational directory only.
- Redirect URI Leave this blank. Agent Identity Security uses client credentials and does not require a redirect URI.
-
Select Register.
You are redirected to the app's overview page.
Step 2: Record your application credentials
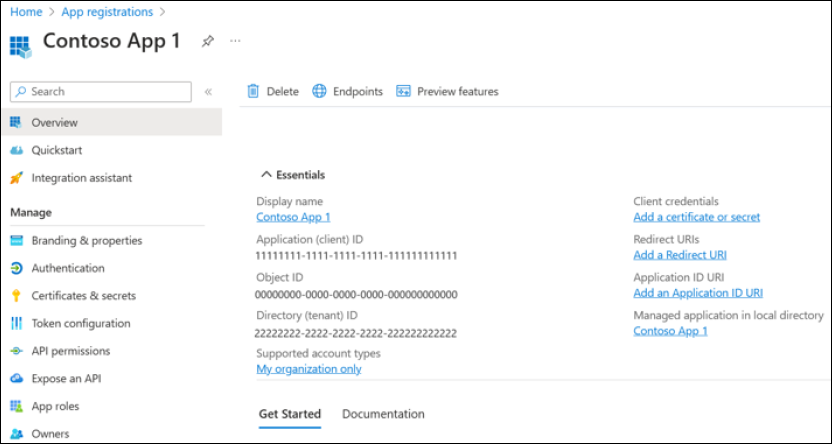
| Credential | Where to find it | Description |
|---|---|---|
| Client ID | Overview page > Application (client) ID | Unique identifier for your registered app. |
| Tenant ID | Overview page > Directory (tenant) ID | Identifier of your Microsoft Entra directory. |
Step 3: Create a client secret
A client secret acts as a password for your app registration. Agent Identity Security uses it together with the Client ID to authenticate with Microsoft Entra ID.
-
In the left menu of your app registration, select Certificates & secrets.
-
Under Client secrets, select + New client secret.
-
In the Description field, enter a name such as ais-purview-secret.
-
Select an expiration period that aligns with your organization's secret rotation policy, then select Add.
-
In the Value column of the newly created secret, select the copy icon to copy the secret value.
Step 4: Grant API permissions
Your app registration needs permission to read sensitivity labels from Microsoft Graph. Grant the minimum required permission using the steps below.
-
In the left menu of your app registration, select API permissions.
-
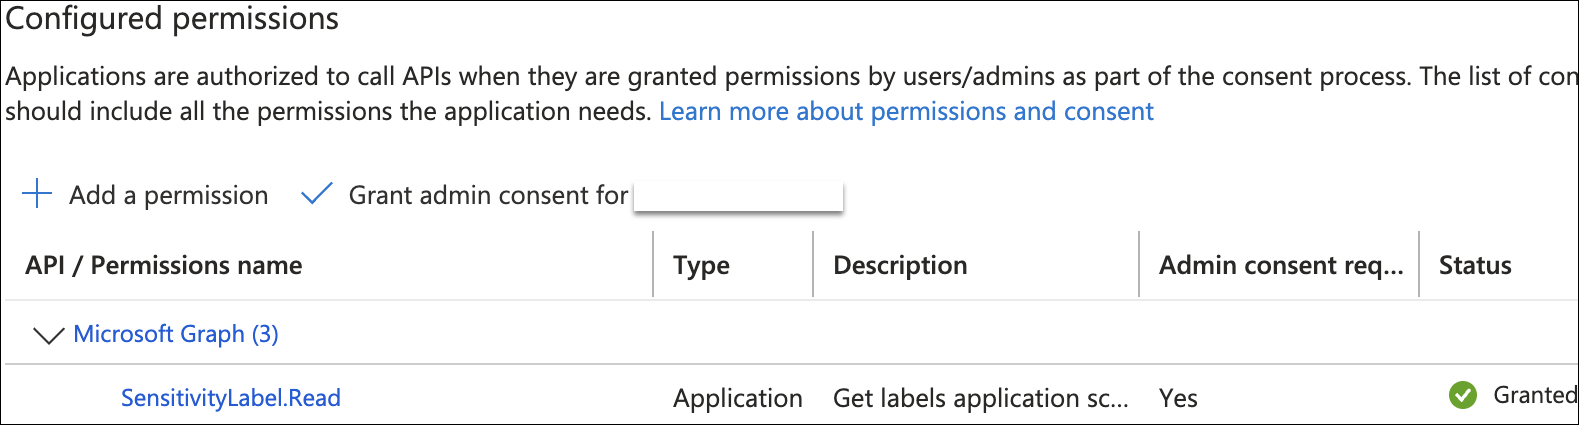
Select + Add a permission.
-
Select Microsoft Graph.
-
Select Application permissions (not Delegated), because Agent Identity Security runs as a background service without a signed-in user.
-
In the search box, type SensitivityLabel and select SensitivityLabel.Read.
-
Select Add permissions.
-
Select Grant admin consent for <your organization>, then confirm by selecting Yes.
The status column for the permission changes to a green check mark indicating Granted.
Step 5: Configure the Microsoft Purview integration in Agent Identity Security
With the app registration complete, add Microsoft Purview as an integration in the Agent Identity Security portal.
-
Sign in to the AppViewX Agent Identity Security portal.
-
In the left navigation pane, go to .
-
Locate Microsoft Purview in the catalog and select it.
-
On the Configure your new integration page, fill in the following fields:
Field Value Instance Name Enter a descriptive name for this integration, for example, Production Microsoft Purview. Description (optional) Enter a brief description to help identify this integration instance. Client ID Paste the Application (client) ID you copied in Step 2. Client Secret Paste the client secret Value you copied in Step 3. Tenant ID Paste the Directory (tenant) ID you copied in Step 2. -
(Optional) Select Test Configuration to verify that Agent Identity Security can authenticate with Microsoft Entra ID and retrieve labels successfully before saving.
-
Select Create Instance.
Agent Identity Security saves the integration and begins synchronizing sensitivity labels from Purview.
Credentials reference
The following table summarizes the three credentials required to complete this integration.
| Credential | Description | Where to find it in Microsoft Entra ID |
|---|---|---|
| Client ID | Unique identifier for the registered app that Agent Identity Security uses to authenticate with Microsoft Entra ID. | App registration > Overview > Application (client) ID |
| Client Secret | Secret key that Agent Identity Security presents alongside the Client ID to obtain an access token. | App registration > Certificates & secrets > Client secrets > Value |
| Tenant ID | Identifier of the Microsoft Entra directory (tenant) where the app is registered. | App registration > Overview > Directory (tenant) ID |
