Customizing the Screen Header
-
On the Settings :: Theme page, to customize the screen header, click
Header tab, enter the Header Info, Header
color and Header logo section details:
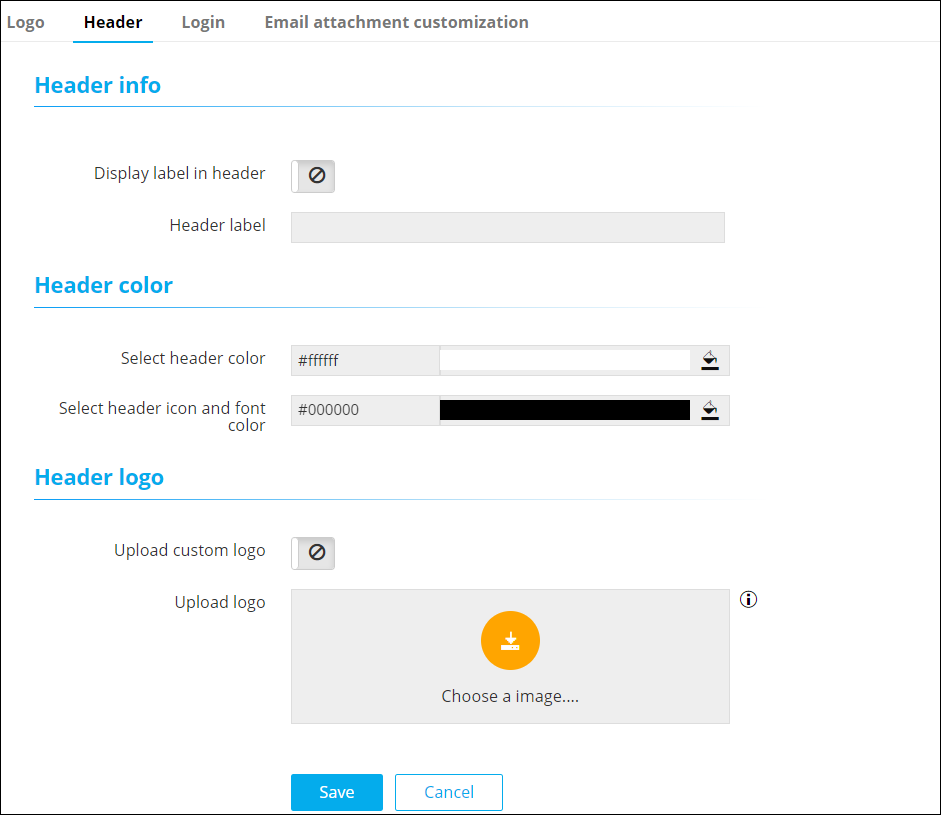
Table 1. Field descriptions for Header Info section Field Description Display label in header To display custom header text, turn on this toggle. Header label Enter the custom header text. This field is enabled only when the Display label in header toggle is turned on.
Table 2. Field descriptions for Header color section Field Description Select header color To set a color for the header text: - Enter the hex code of the required header color.
OR
- To select a color, click
 .
.
Select header icon and font color To set a color for the header icon and the font: - Enter the hex code of the required color.
OR
- To select a color, click .
Table 3. Field descriptions for Header logo section Field Description Upload custom logo To insert a custom logo image in the header, turn on this toggle. Upload logo This field is enabled only when the Upload custom logo toggle is turned on. To upload a logo image:- Click
 (Upload) icon.
 - From Windows Explorer, navigate to the location
of the image, select the image, and click
Open.Note:
- Image formats allowed for upload: .png and .svg
- Maximum image resolution allowed: 865 X 185 (width X height)
- Image size: < 5 MB
- Recommended image dimensions: 175 X 37 (width X height)
- In the Confirmation Message dialog box, click Yes.
- Enter the hex code of the required header color.
- In the Preview section, view a preview of your header customization.
- To apply the changes, click Save.