Configurations in CEP/CES machine
-
CEP/CES Installation
To install the Certificate Enrollment Services on the CEP/CES server:
- Open the Server Manager.
- Click Add Roles and Features, and click Next.
- Select Role-based or feature-based installation, and click Next.
- Choose Select a server from the server pool, and click Next.
- Expand the Active Directory Certificate Services, select Certificate Enrollment Web Service and Certificate Enrollment Policy Web Service, and click Next.
- Proceed until the Confirmation page, and click Install.
-
CEP/CES Configuration
- Click the new task shown in the Server Manager notifications: Configure Active Directory Certificate Services on the destination server.
- In the credentials panel shown, click Change.
- Enter an account service account which we created, click OK and then click Next.
- Select Certificate Enrollment Web Service and Certificate Enrollment Policy Web Service and click Next.
- Select the CA Name.
- Click Select and choose the Microsoft CA that will be issuing the certificates using certificate enrollment web service, click OK and then click Next.
- For CES authentication type, select Windows Integrated Authentication and then click Next.
- For CES service account, select use built in application pool identity.
- Click OK and then click Next.
- For CEP authentication type, select Windows Integrated Authentication and then click Next.
- For Certificate authentication, select Choose and assign a certificate for SSL later and click Next.
- Review the confirmation page and click Configure.
- When the installation completes, click Close.
-
Configuring IIS in CEP/CES machine
To configure the Internet Information Services (IIS) on ADCS:
- Type InetMgr.exe in the command prompt to open the Internet Information Services (IIS) Manager.
- Click your server name on the left-hand side.
- Expand the selection for your server and click Application Pools.
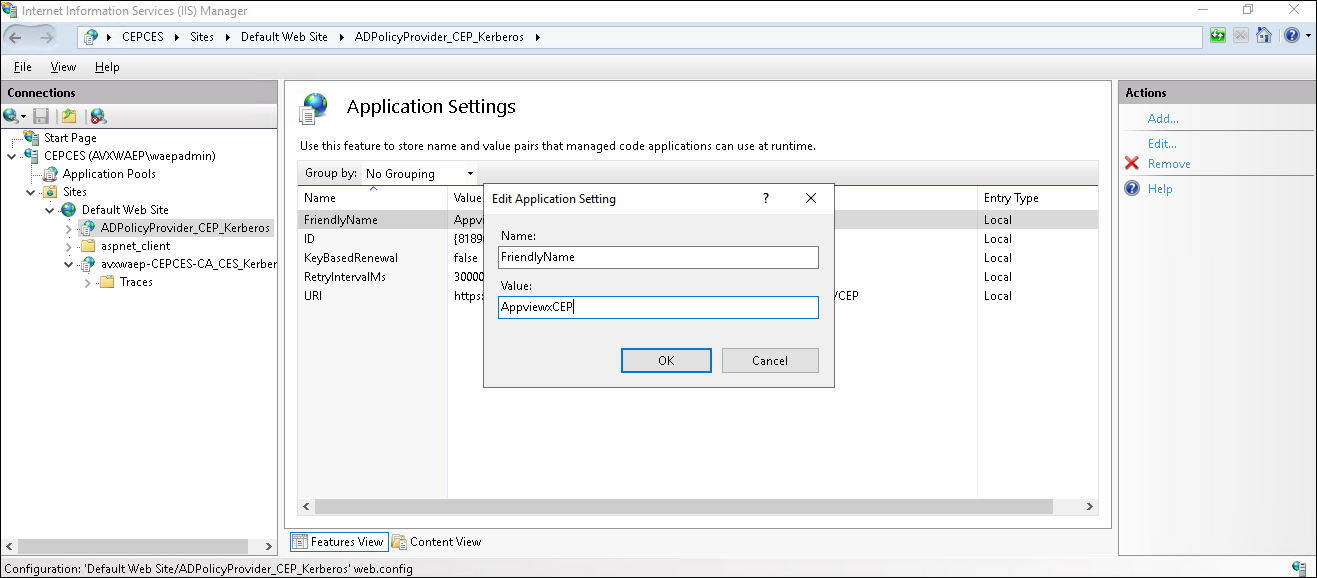
- Expand the default web site and click ADPolicyProvider_CEP_Kerberos and open Application Settings.
- Edit the entry name FriendlyName and set the value to
AppViewX_Enrollment. This is a name that clients will see
only when they are manually requesting for certificates.
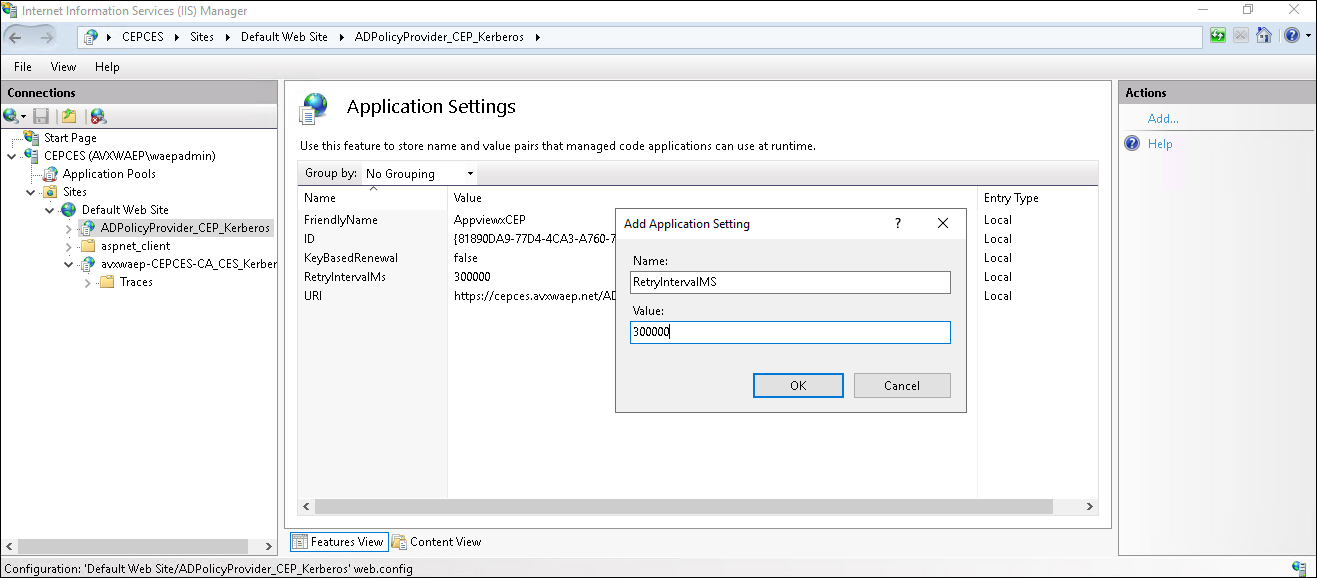
- Click Add and create a new entry with the name
RetryIntervalMs and value 300000.
- Click the URI and copy the URI to use for group policy updates.
- Restart IIS by clicking the server name and then click Restart on the right-hand side.
-
Steps for configuration verification
- Validate if Identity of WSEnrollmentPolicyServer and
WSEnrollmentServer is set to ApplicationPoolsIdentity.
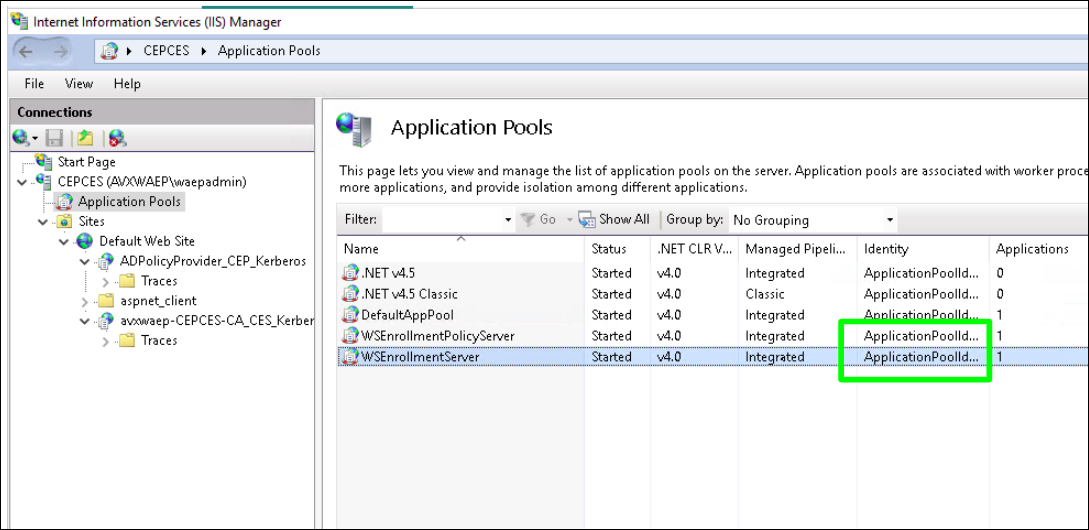 If not, right-click the application pool name and click Advanced Settings > Identity.
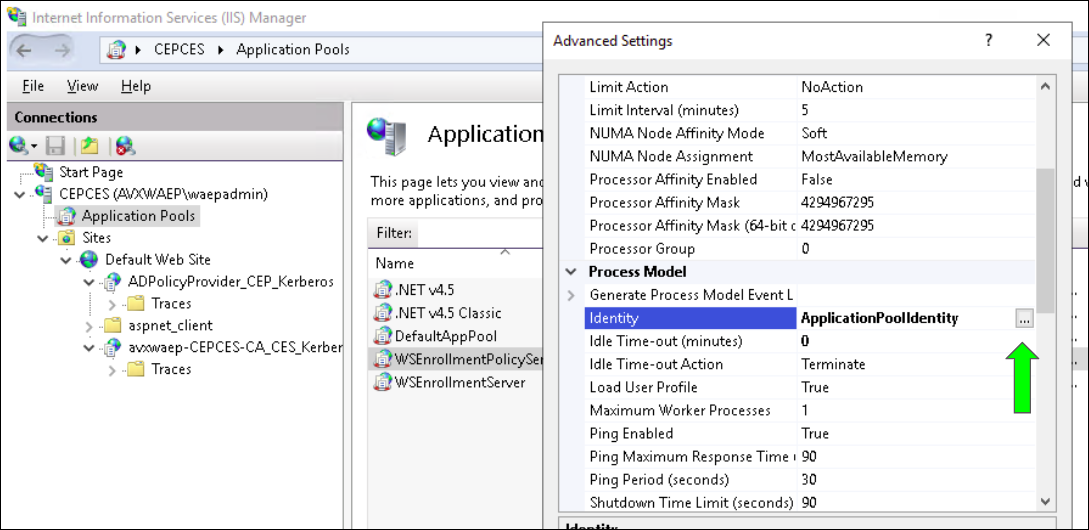 Click the three dots at the end of the identity and configure it as Built in account > ApplicationPoolIdentity as shown:
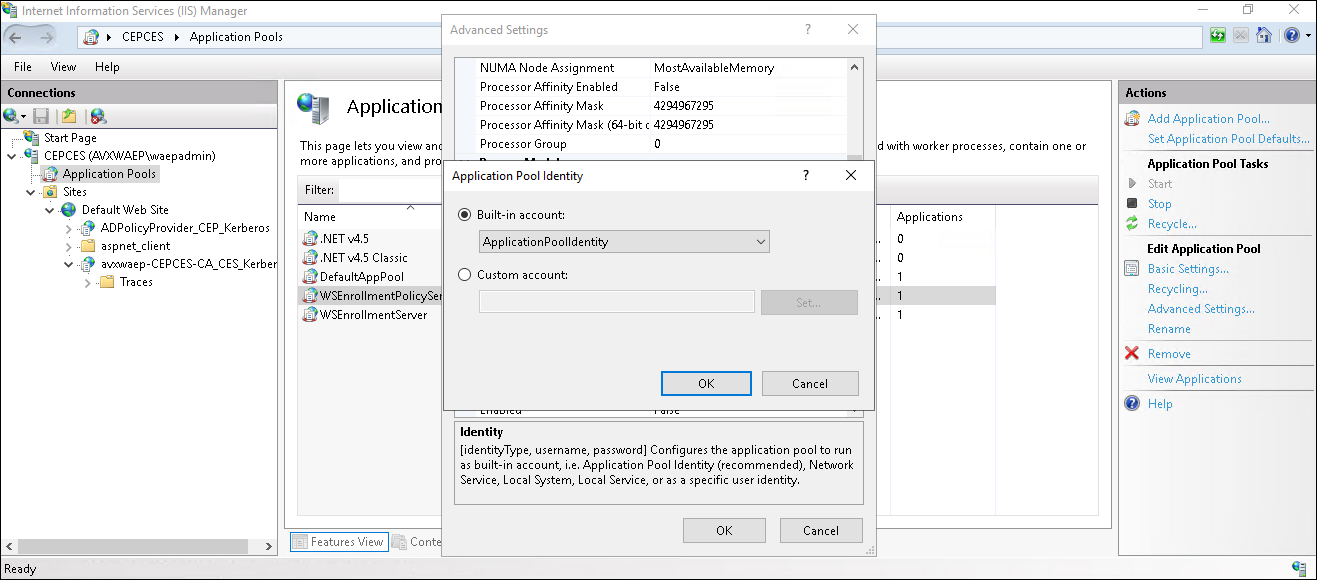
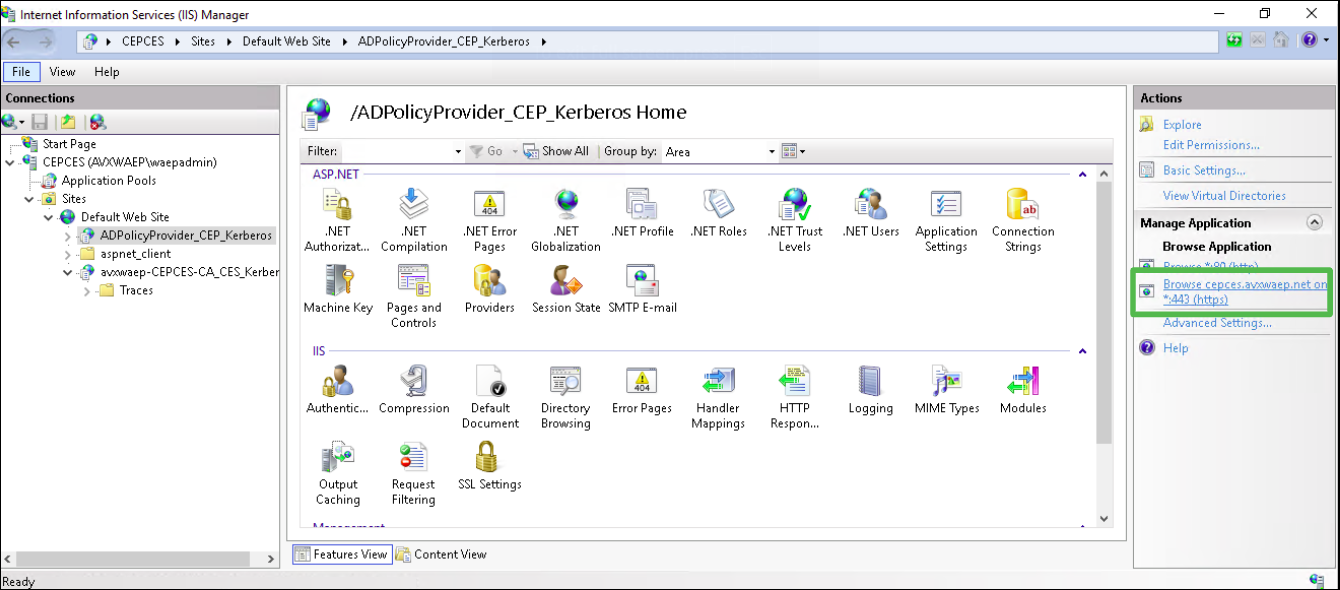
- Enable directory browsing for validation.
- By clicking the website name [ADPolicyProvider_CEP_Kerberos ] > Directory browsing > Enable [Right Pane]
- Once enabled, click the Browse Application URL as shown,
and enter the service account credentials if required.
The expected output is as shown:
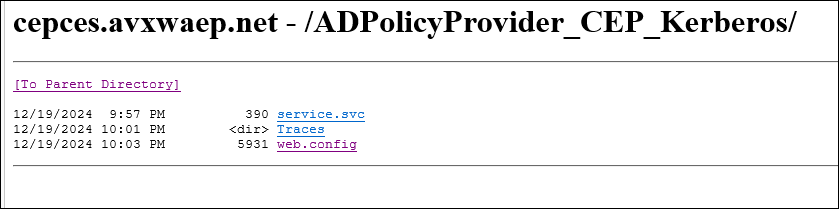
- Similarly enable the directory browsing and verify browsing for the CES [<CA_NAME>_CES_Kerberos].
- Validate if Identity of WSEnrollmentPolicyServer and
WSEnrollmentServer is set to ApplicationPoolsIdentity.