AI Reports
Attention: The AI Reports feature is currently in
Tech Preview and supports only certificate management reporting at this
stage.
AppViewX has introduced AI Reports, offering a natural language processing (NLP) interface for generating certificate management reports. This feature enables users to query certificate data using natural language, making complex reporting accessible to non-technical users while maintaining the power and flexibility of advanced certificate analytics. It provides an intuitive interface where users can:
- Enter natural language queries about their certificate infrastructure
- Access pre-defined sample queries for common use cases
- Generate instant reports based on their queries
The key features are:
- Natural Language Input: Users can type questions in plain English
- Sample Query Templates: Pre-defined queries for common scenarios
- Instant Report Generation: Real-time report creation based on queries
- Responsive Design: Adapts to different screen sizes
- Error Handling: Graceful handling of invalid inputs and system errors
Prerequisites
-
Go to
 ( Menu) >
Platform > Identity >
Role.
The Role page is displayed. The predefined roles are listed here.
( Menu) >
Platform > Identity >
Role.
The Role page is displayed. The predefined roles are listed here. -
Click
 Add.
The Role > Add page is displayed with the Information tab enabled.
Add.
The Role > Add page is displayed with the Information tab enabled. -
From the Information tab, Enter the Name (mandatory) and
Description and click Save.
The Role name is created successfully and the Authorized functions tab is enabled.
- Click the Authorized functions tab.
-
Expand AVXPERT > Reports and select the following options:
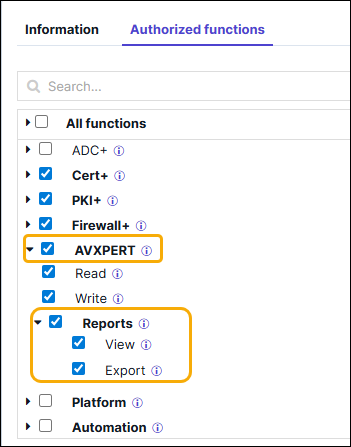
- View - Access to query any data source using natural language and generate AI-based reports
- Export - Access to export AI-generated reports.
Accessing and Generating AI Reports
Accessing AI Reports
-
Go to ( Menu) >
Platform > DATA STUDIO
> Reports.
The Reports page is displayed.
-
Click
 (AI Reports).
The AI Reports page is displayed with a list of previously saved reports and the Generate AI Report button.
(AI Reports).
The AI Reports page is displayed with a list of previously saved reports and the Generate AI Report button.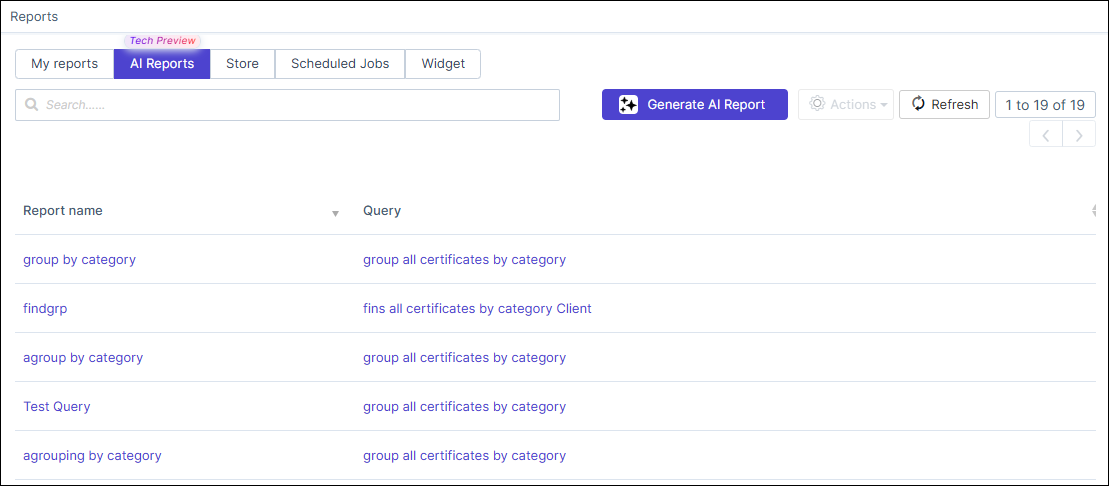
Generating Pre-Defined AI Reports
-
Click Generate AI Report.
The AI Reports page is displayed with the following widgets:
- Certificate Management
- Security Analysis
- Performance Insights
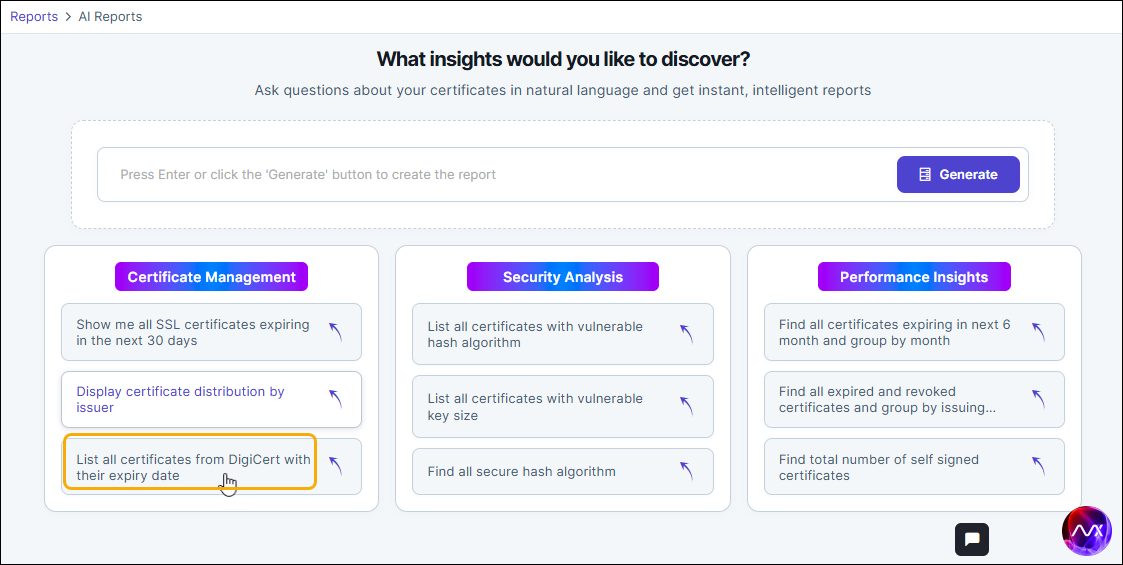 Each widget has a list of pre-defined reports under it.Note: The report is intuitive to display the values either in a grid or a bar chart.
 -
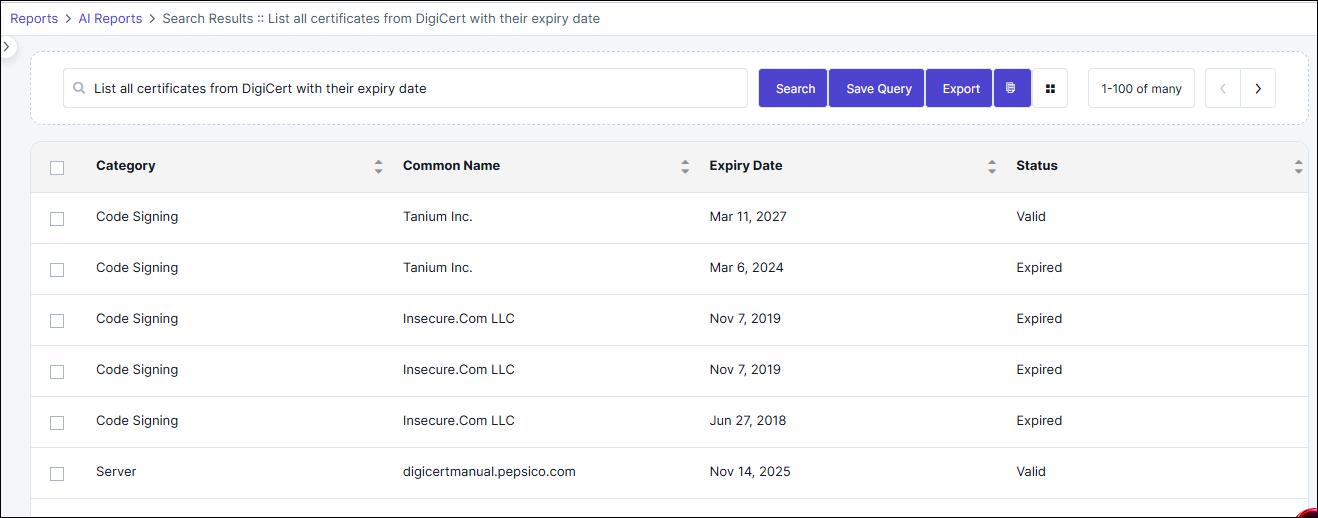
Click any value within the widget.
An example of a grid report is Certificate Management > List all certificates from DigiCert with their expiry date.
 An example of a bar graph is Performance Insights > Find all expired and revoked certificates and group by issuing certificate authority.
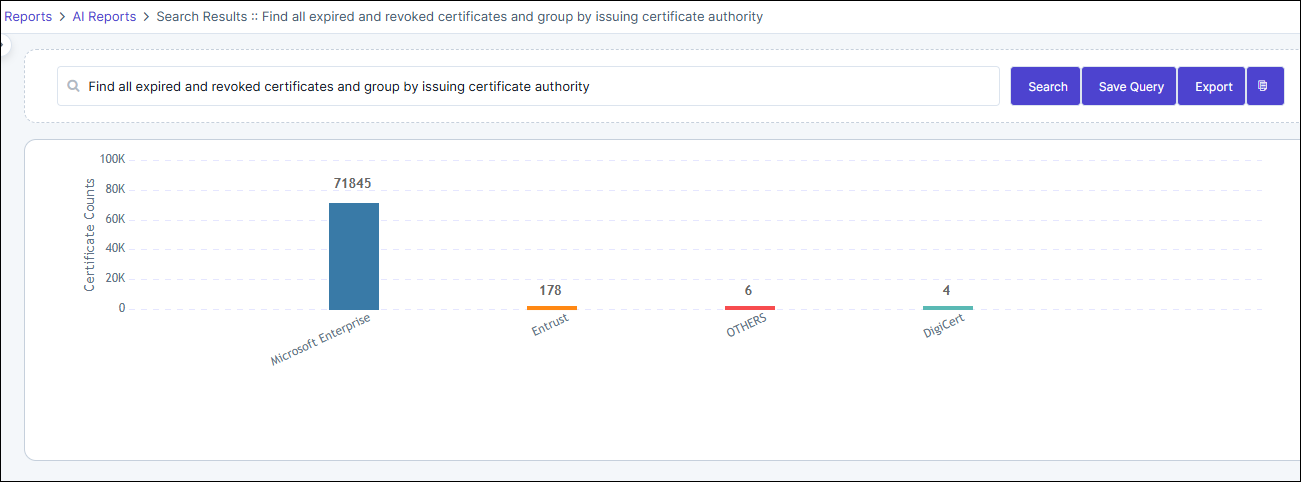
-
Use the following options provided in the report output page:
-
 (Save Query) - To
save a query
(Save Query) - To
save a query
- Click Save Query to display the pop-up.
- Enter a name for the query.
- Click the Save Query button in the pop-up.
-
 (View Collection
Reasoning) - When the button is clicked, the reason is
displayed in a pop-up above the search bar.
(View Collection
Reasoning) - When the button is clicked, the reason is
displayed in a pop-up above the search bar.
-
 (Manage Grid
Columns) - To add or delete column in the grid.
Note: This button is only displayed for grid-based reports.
(Manage Grid
Columns) - To add or delete column in the grid.
Note: This button is only displayed for grid-based reports.- Click the manage grid column button to display a pop-up with Available Columns and Selected Columns list.
- Click the arrow buttons to move the columns from the Available to Selected list and vice versa.
- Click the Save button in the pop-up.
-
 (Export) - Click
the Export button to download the report in the CSV
format.
(Export) - Click
the Export button to download the report in the CSV
format.
-
Generating Real-Time AI Reports
-
Click Generate AI Report.
The AI Reports page is displayed with widgets:
-
Enter the query in the search bar as shown below and click
Generate.
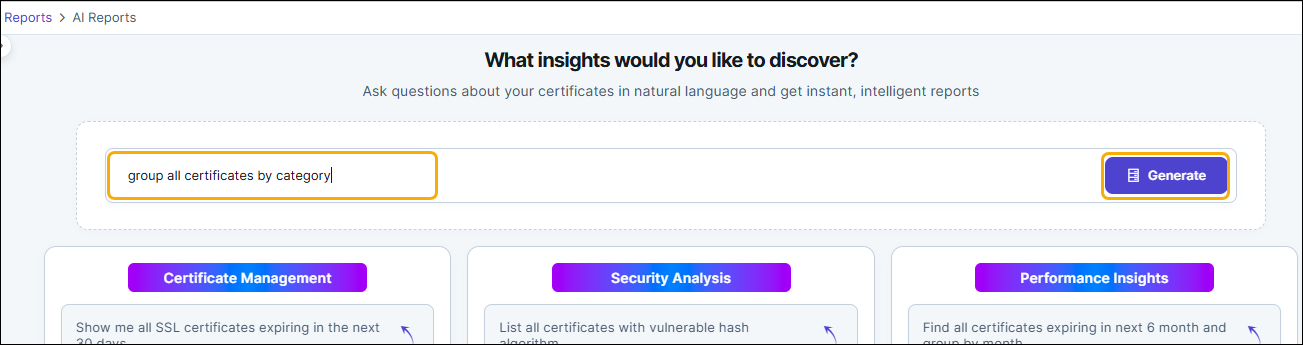 Note: The report is intuitive to display the values either in a grid or a bar chart.
 - Use the options: Save Query, View Collection Reasoning, Manage Grid Columns, and Export in the report output page as explained in the section above.