Enabling the Insight Module
To install Insight for statistics collection:
- Open the terminal.
- Navigate to the /home/appviewx/appviewx_kubernetes/yaml directory.
- Download the appviewx_kubernetes_insight_2026.1.0.0.tar.gz file.
-
To extract the file, execute the following command:
tar -xvf appviewx_kubernetes_insight_2026.1.0.0.tar.gz - Navigate to the /home/appviewx/appviewx_kubernetes/scripts directory.
- To open the appviewx.conf file in the editor mode, execute the following
command:
vi appviewx.conf -
Set the following parameters as follows:
- INSIGHT = TRUE
- ELASTICSEARCH_BACKUP_HOST = <node1-hostname>,<node2-hostname>
- ELASTIC_BACKUP_PATH = <path to store backup e.g.: /home/appviewx/elastic_backup>
-
Search for Enabled Plugins and add the following
plugins:
- appviewx_dependencies
- avx_insight_subsystem_adc
- avx_insight_statistics_bot
- avx_platform_gateway
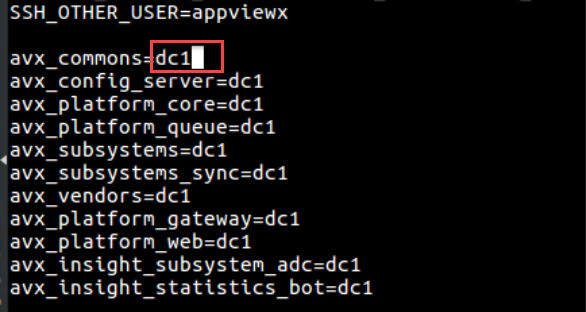
- Update the data center for insight plugins as shown in the image below:
- Save and exit the appviewx.conf file.
- To install Insight, navigate to the /home/appviewx/appviewx_kubernetes/scripts directory.
-
Execute the following command:
./insight_install.sh -
Execute the following command:
./plugins_install.sh -
To restart subsystems and vendors, execute the following
command:
For example:kubectl delete pods "Pod name" -n "datacenter name"
To restart multiple Pods, enter the name of the pod in the above command with space.kubectl delete pods avx-insight-statsitics-bot-3499c69cd6-4sdfs,avx-insight-subsystem-adc-4399c69ed6-4sdfs,avx-subsystems-7666cfb459-6q4rn -n absecon - In the case of Insight migration, continue till point 11.
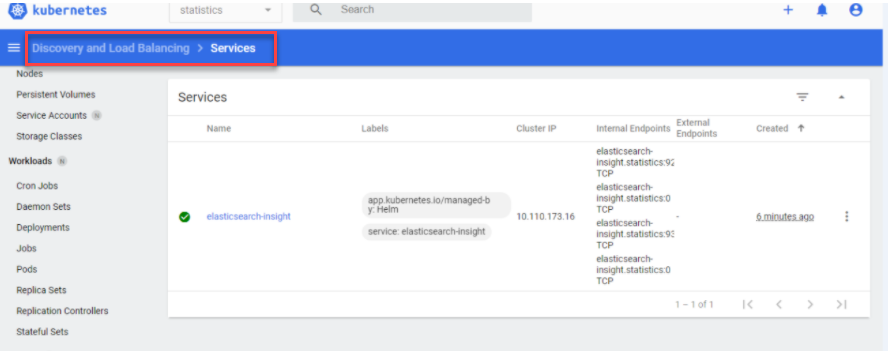
- Log in to the Kubernetes dashboard, enter statistics as the namespace.
-
Select services and search for elasticsearch-insight.
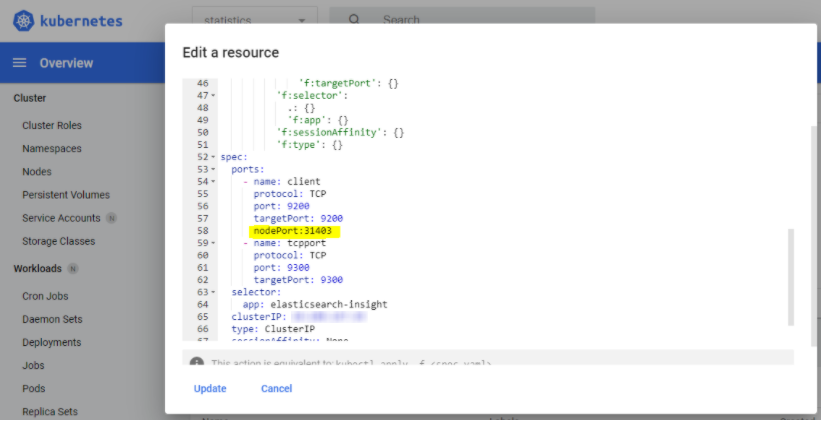
- On the Pod, click Edit.
-
Enter the port details as nodePort: 31403 and save as shown in
the image below:
-
To restore the elastic data, go to the old installation path of
AppViewX, and execute the following command:
appviewx --elastic-restore
- To connect to the elastic database, execute the following command:
kubectl get services -n statisticsIt displays the results as shown in the image below: