Configuring Azure IoT Hub in AppViewX
Creating a Service Account
- Log in to the AppViewX with valid credentials.
-
Got to
 (Menu) > Platform > IDENTITY > Service
Account.
(Menu) > Platform > IDENTITY > Service
Account.
- Add a new account, by providing the necessary details.
- Assign the user group to Admin.
Uploading and Enabling the Workflow
- Folders—Est server and workflow
- PDF—Config Guide
- text file—readme
- Log in to the AppViewX with valid credentials.
-
Got to
(Menu) > Automation > Workflow > Service
Account.
- Click Browse, to upload the provided workflow file [zip file inside the workflow directory (refer Prerequisites).]
-
Select the uploaded workflow and click Submit as shown below.
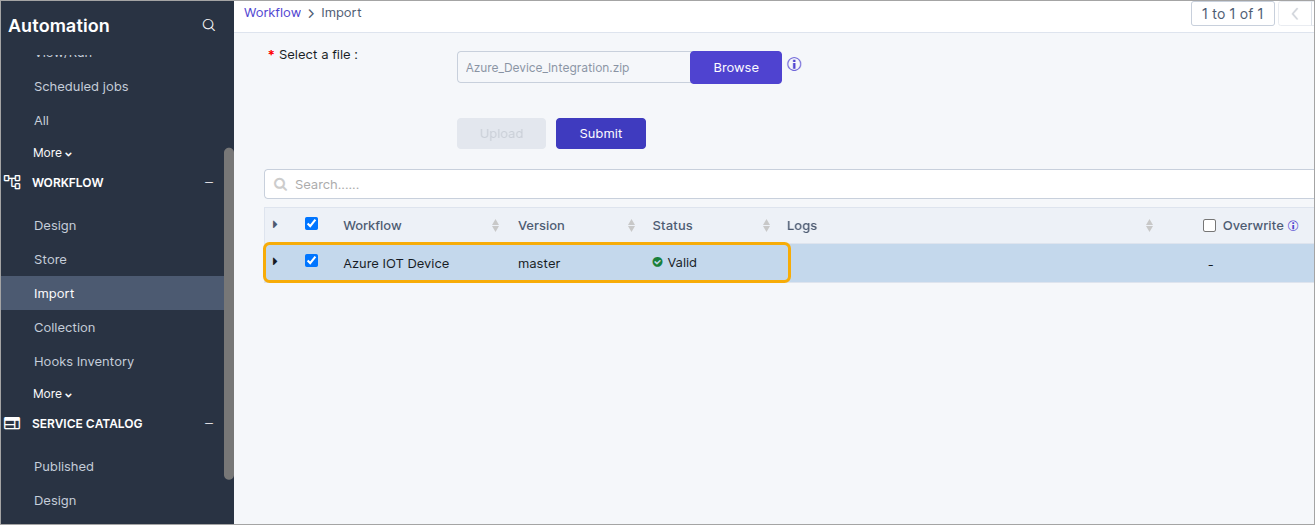
- Once submitted, go to the Workflow > Design, and choose the workflow named Azure IoT Device.
-
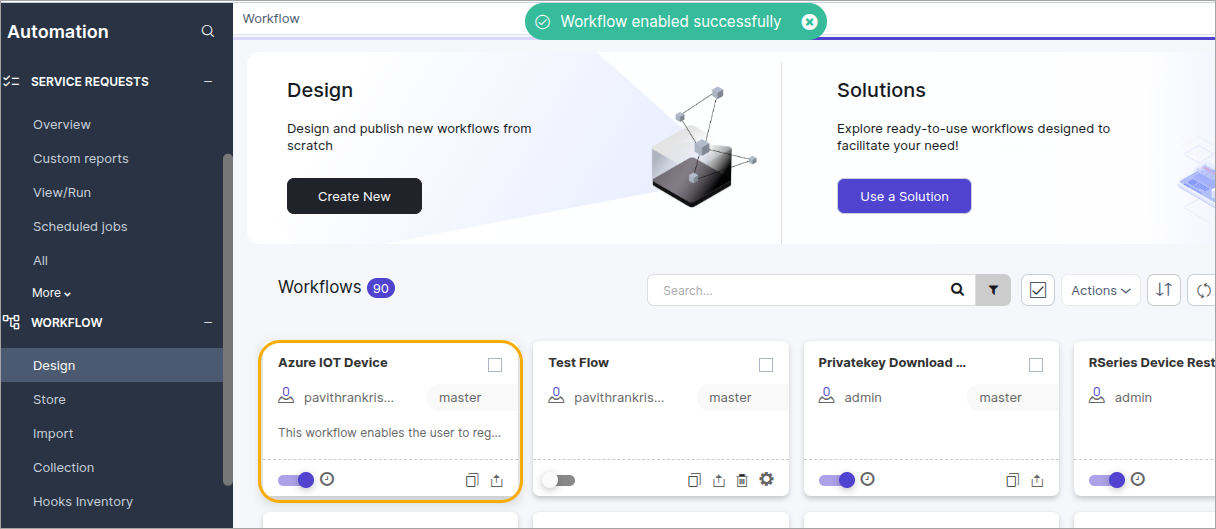
Enable the workflow as shown below by clicking on the toggle.
Updating Azure IoT Hub Configuration in AppViewX
- Log in to the AppViewX with valid credentials.
-
Got to
(Menu) > Platform > Asset Management >
Integration Hub.
-
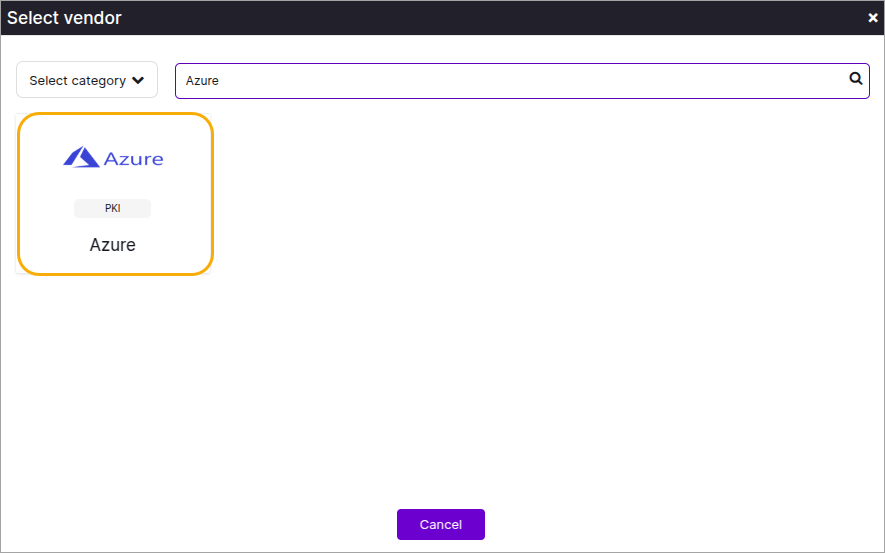
Click Add new vendor icon.
The Select vendor pop-up is displayed.
-
In the Select vendor pop-up, enter Azure in the search
bar.
The Azure vendor icon is displayed.
-
Select the Azure vendor and enter the following values in the fields
specified below:
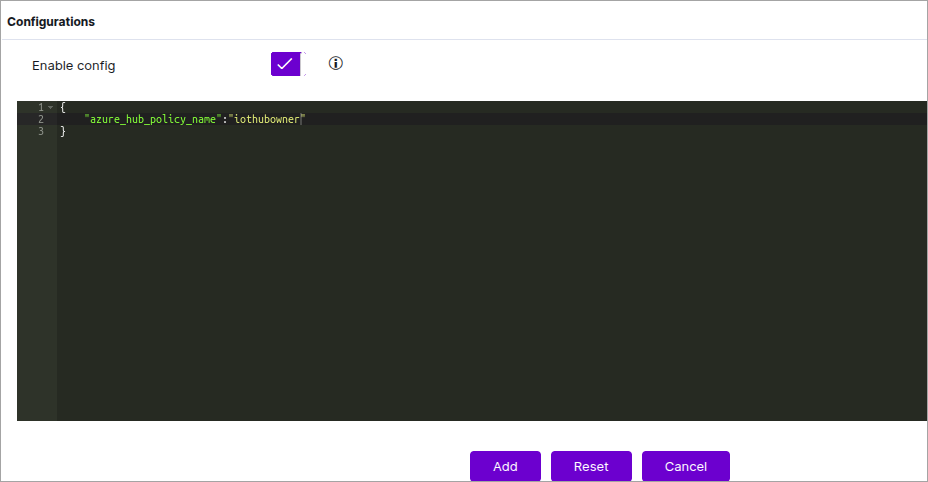
Field Value Name Enter the value AzureIoT. Datacenter Select the required value through which the cloud connector device registration/update call should be communicated. Auth Type Select API Key. URL Enter the Azure IOT HUB URL. Key Enter the value as X-Authorization. Value Enter the secret key of Azure IOT Hub. Enable config Click the toggle button to enable it and enter the Azure IOT Hub policy name in the config field using the format below: { "azure_hub_policy_name": "<AZURE_IOT_HUB_POLICY_NAME>" }Refer figure below.
- Click Add to save the values.