HSM Inventory and Encryption Settings
To configure HSM for a vendor:
-
On the HSM page, the inventory of all added HSMs, displays details such
as name, vendor, description, HSM Usage, and status.
 You can use the search bar.
The inventory table provides essential details about the integrated HSM.
You can use the search bar.
The inventory table provides essential details about the integrated HSM.Table 1. Field descriptions for HSM Inventory Field Description Name Displays the name of integrated HSM. Vendor Displays the vendor name of integrated HSM. Description Displays the description of integrated HSM. HSM usage It displays the usage of HSM. Note: If you opt to use the HSM for Master Key Encryption in SaaS, its reflection in the HSM Usage column will occur only after the Account Owner has selected that HSM in the Master Encryption Settings Page.Status Displays the current status of the HSM. - Available - To know the details about the communication and last checked date and time, click on the "Available" status.
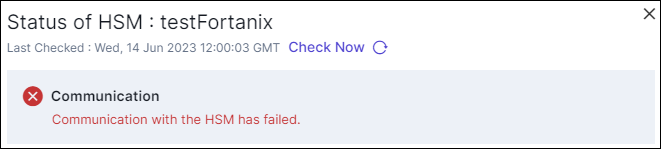
- Not Available - To know the details about
the reason for communication failure and last
checked date and time, click on the "Not
Available" status.
- In Progress - To know the details about the communication In progress, click on the "In-progress" status.
-
On the HSM page, from the top-right corner of the screen, click
 .
.
-
From the left pane, select the vendor for whom you want to integrate HSM.
HSM integration details fields are displayed for the selected vendor.
-
Enter the HSM details for the vendor.
- To enter the HSM details for Utimaco, click here.
- To enter the HSM details for Fortanix, click here.
- To enter the credential details for Thales TCT, click here.
- To enter the credential details for Thales DPoD, click here.
- To enter the credential details for Thales GPN, click here.
- To enter the credential details for Entrust, click here.
- Click Save.
Adding HSM in the inventory
-
Login to the AppViewX UI using valid credentials.
The Dashboard page is displayed by default.
-
On HSM page, click Add HSM, from the navigation pane on the
left, select Thales TCT.
The HSM > Add page is updated to display the fields required to integrate Thales TCT with the AppViewX.
-
In the General Information section, enter/select the required field
information.
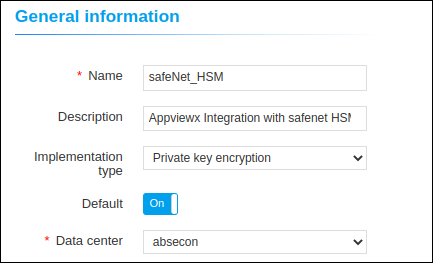
Table 2. Field descriptions for General Information Field Description *Name Enter a name for this integration. Description Enter a description for the integration. Implementation type Select an implementation type from the following options: - CSR generation
- Master key encryption
- Both
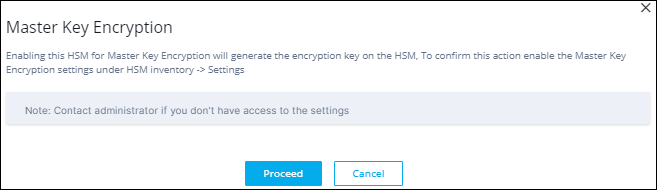
- Click Proceed.
- To confirm this action enable the Master
Key Encryption settings under HSM
inventory > Settings.
*Data center From the dropdown list, from the list of applicable values, select the required data center. Note: The data center selected here is used to map the AppViewX Cloud Connector for this integration.* : Mandatory fields -
In the Vendor specific details section, enter/select the required
field information.
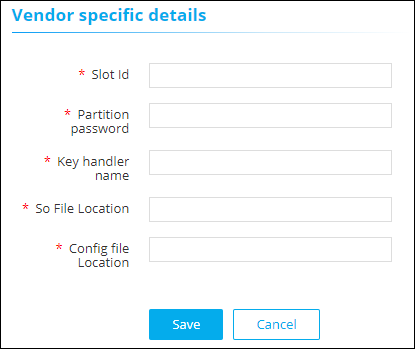
Table 3. Field descriptions for Vendor specific details Field Description *Slot Id Unique identification number of the slot in the HSM will be used to communicate with the end HSM device. *Partition password Password of the HSM partition for the specific slot mentioned above. *Key handler name A reference name to create a Master Encryption key in HSM. This enables us to pick the right MEK for crypto operations over KEK. *So File The SO file is used to facilitate the communication between the HSM and AppViewX. Enter the .so file location hsm/safenet/lunaclient/lib/libCryptoki2_64.so. So File Location:
*Config file The Config file is used to facilitate the communication between the HSM and AppViewX. Enter the .conf file location hsm/Chrystoki.conf. * : Mandatory fields - Click Save.
-
Scroll to the end of this page to view the table/navigate to HSM inventory
to view the HSM status. If the HSM has been configured correctly, the Status
for the HSM will be set to Available (after checking the encryption
and decryption logic). If the Status is Not Available:
- Check the installation path for the HSM.
- Ensure that all required permissions have been enabled.
- Go to Logs > Logging :: All. Search with HSM and see the Log message.
- If the implementation type is CSR Generation, refer to the Cert+ User Guide for steps on how to generate a CSR.
HSM Encryption Settings 
To secure certificates with a private key, enable private key encryption in the
Master Encryption Settings page. Follow the steps below to enable private key
encryption.
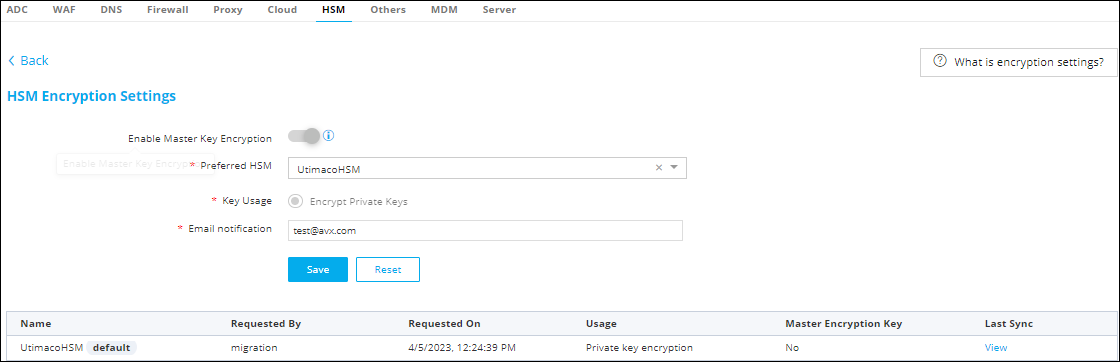
- Add a new HSM to the HSM inventory by selecting Master Key Encryption as the HSM usage.
- In the top-right corner of the HSM inventory page, select the Master Encryption Settings button.
- Enable the Master Key Encryption Toggle under the HSM Settings.
- Select the added HSM from the preferred HSM dropdown and set the key usage to encrypt private keys.
- Provide notification emails or email distro, in the case of HSM
connectivity or key not accessible failures to the administrators. Note: To receive default HSM health status emails, set up the email address in the settings page. Ensure SMTP settings are configured in Platform > System Administration > SMTP for email functionality.
- Save the Settings for the HSM to be marked as default HSM for storing encryption keys.