Entrust HSM
Prerequisites
- The Ncipher client must be installed at the default location (/opt/) on the host machine. After installation, the Ncipher client and its utility scripts must be present under /opt/nfast/. For a sample installation steps refer to the section Sample Ncipher Client Installation Steps.
- After installing the Ncipher client in /opt/nfast/,
ensure that all permissions are granted for the
/opt/nfast/kmdata directory by executing the
following
command:
Keys are generated within the same directory and will require permissions to read/write.sudo chmod -R 777 /opt/nfast/kmdata/ - The Ncipher client must be installed on all the nodes where the
avx-platform-hsm for
 and avx-midserver-platform in cloud
connector for
and avx-midserver-platform in cloud
connector for  plugin is up and running.
 - The RFS server must be set up, and the clients must be registered on the RFS server.
- The RFS server must be configured for all the clients. Note: Steps 3 and 4 are required only in cases of multi-node deployment.
Why is Key Synchronization required?
In a multi-node setup, after ensuring the prerequisites are met, execute the following steps on all the nodes:
-
Execute the command:
sudo crontab -eAdd the below line to the file:* * * * * for i in {1..6}; do sh {APPVIEWX_INSTALLATION_PATH}/appviewx_dependencies/properties/avx_key_sync.sh > /tmp/avx_keys_sync.logs & sleep 10; doneNote: The above line executes the key sync script every 10 seconds. -
Restart cron by executing the following command:
For Centos:
For Ubuntu:systemctl restart crond.servicesudo service cron restart -
After completing all the steps, restart the avx-platform-hsm pod for
and avx-midserver-platform in cloud connector for in
all DC nodes.
Sample Ncipher Client Installation Steps
-
Navigate to the directory containing the installation ISOs.
cd /home/appviewx/ncipher/
-
Mount the SecWorld ISO to access installation packages.
sudo mount -o loop SecWorld_Lin64-12.80.4.iso /mnt/software/
If u get a messagemount: mount point /mnt/software/ does not exist, create folder software under mnt (/mnt/software/) -
Navigate to the directory containing tar files for 64-bit Linux.
cd /mnt/software/
cd /linux/amd64/
-
Extract nCipher Core Components - hardware support, core tools, Java
libraries, and remote admin services - into the root directory.
sudo tar -xvf hwsp.tar.gz -C /
sudo tar -xvf ctls.tar.gz -C /
sudo tar -xvf javasp.tar.gz -C /
sudo tar -xvf raserv.tar.gz -C /
-
Mount and extract the Remote Admin Client components required for secure
remote HSM access.
cd /home/appviewx/ncipher/
sudo mount -o loop RemoteAdmin-Common-12.80.4.iso /mnt/software/
cd /mnt/software/
cd /lin64/amd64/
sudo tar -xvf rac.tar.gz -C /
-
Run the nCipher installation script.
cd /opt/nfast/
cd sbin/
sudo ./install
-
Verify installation and HSM connectivity using the enquiry tool.
cd ../bin/
./enquiry
-
Copy key material (KNETI data, config files) and set correct
ownership.
cd /opt/nfast/kmdata/local/
sudo cp /home/appviewx/ncipher/latest/* .
sudo chown -R nfast:nfast *
-
Register the client with the HSM using anonymous KNETI and HSM enrollment
command.
cd ../../bin/
./anonkneti --port 9014 <IP-App>sudo ./nethsmenroll --port 9014 93.93.131.226 F013-03E0-D947 fe0343f3fc7930f9d75d312cd68cda1cee8004c4
-
Edit the cardlist file and uncomment the * entry to allow
access.
cd ../kmdata/config/
sudo vi cardlist [uncomment *]
-
Create the cknfastrc configuration file with environment
settings:
cd ../../
sudo vi cknfastrc
Add the following parameters:CKNFAST_LOADSHARING=1 CKNFAST_DEBUG=7 CKNFAST_DEBUGFILE=/opt/nfast/log/pkcs11.log -
Set appropriate permissions for the cknfastrc config file.
sudo chown -R nfast:nfast cknfastrc
-
Enable TCP interfaces for secure communication with the HSM.
cd bin/
sudo ./config-serverstartup --enable-tcp --enable-privileged-tcp
-
Restart the nCipher services to apply changes.
cd ../sbin/
sudo ./init.d-ncipher restart
-
Run various diagnostic commands to confirm key module setup.
cd ../bin/
./enquiry
./nfkminfo
./nfkmcheck
./nfkminfo -w
-
Generate a new key named AppViewX_QA for use with the
application.
sudo ./ppmk --new AppViewX_QA
Troubleshooting
CKR_FUNCTION_FAILED error is encountered, login to the HSM
pod and run the following command to adjust the directory permissions:
sudo chmod -R 777 /appviewx/hsm/opt/nfastThis ensures the necessary read/write/execute permissions are granted for HSM operations.
Integrating Entrust HSM with AppViewX
-
Login to the AppViewX UI using valid credentials.
The Dashboard page is displayed by default.
-
On HSM page, click Add HSM, from the navigation pane
on the left, select Entrust.
The HSM > Add page is updated to display the fields required to integrate Entrust with AppViewX.
-
In the General Information section, enter/select the required field
information.
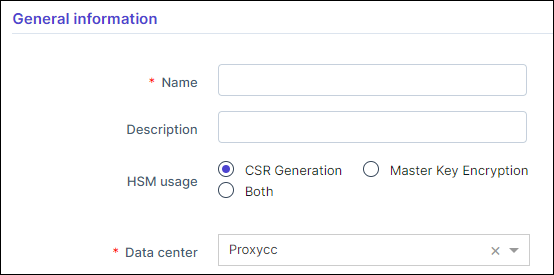
Table 1. Field descriptions for General Information Field Description *Name Enter a name of the HSM. This is a unique field. Description Enter a description of the HSM. HSM usage For Entrust, private key encryption purposes the HSM usage is applicable to - CSR Generation
- Master Key Encryption
- Both
On selecting, Master Key Encryption or Both, the following pop-up is displayed: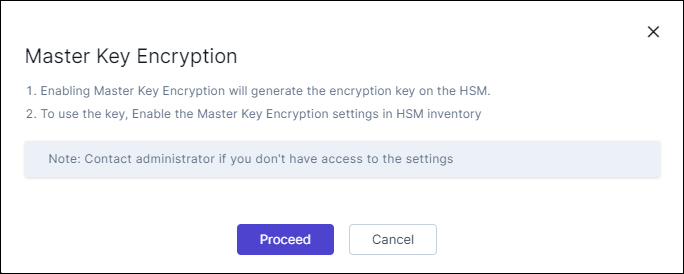
Read the details and click Proceed.
*Data center Select the required datacenter to which all HSM calls are directed. *: Mandatory fields -
To integrate the Entrust HSM device with AppViewX,
please get the following details from the HSM device.
In the Vendor specific details section, enter/select the required field information.
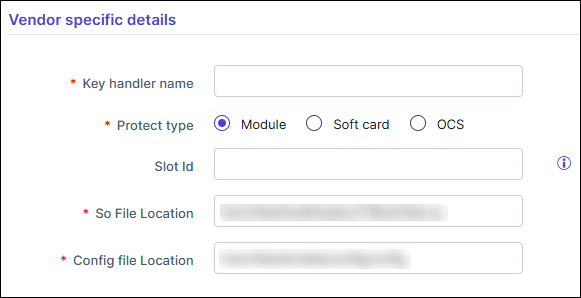
Table 2. Field descriptions for Vendor specific details Field Description *Key handler name Enter the name of the Key which will be created in the HSM. *Protect type Select the appropriate Protect type. - Module is supported.
- Soft card is supported.
- OCS is supported.
Slot Id Enter the Slot Id; it denotes the slot that is allocated for the Module. By default the slot will be taken as Zero and is as non mandatory field. *Card name This field is displayed only if Protect type = Soft card or OCS Enter the name of the Soft card/OCS created in HSM. This field is not case sensitive.
*Partition password This field is displayed only if Protect type = Soft card or OCS Enter the password for that Soft card/OCS.
Note: This field is not mandatory when the Protect type is selected as OCS.*So File Location The SO file is used to facilitate the communication between the HSM and AppViewX. Location of the so file. This should not be changed. Custom so file path is not supported currently. The default location is: /opt/hsm/nfast/toolkits/pkcs11/libcknfast.so. *Config File Location The Config file is used to facilitate the communication between the HSM and AppViewX. Location of the config file should not be changed. Custom config file path is not supported currently. The default location is: /opt/nfast/kmdata/config/config. *: Mandatory fields -
Click Save.
Scroll to the end of this page to view the table/navigate to HSM inventory to view the HSM status. If the HSM has been configured correctly, the status for the HSM will be set to Available else the status will be Not Available.
In a multi-node setup with Ncipher clients installed on various nodes, it is essential to synchronize keys generated on one node with others. Without key synchronization, HSM encryption/decryption calls on different nodes may fail. To address this, Entrust offers utility scripts, but manual execution is required each time a new key is generated. AppViewX simplifies this process by including a script that runs every 10 seconds, automatically synchronizing keys across all nodes. This script internally invokes Entrust's utility scripts, particularly the rfs-sync utility.