Configuring the SMTP Settings for Microsoft
- Ensure connectivity of the SMTP Server from the selected Data Center.
- Verify unrestricted connectivity between the Data Center and SMTP Server by checking for any firewall restrictions.
- For Microsoft SMTP OAuth.
- Ensure the SMTP OAuth is enabled. For more details, refer to "Enable or Disable SMTP AUTH in Exchange Online" to enable it.
- Ensure that a valid license is available for the mailbox.
- Validate the accuracy of the configuration details provided on the settings page.
- Prior to saving the configuration, verify the functionality of the Test Mail feature.
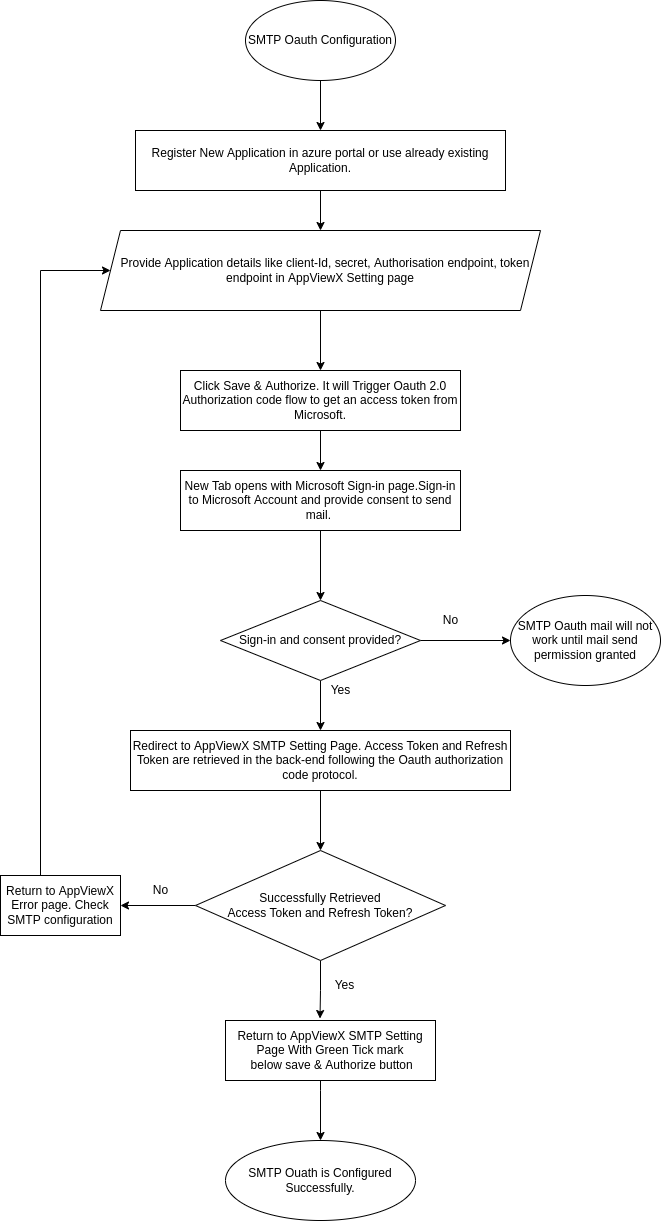
The SMTP oAuth uses an access token instead of a password to send email. The access token works as a temporary password with fixed validity and has permissions delegated by the user.
To get the access token you must provide details such as username, client-id, secret, Authorization endpoint, token Endpoint and scope. Once these details are submitted, you will be redirected to the oAuth server login page. Once the user authorization is done here, the oAuth server returns the Auth code.
The Auth code is exchanged with the access token and refresh token in the backend and saved in DB.
.png)
To configure the SMTP server:
-
On the Settings :: SMTP page, in the SMTP configuration section,
enter the required field information.
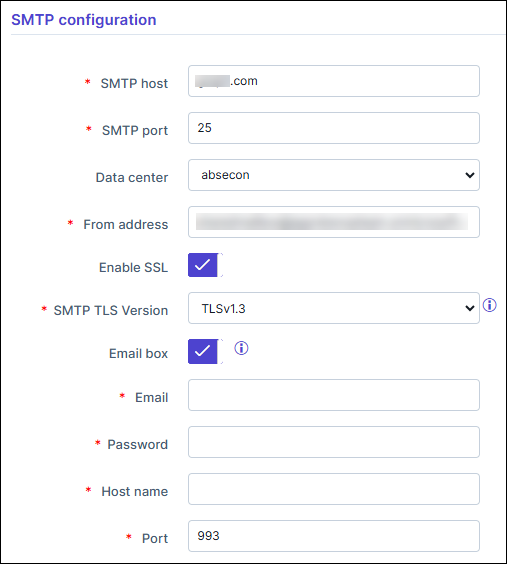
Table 1. Field descriptions for SMTP configuration Field Description *SMTP host Host name of the SMTP server. *SMTP port Port number of the SMTP server. Data center From the options available in the dropdown, select the data center. *From address Enter the email address that will be used to email the logs and alerts. Enable SSL To allow SSL encryption, enable this toggle key. *SMTP TLS Version From the options available in the dropdown, select the TLS version of the SMTP server. Note: Versions 1.2 and higher are recommended.Email box To use the mailbox feature to read emails in Visual Workflow, enable this toggle key. *Email This field is displayed only if the Email box key is enabled. Email address of the IMAP server used for the mailbox feature.
*Password This field is displayed only if the Email box key is enabled. Password of the IMAP server used for the mailbox feature.
*Host name This field is displayed only if the Email box key is enabled. Host name of the IMAP server used for the mailbox feature.
*Port This field is displayed only if the Email box key is enabled. Enter the Port number.
* : Mandatory fields -
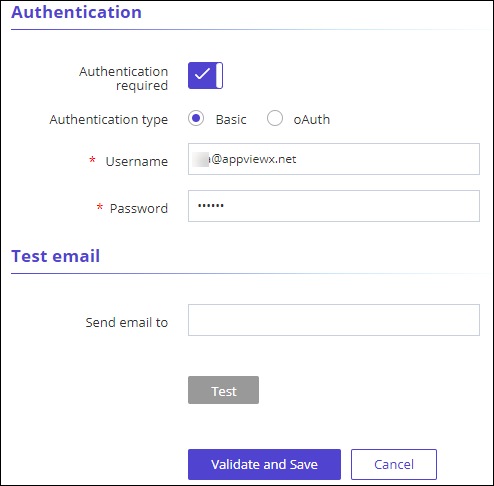
In the Authentication section, enter the required field information.
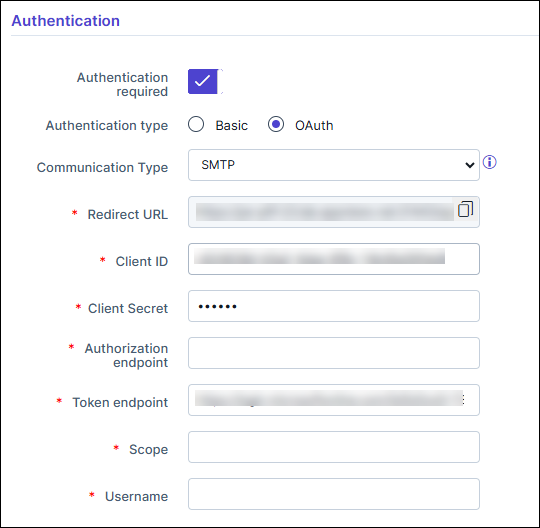
Table 2. Field descriptions for Authentication (oAuth) Field Description Authentication required To enable authenticated mail server communication, enable this toggle. Authentication type Select the Authentication type as Basic or oAuth. Note: Selecting Basic displays the Username and Password fields.SMTP oAuth method to send email, we can’t use a different address in From field. The sending address must be the same with the authenticated account.Selecting oAuth displays the fields that are described below.
Communication type Select the Communication type as follows: - SMTP: email communication via SMTP.
- API: email communication via Graph API (Outlook).
Note: When using Communication type = API, In the Azure, for API Permission, set the Application level permissions to Mail.Read and Mail.Send. Refer*Redirect URL This field is displayed only when Communication type = SMTP. This field is auto-populated from the address bar of the browser.
*Client ID Enter the Client ID that is generated in the oAuth server when the oAuth client is created. Note: The steps to create an oAuth client are different for Google and Microsoft.For more information on steps for Google, click here.
For more information on steps for Microsoft click here.
*Client Secret Enter the Client Secret that is generated in the oAuth server when the oAuth client is created. *Authorization endpoint This field is displayed only when Communication type = SMTP. Enter the authorization endpoint where the user authorizes and gives permission to the oAuth client to send email on behalf of the user.
*Token endpoint Enter the token endpoint to get Access Token and Refresh Token. You can get the endpoint by providing Client ID, Secret, and other relevant values based on oAuth 2.0 specifications. *Scope This field is displayed only when Communication type = SMTP. The permission required to send email.
Note: For Microsoft, enter https://outlook.office.com/SMTP.Send.*Username This field is displayed only when Communication type = SMTP or when Authentication type = oAuth. Username for the authenticated mail server
If the Authentication is chosen as oAuth the Username and From address should be the same.
*Password This field is enabled if you select Basic as your Authentication type. Enter the valid password associated with the username.
* : Mandatory fields - If the Authentication type is selected as Basic, displays the Username and Password attributes.
-
In the Test email section, enter the email address to which a test email
should be sent and click Test.
-
To save the SMTP configuration settings, click Validate and Save.
Upon clicking "Validate and Save," an email will be sent to the user's email address for validation.Note:
- If the user does not have an email ID configured, an error will be displayed, prompting them to set up an email address.
- In case of validation failure, the SMTP settings will not be saved.
-
If the Authentication type is selected as oAuth,
To save the SMTP configuration settings, click Save &
Authorize.
New Tab is displayed for Single Sign On (SSO) with microsoft.
- Provide your login credentials and submit your consent for the mentioned permissions. The login credential should be the same as the username configured in the SMTP Authentication.
-
Displays confirmation of SMTP Settings Authorized.

-
AppViewX can send an email on behalf of the authorized user as the user has
given the consent to send email on his behalf during authentication.
Note: The Username should have a mailbox assigned, and it should also have all the necessary permissions for web sign-in as per the oAuth 2.0 authorization code flow.
A new tab will open, prompting for sign-in.
Once authorization is done the user receives an access token and a refresh token from the token endpoint. The access token is used for sending email and the refresh token is used for renewing the access token upon its expiry.
Authentication for Microsoft SMTP Settings
Create authorization credentials.
Registering your application establishes a trust relationship between your app and the Microsoft identity platform. The trust is unidirectional: your app trusts the Microsoft identity platform, and not the other way around.
Follow these steps to create the app registration:
- Sign in to Microsoft using valid credentials for App Registration using the following URL: https://portal.azure.com/.
-
Under Manage, click App registrations > New
registration.

- In the Register an Application section, enter the required field information.
- Click Register to complete the initial app registration.
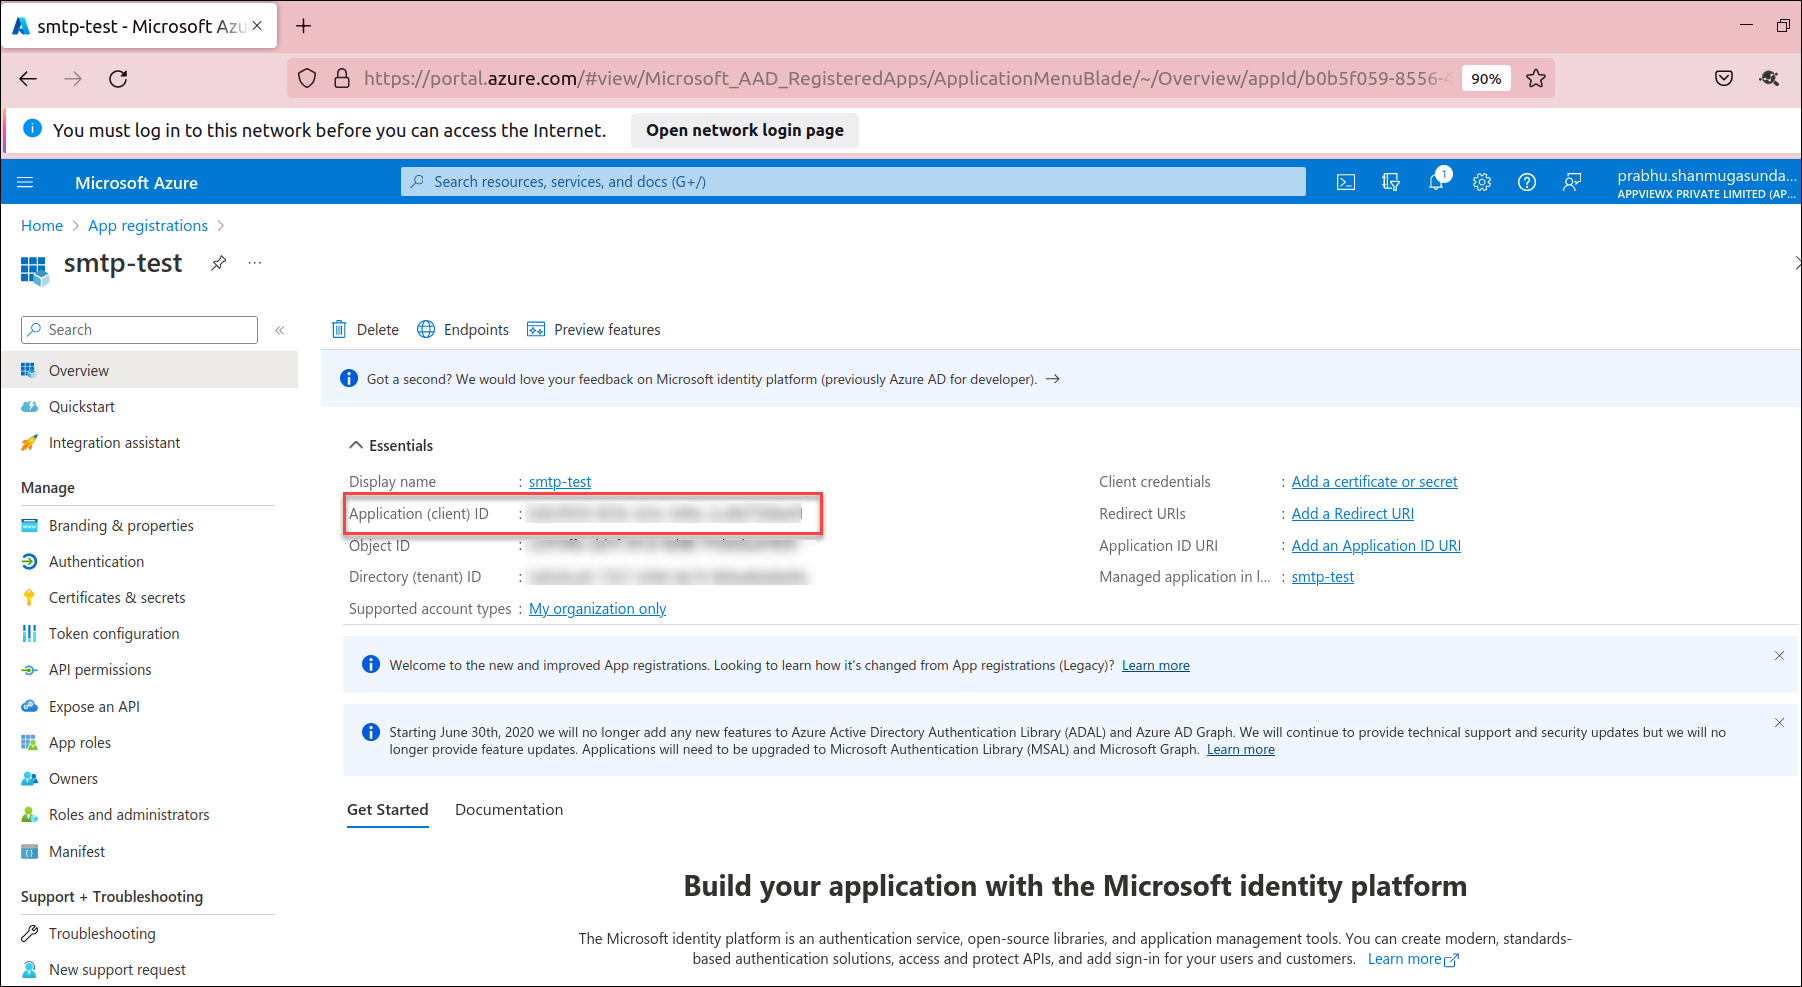
-
When registration finishes, the Azure portal displays the app
registration's Overview pane. You see the Application (client) ID.
- Under Manage, select Authentication.
-
Under Platform configurations, select Add a platform.
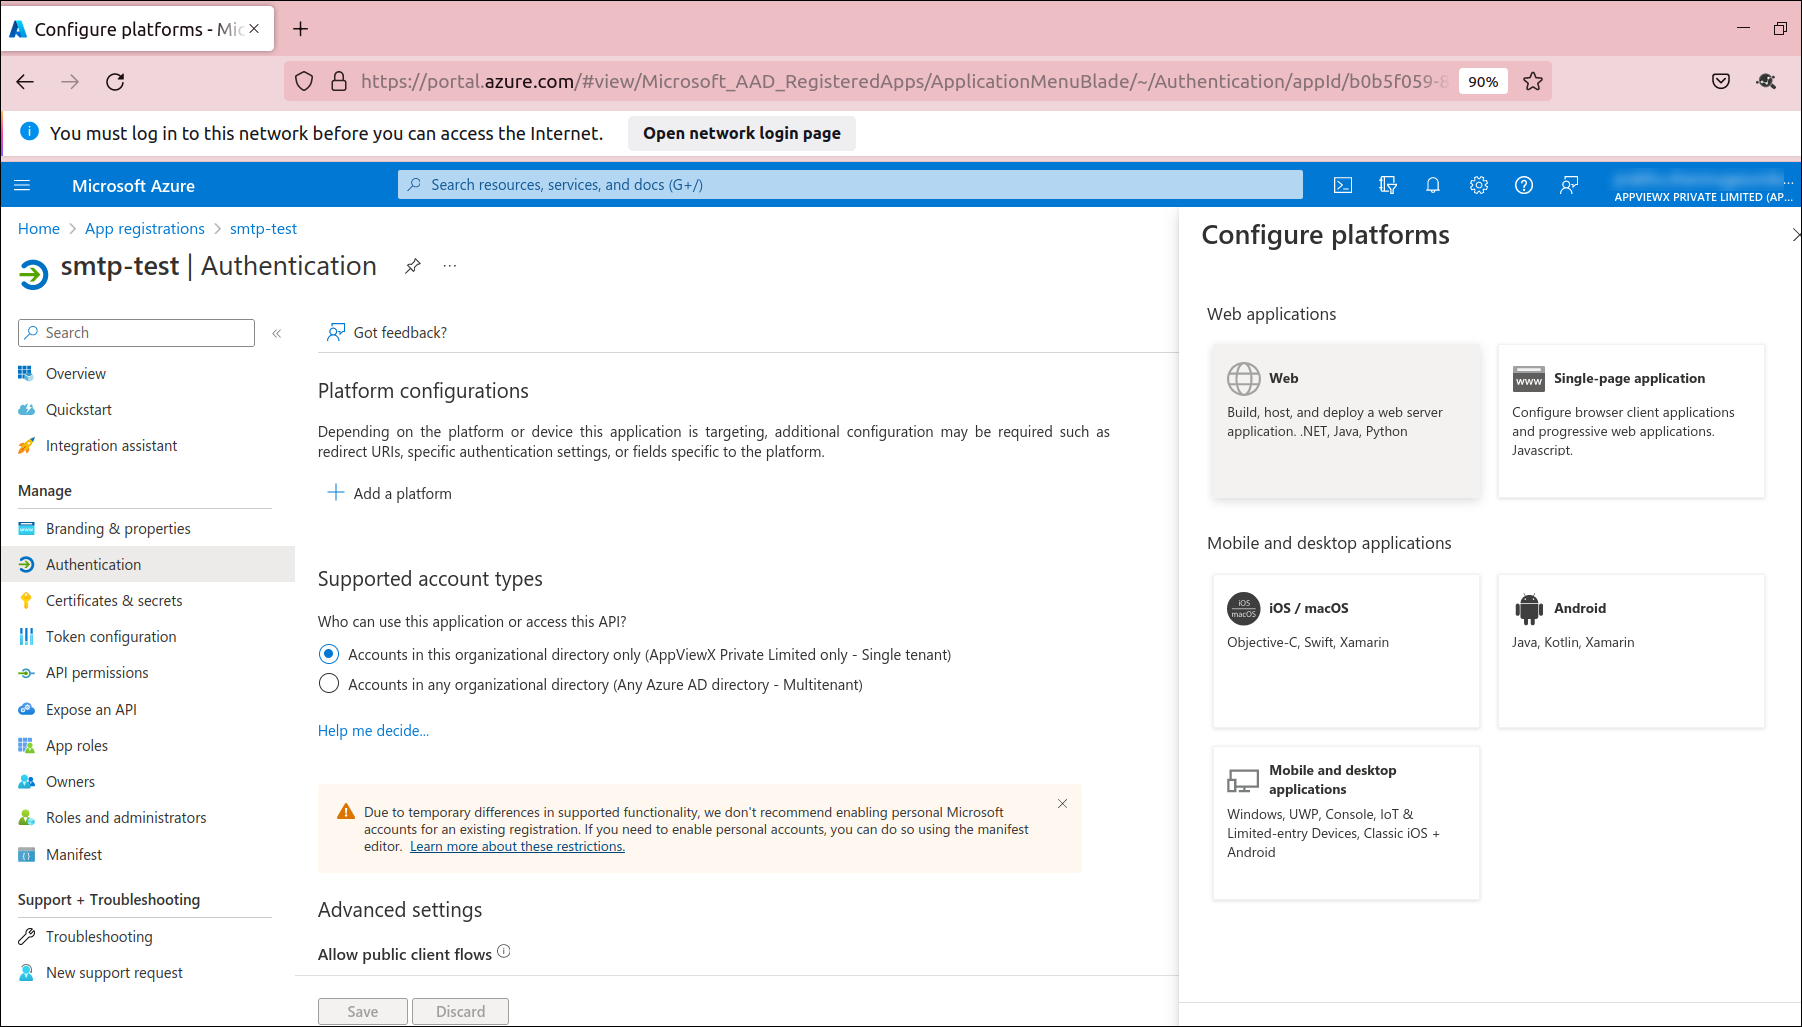
-
Under Configure platforms, select Web for application type
(platform) to configure its settings.
The Redirect URI :: Configure Web page is displayed.
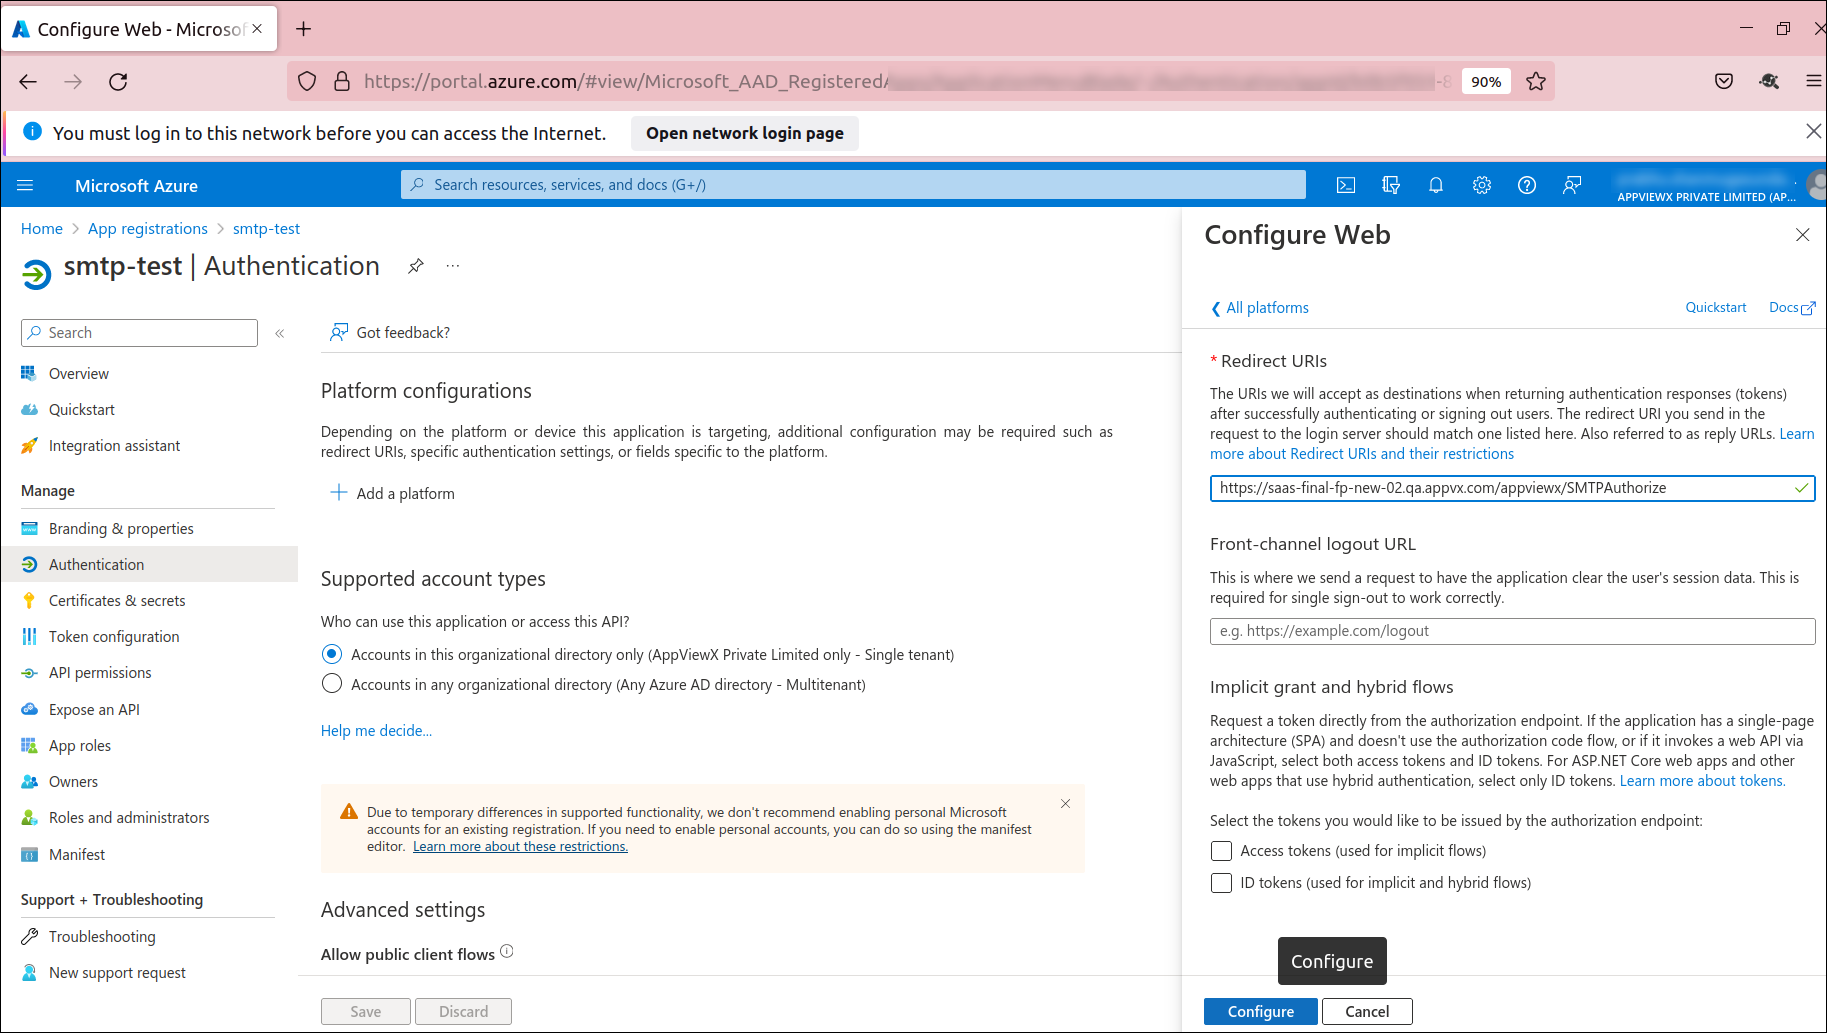
- Enter a Redirect URI for your app. This URI is the location where the Microsoft identity platform redirects a user's client and sends security tokens after authentication.
- Click Configure to complete the platform configuration.
-
Select Certificates & secrets > Client secrets > New
client secret.
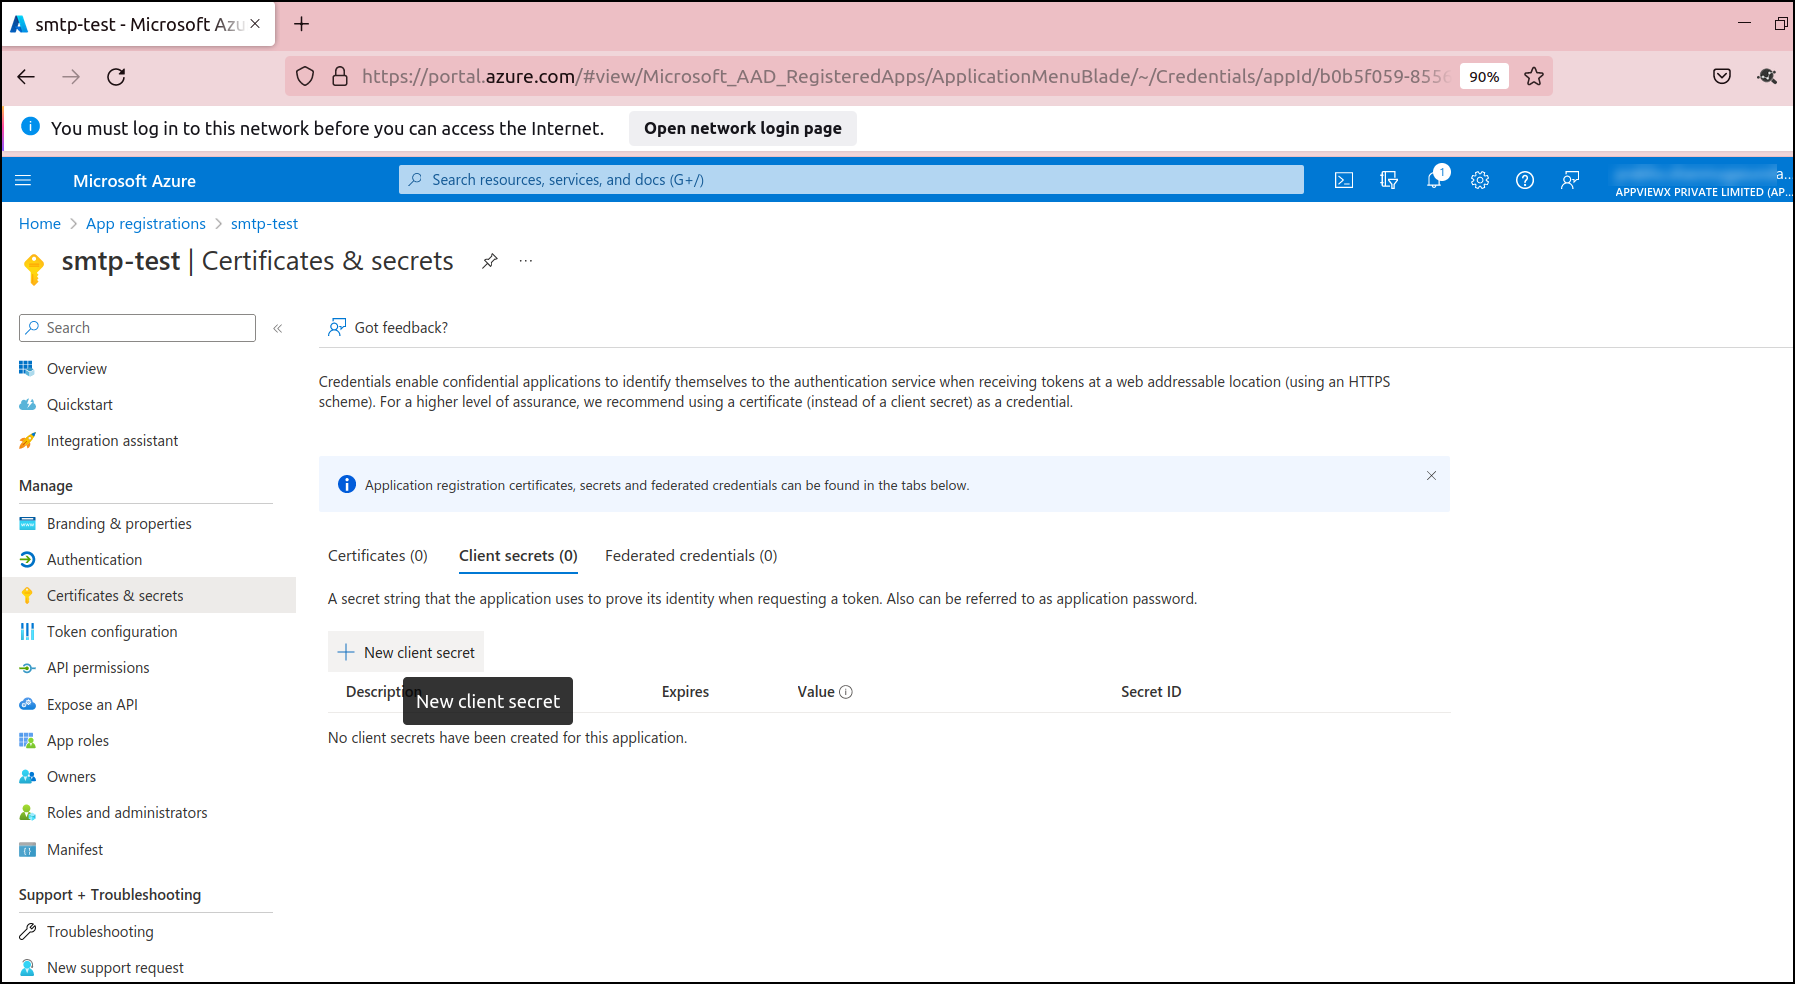 The New client secret :: Add a client secret page is displayed.
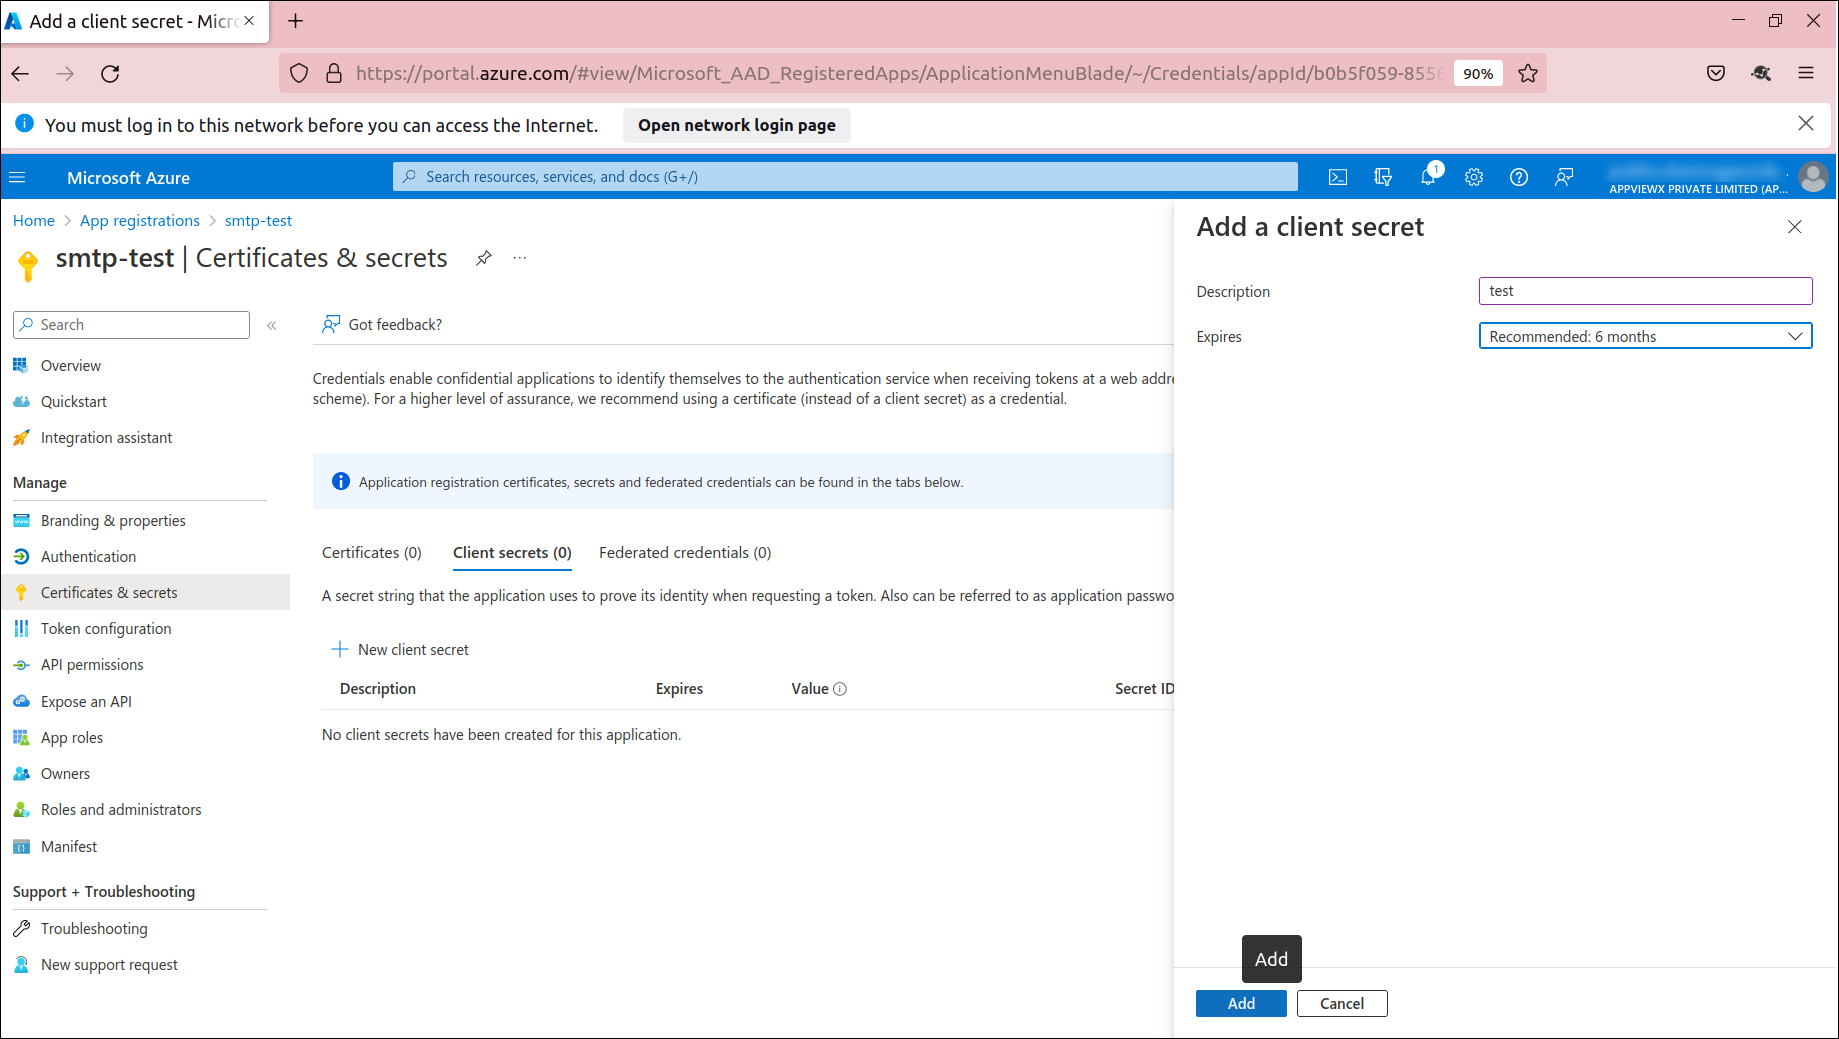
- Add a Description for your client secret.
- Select an Expiration for the secret or specify a custom lifetime.
- Click Add.
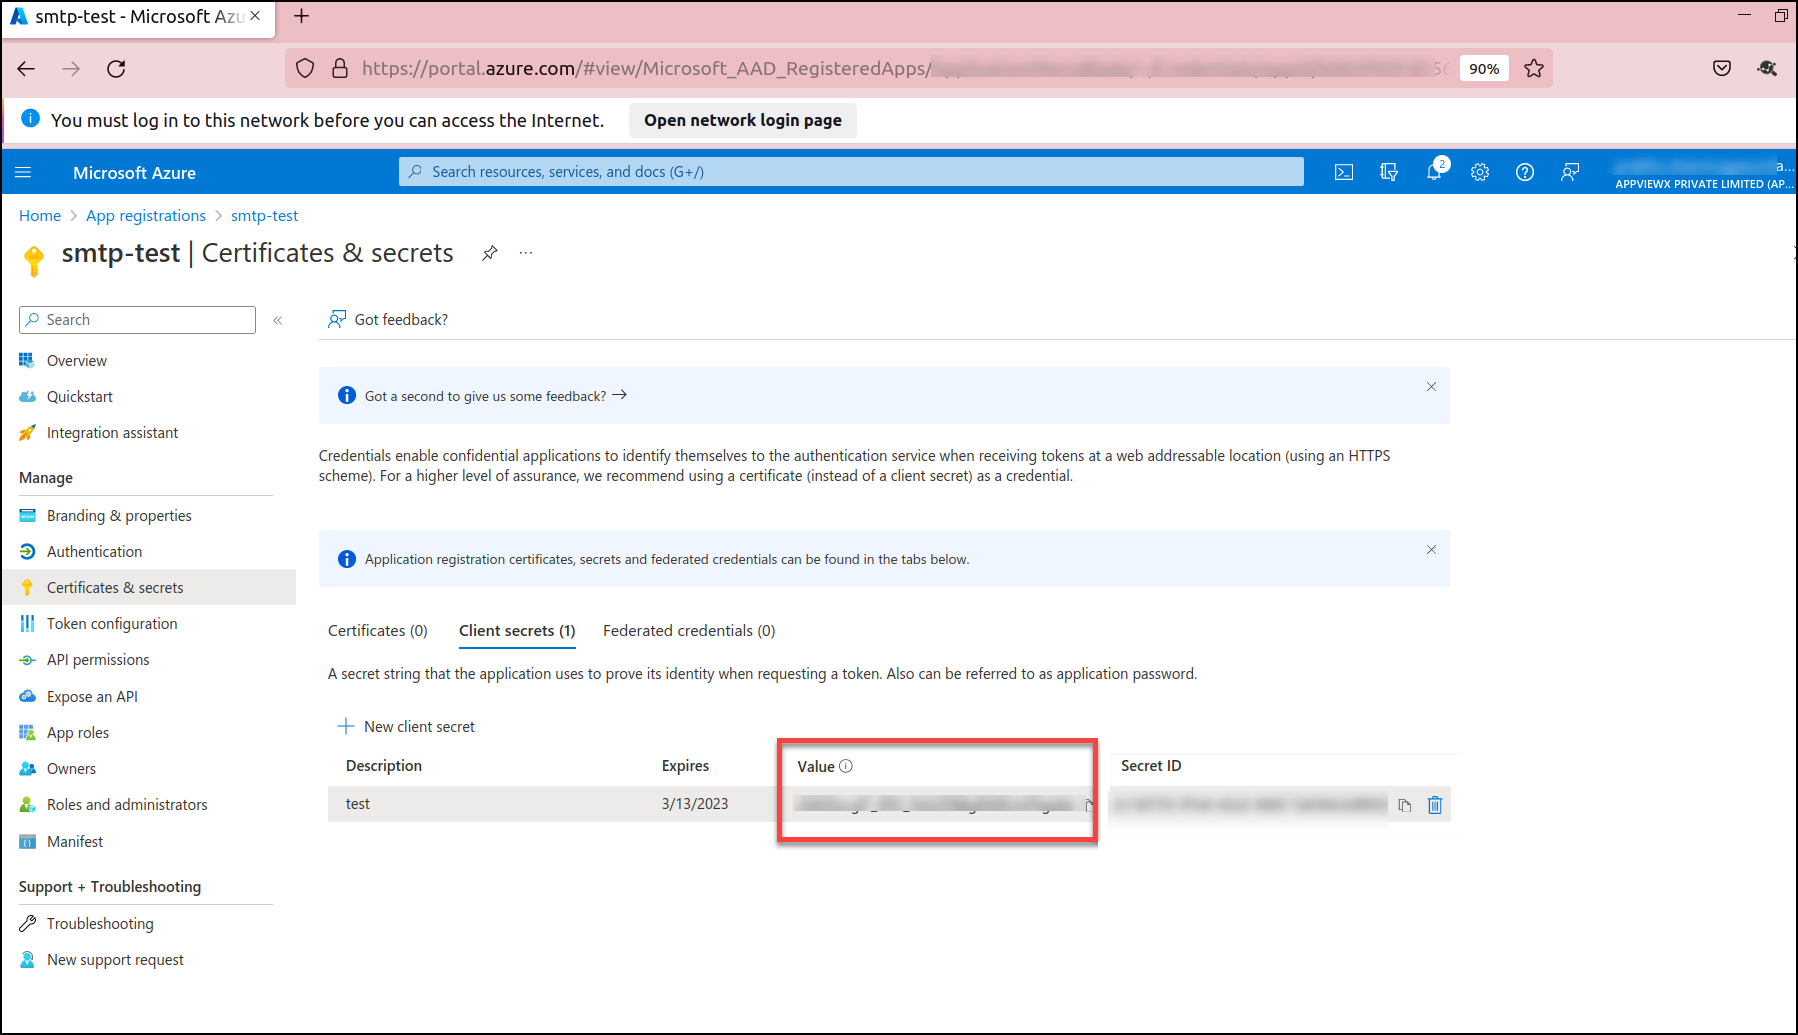
-
Record the Secret value for use in your client application code.
This secret value is never displayed again after you leave this page.
- Under App Registration, click Overview.
-
Click Endpoints.
The Overview :: Endpoints page is displayed.

- Copy authorization endpoint and token endpoint for Authentication of SMTP Server Settings.
-
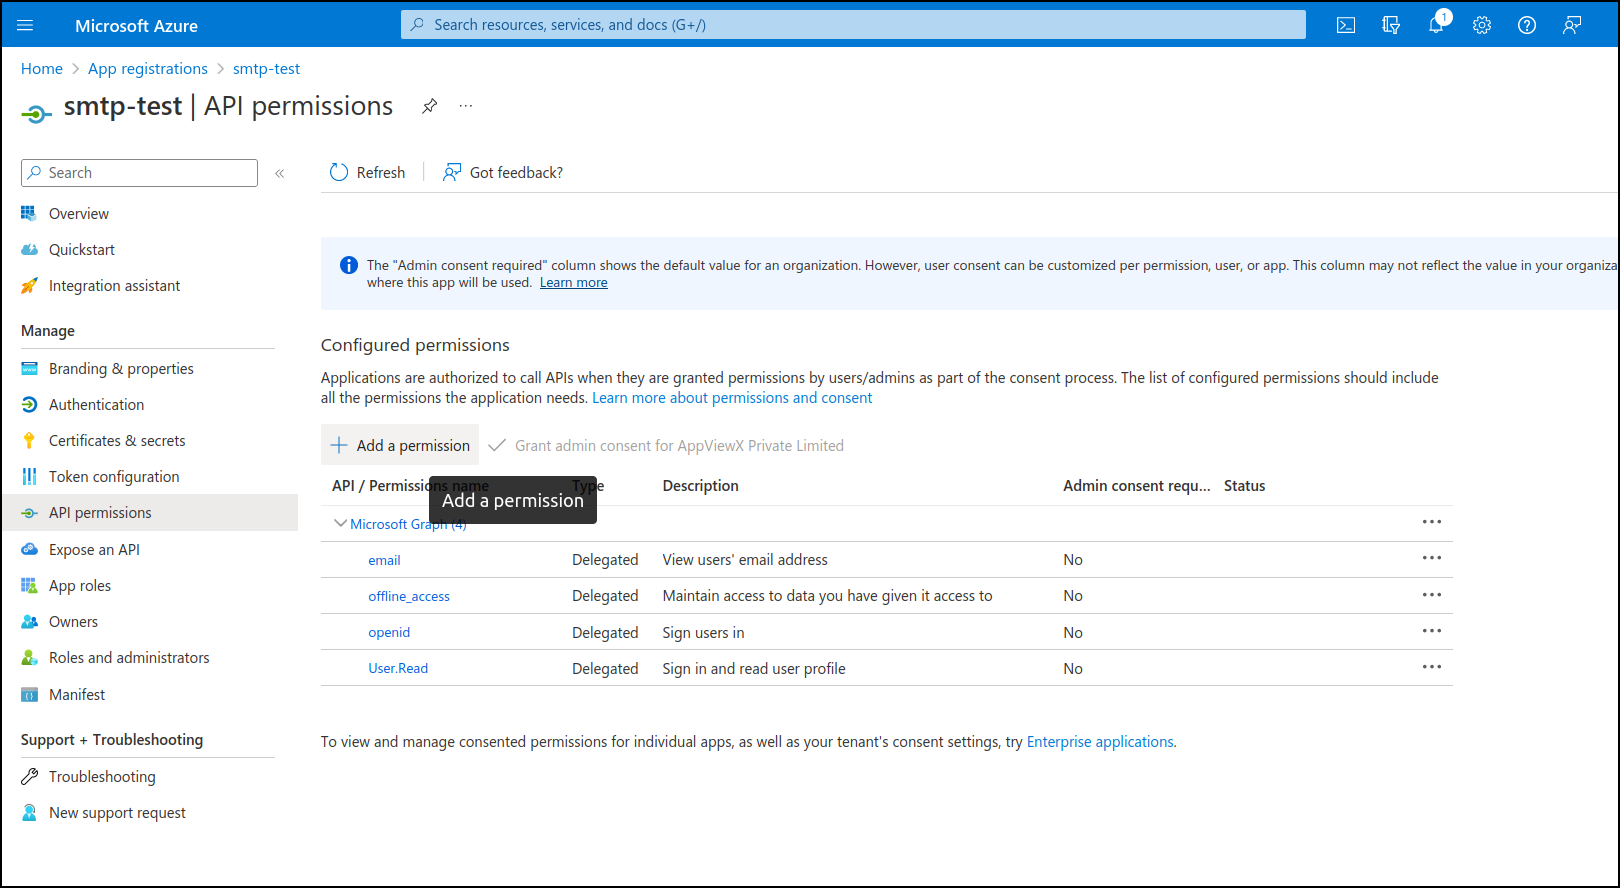
Under Manage, click API permissions.
The API permissions page is displayed.
-
To add required permissions, click Add a permission.
The Request API permissions page is displayed.
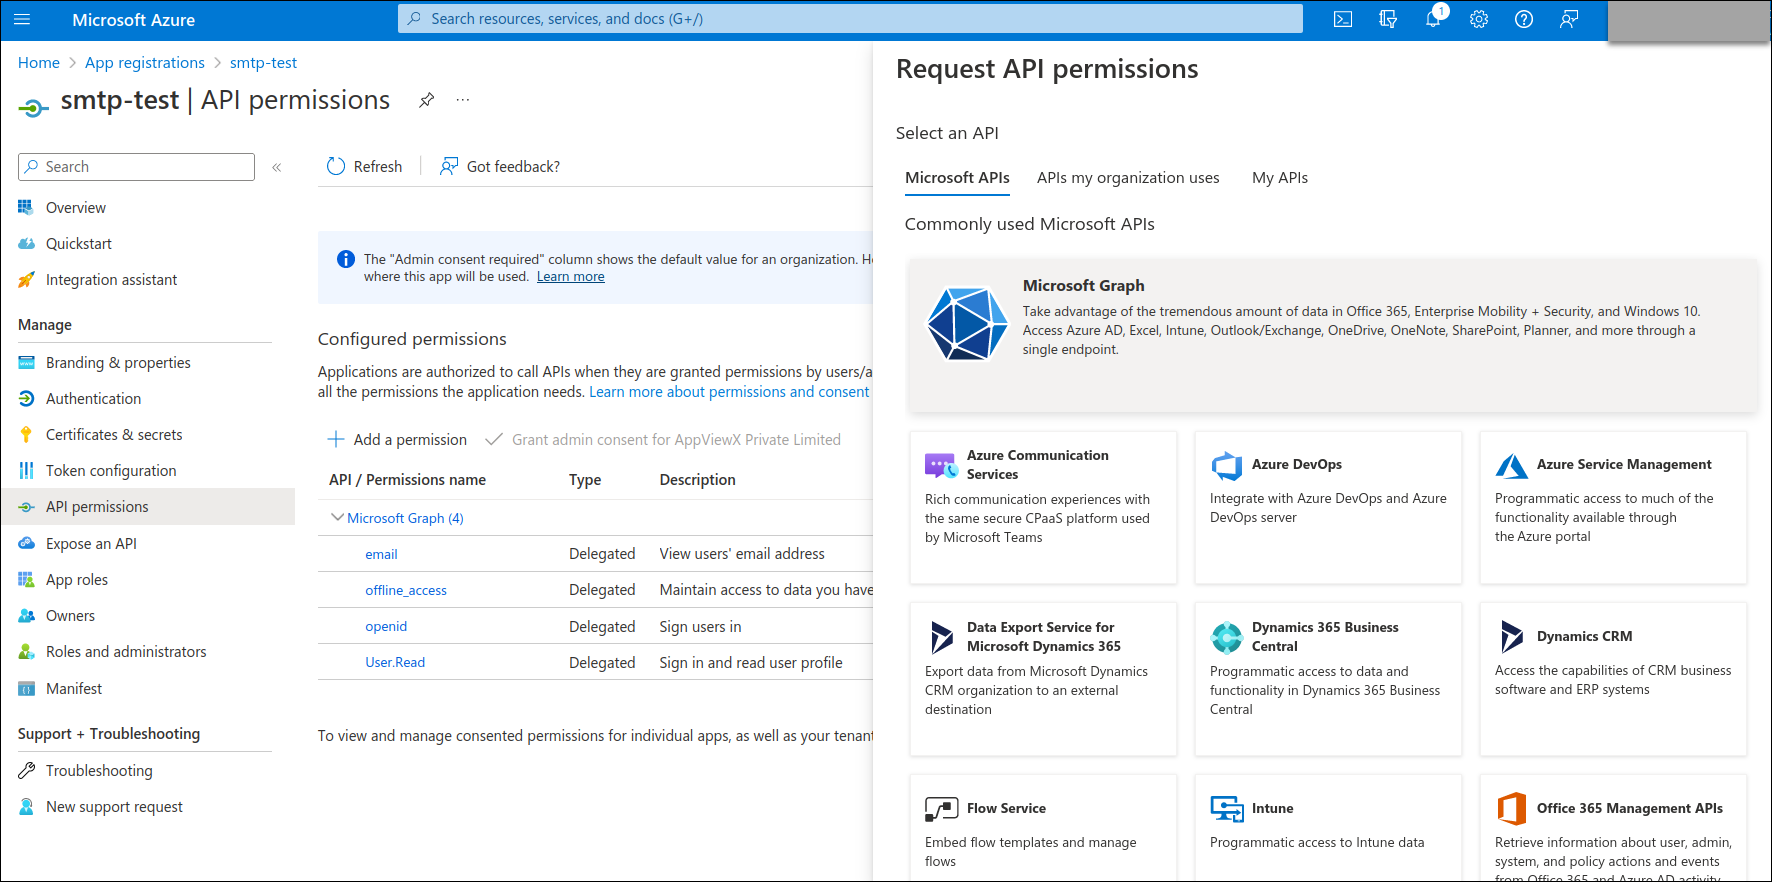
-
Click Microsoft Graph > Delegated permissions.
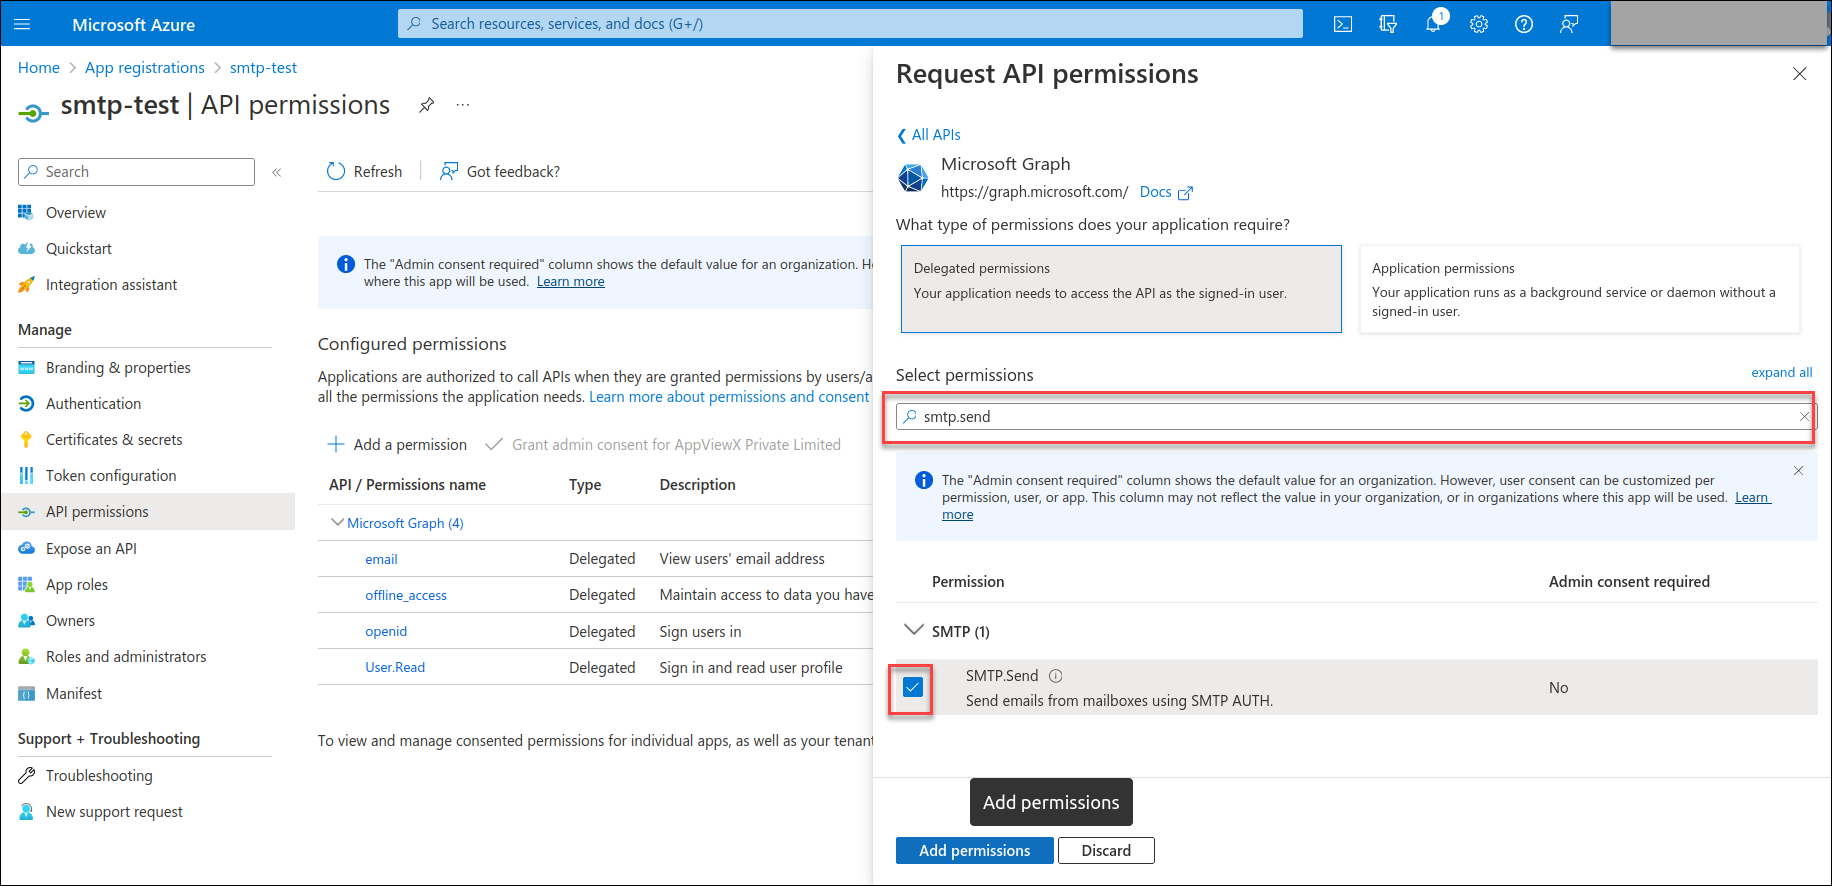
- Under Select permissions search box, search for the smtp.send and select the SMTP.Send from the dropdown.
- Similarly search for email, offline_access, openid, User.Read and select the email, offline_access, openid, User.Read from the respective dropdowns.
-
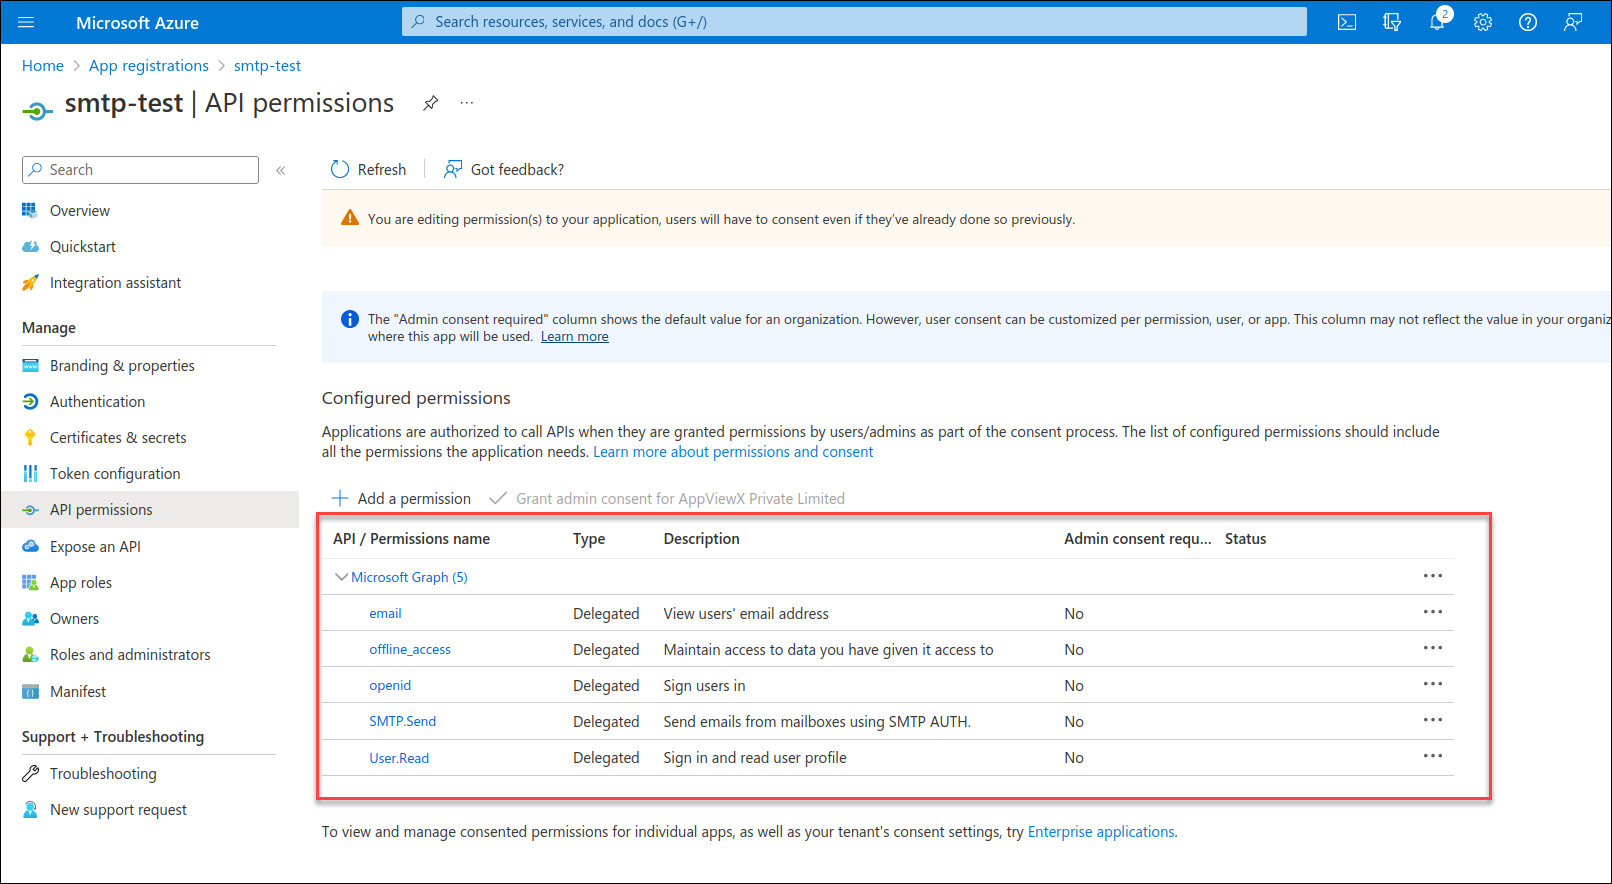
Click Add permissions.
For Communication type = SMTP, the API permissions added will be displayed below API / Permissions name and will be of Type = Delegated.
 For Communication type = API, the API permissions added will be displayed below API / Permissions name and will be of Type = Application.
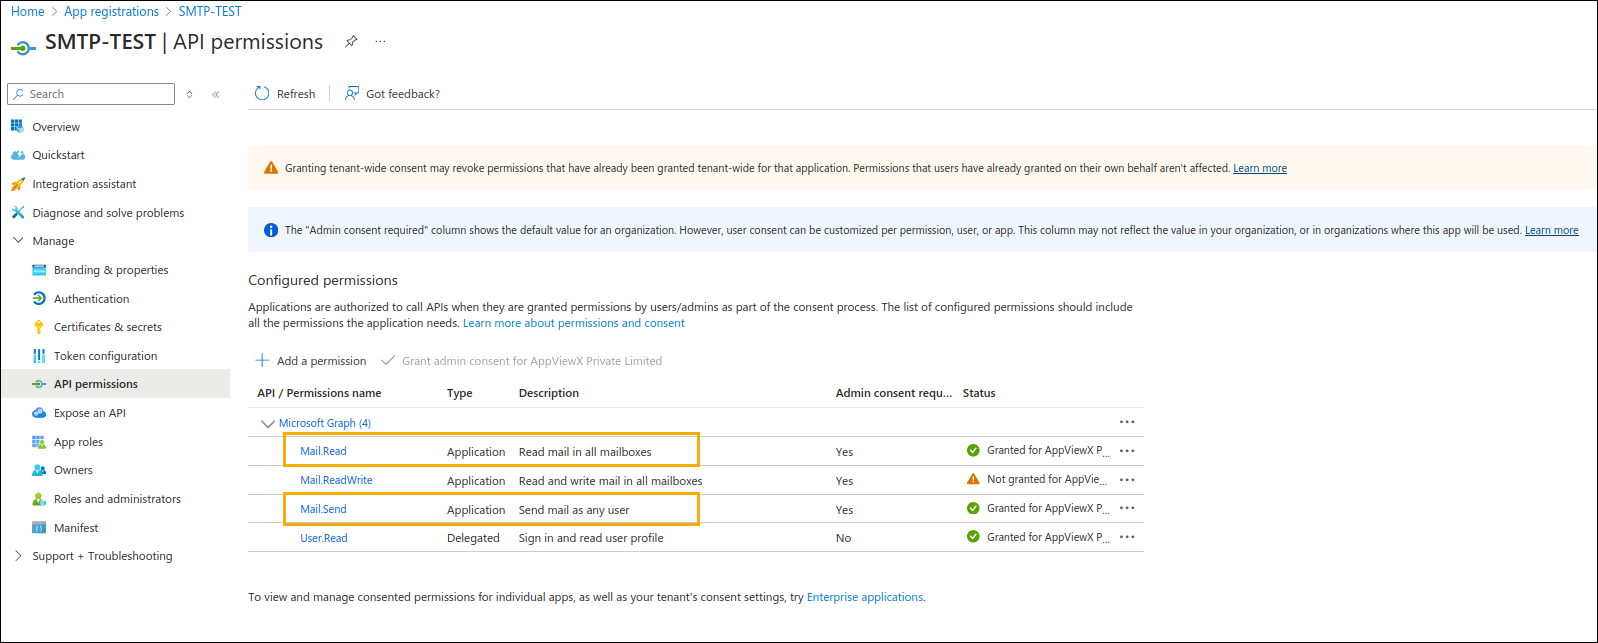
Frequently Asked Questions
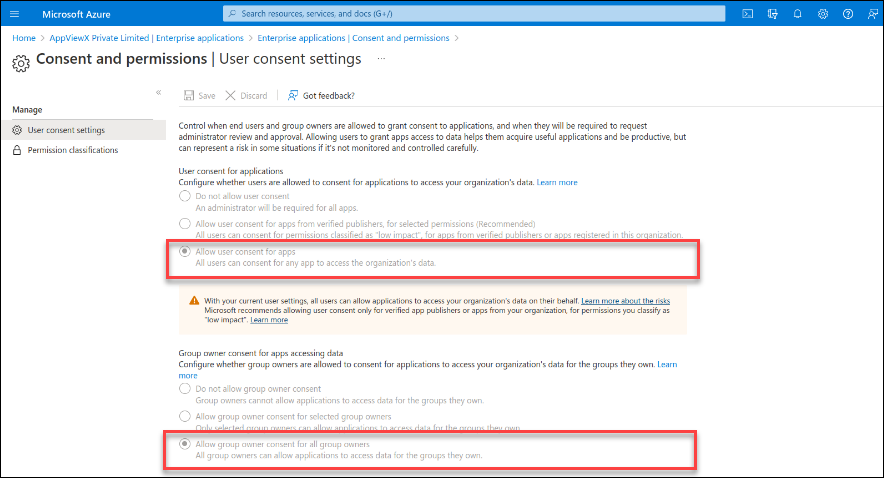
While adding API permissions Owner Consent Error is shown, to avoid this error following changes have to be done.
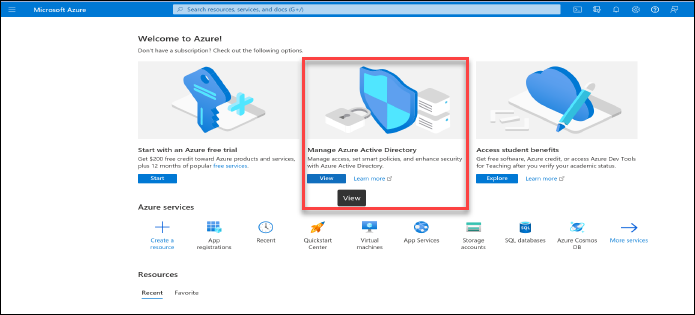
- Sign in to Microsoft using valid credentials for App Registration using the following URL: https://portal.azure.com/.
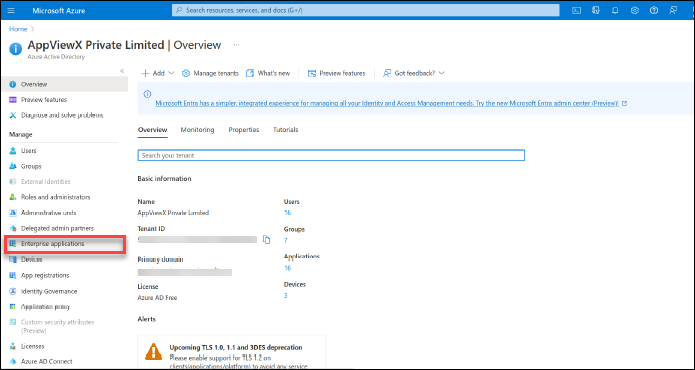
- Click Manage Azure Active Directory.
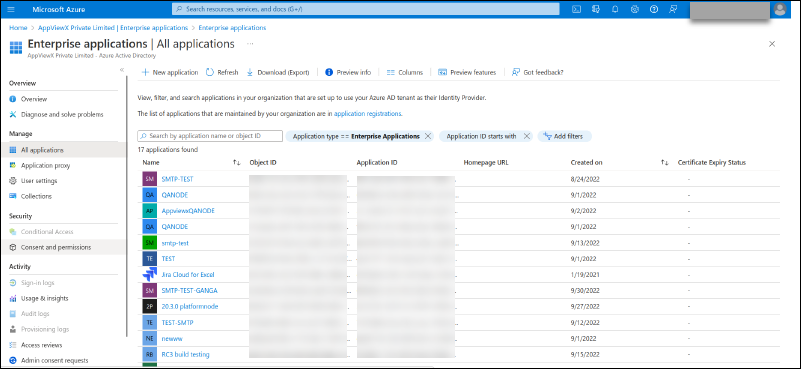
- Click Enterprise applications in the left menu.
- Click Consent and permissions in the left menu.
- Change the User Consent Settings for user consent for applications from Do not allow user consent to Allow user consent for apps.
- Change the User Consent Settings for group owner consent for apps
accessing data from Do not allow group owner consent to Allow
group owner consent for all group owners.