Authentication
Configure the Role-Based Access Control for LDAP
-
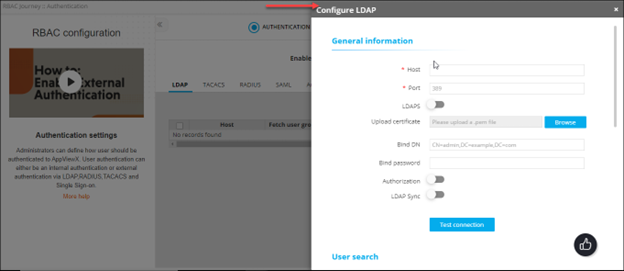
On the RBAC Journey :: Authentication page, click Configure
LDAP.
The Configure LDAP action pane is displayed.
-
In the General Information section, enter the following details
(sample values are shown in the image).
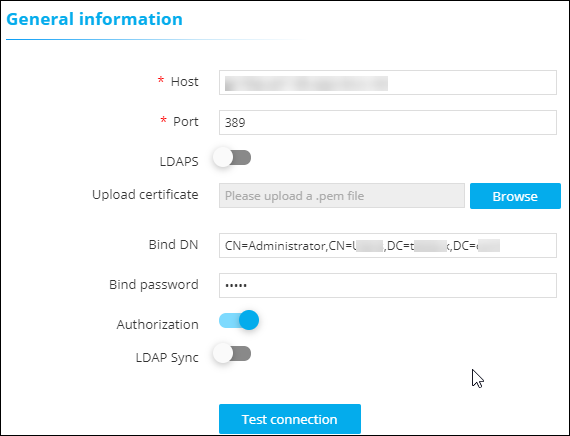
Table 1. Field descriptions for General Information Field Description *Host Host name (domain name) of the LDAP server. *Port Port number of the LDAP server. This value is entered based on the port number used in your deployment. By default, port number 389 is used for a LDAP configuration and port number 636 is used for a LDAPS configuration.
3269 for LDAPS, #268 FOR ldap
LDAPS The LDAPS protocol is used for secure communication between AppViewX and Active Directory/Open LDAP. To enable use of the LDAPS protocol authentication, instead of the LDAP protocol, turn on this toggle.
Upload certificate This field is enabled only when the LDAPS is enabled. To upload a LDAP server certificate:
- Click Browse .
- Navigate to the location of the
.pem certificate file.
If the LDAP servers are load balanced with VIP, upload the root certificate of the LDAP server instead of the server certificate.
- Select the certificate to be uploaded and click Open.
Note: Only a single certificate can be uploaded for each server.Bind DN Username of the base authentication endpoint that will be used to connect to LDAP. Bind Password The password of the base authentication endpoint that will be used to connect to LDAP. Authorization To check user permissions at the time of authentication, select this check box. In addition to authentication, AppViewX also lets you perform user authorization against the LDAP server. To enable authorization along with authentication, select this check box. Note: If Authorization is not enabled, AppViewX will only carry out LDAP authentication for the given user.LDAP Sync To enable the use of the SSH module in AppViewX for SSH key discovery use case, turn on this toggle. *: Mandatory fields -
After entering the above connection details, to test if the host is
reachable and the port is valid for establishing an LDAP/LDAPS connection,
click Test Connection.
Note: You can test the connection of LDAPS only when you save all of the configuration details. Bind DN and Bind password details cannot be validated through a test connection.
-
The User Search section collects information to validate a user’s
presence in the Active Directory. In the User Search section, enter
the following details(sample values are shown in the image).
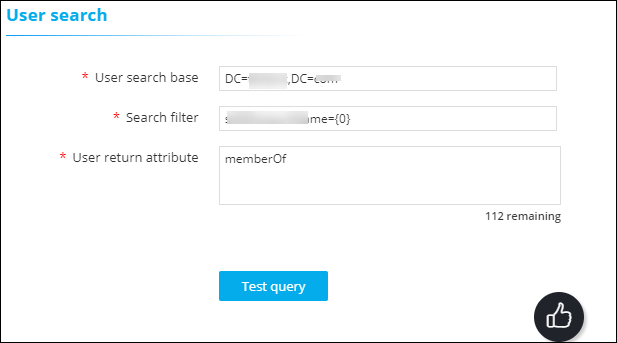
Table 2. Field descriptions for User search Field Description *User search base Base directory where the user is present. *Search filter Criteria for searching for the user from the search base. *User return attribute User information to be retrieved from the search base. Note:- This field is enabled only when the Authorization toggle (in the General Information section) is turned on.
- You can specify only User return attribute.
*: Mandatory fields - After entering the above details, to test if the user is present in the Active Directory, click Test query.
-
In the User search result action pane, enter the
Test username and click
Test.
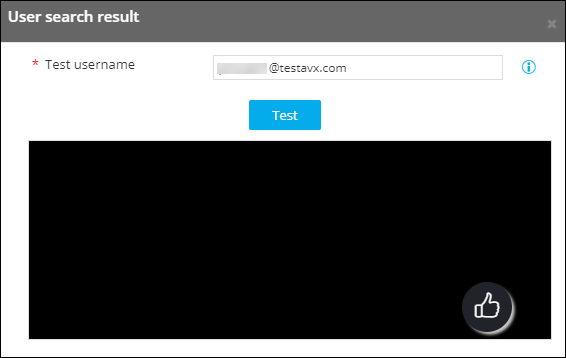 Note: You are allowed to check the query response for User search and Group search only when the connection is valid.
 -
To test which user group the user belongs to, in the Group search
section, enter the following details:
Note: This section is enabled only when the Authorization toggle (in the General Information section) is turned on.
Table 3. Field descriptions for Group search Field Description Group search base Base directory where the user group is present. Search filter Criteria to search the user group from the search base. Group return attribute User group information to be retrieved from the search base. Note:- You are allowed to check the query response for User search and Group search only when the connection is valid.
- Group search can be performed only if the customer’s LDAP is of type Open LDAP. Microsoft Active Directory does not need group search configuration. For Open LDAP, group search needs to be configured mandatorily. The User return attribute in the User search section does not return the group membership details.
- In the case of multiple LDAP servers, to define/update the order in which the servers will be authenticated, drag and drop the entries in this table.
Deleting a LDAP Configuration
- On the RBAC Journey :: Authentication page, from the table of LDAP configurations, to delete a LDAP configuration, select the check box corresponding to that entry.
-
From the More actions drop-down menu, click
Delete.
-
In the Confirmation dialog box, click Delete.
The selected configuration is deleted.
Configuring Role-Based Access Control for TACACS
-
On the RBAC Journey :: Authentication page, click the
TACACS tab and click Configure
TACACS.
 The Configure TACACS action pane is displayed.
 -
Enter the field information as shown in the table below:
Table 4. Field descriptions for TACACS Test connection Field Description *Server name Name of the TACACS server. *IP address IP address of the TACACS server. *Port Port number of the TACACS server *: Mandatory fields - To test the connectivity between AppViewX and the IP address mentioned above, click Test connection.
-
Enter the field information as shown in the table below::
Table 5. Field descriptions for TACACS Field Description *Secret key A unique key for authentication between the AppViewX server and the TACACS server. *Service Name of the service used by the user requested to be authorized. Specifying the service name is mandatory because it enables the TACACS+ server to behave according to the type of each authorization request.
Commonly, the Point-to-Point Protocol (PPP) is used for authorization checks.
*Protocol The protocol associated with the value specified in Service Name, which is a subset of the associated service being used for client authorization or system accounting Commonly, the Internet Protocol (IP) is used as the modifier with PPP to indicate the protocol layer for authorization check.
*Authorization Attribute Name Attribute that will be returned from the TACACS server to authenticate and authorize the connection between the AppViewX server and the TACACS server. *: Mandatory fields -
To save the TACACS authentication settings, click Add and to
reconfigure the settings, click Reset.
The TACACS authentication settings thus configured are saved and displayed in the table.Note: In the case of multiple TACACS servers, to define/update the order in which the servers will be authenticated, drag and drop the entries in this table.
Enabling a TACACS Configuration
- On the RBAC Journey :: Authentication page, click the TACACS tab.
- From the table of TACACS configurations, for the configuration you want to enable, select the check box corresponding to that entry.
-
From the More actions drop-down menu, click
Enable.
-
In the Confirmation message dialog box, click Proceed.
The selected configuration is enabled.
Disabling a TACACS Configuration
- On the RBAC Journey :: Authentication page, click the TACACS tab.
- From the table of TACACS configurations, for the configuration you want to disable, select the check box corresponding to that entry.
-
From the More actions drop-down menu, click
Disable.
-
In the Confirmation message dialog box, click Proceed.
The selected configuration is disabled.
Deleting a TACACS Configuration
- On the RBAC Journey :: Authentication page, click the TACACS tab.
- From the table of TACACS configurations, for the configuration you want to delete, select the check box corresponding to that entry.
-
From the More actions drop-down menu, click
Delete.
-
In the Confirmation message dialog box, click Proceed.
The selected configuration is deleted.
Configuring Role-Based Access Control for RADIUS
-
On the RBAC Journey :: Authentication page, click the
RADIUS tab and click Configure
RADIUS.
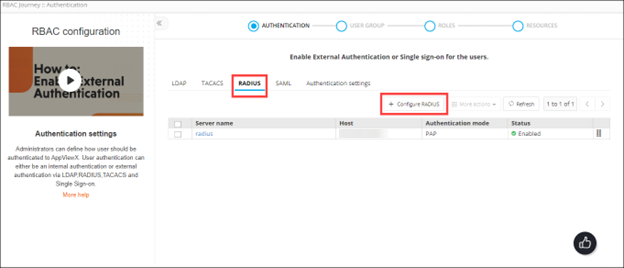 The Configure RADIUS action is displayed.
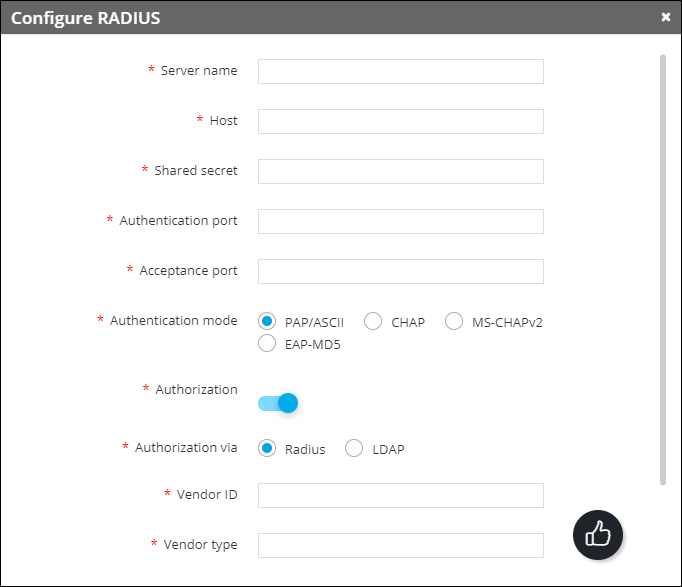
Table 6. Field descriptions for RADIUS Field Description *Server Name Name of the RADIUS server. *Host The IP address of the RADIUS server. *Shared secret A unique key for authentication between the AppViewX server and the RADIUS server. *Authentication port Port number that AppViewX will use for authentication. The default authentication port number is 1812. Please check with your sysadmin if your organization uses a different port number.
*Acceptance port Port number that AppViewX will use to accept a response from the RADIUS server. The default acceptance port number is 1813. Please check with your sysadmin if your organization uses a different port number.
*Authentication mode Select one of the following authentication modes: - PAP/ASCII
- CHAP
- MS-CHAPv2
- EAP-MD5.
Note: Ensure that the selected authentication mode is also confirmed in the RADIUS server settings.Authorization via Select from one of the following authorization modes: - RADIUS
- LDAP.
This field is enabled only when the Authorization toggle is turned on.
*Vendor ID Enter the vendor ID. This field is enabled only when the Authorization toggle is turned on and authorization is done via the RADIUS server.Note: AppViewX does not have a unique vendor ID. We use a free vendor ID: 500. Ensure that this is configured as part of the RADIUS server settings.*Vendor type Enter the vendor type. This field is enabled only when the Authorization toggle is turned on and authorization is done via the RADIUS server.Note: AppViewX does not have a unique vendor type. We use a free vendor ID: 200. Ensure that this is configured as part of the RADIUS server settings.*LDAP From the dropdown menu, select the LDAP server to be used for the authorization. This field is enabled only when the Authorization toggle is turned on and authorization is done via the LDAP server.
*: Mandatory fields -
To save the RADIUS authentication settings entered above, click Add
or to reconfigure the settings, click Reset.
The RADIUS authentication settings thus configured are saved and displayed in the table.Note: In the case of multiple RADIUS servers, to define/update the order in which the servers will be authenticated, drag and drop the entries in this table.
Enabling a RADIUS Configuration
- On the RBAC Journey :: Authentication page, click the RADIUS tab.
- From the table of RADIUS configurations, for the configuration you want to enable, select the check box corresponding to that entry.
-
From the More actions drop-down menu, click
Enable.
-
In the Confirmation message dialog box, click Proceed.
The selected configuration is enabled.
Disabling a RADIUS Configuration
- On the RBAC Journey :: Authentication page, click the RADIUS tab.
- From the table of RADIUS configurations, for the configuration you want to disable, select the check box corresponding to that entry.
-
From the More actions drop-down menu, click
Disable.
-
In the Confirmation message dialog box, click Proceed.
The selected configuration is disabled.
Deleting a RADIUS Configuration
- On the RBAC Journey :: Authentication page, click the RADIUS tab.
- From the table of RADIUS configurations, for the configuration you want to delete, select the check box corresponding to that entry.
-
From the More actions drop-down menu, click
Delete.
-
In the Confirmation message dialog box, click Proceed.
The selected configuration is deleted.
Configuring Single Sign On Settings with AppViewX
-
On the RBAC Journey :: Authentication page, click the
SAML tab.
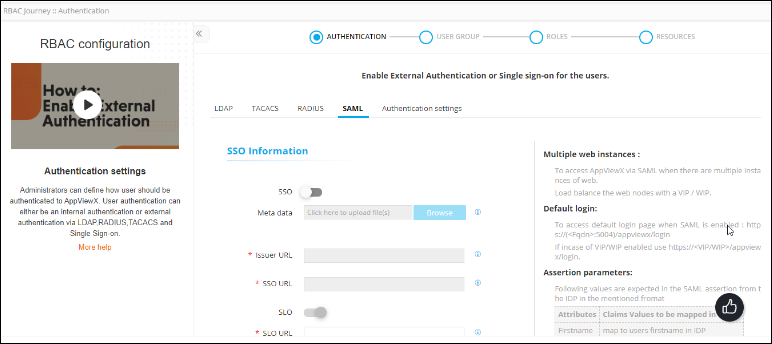
-
In the SSO Information section, enter the following
details:
Table 7. Field descriptions for SSO Information Field Description SSO To use SAML authentication for Single Sign On, turn on the SSO toggle. The Config Information section is displayed with the field information auto-populated as shown below: 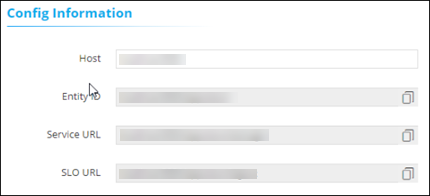
Metadata To import an identity provider (IdP): - Click Browse.
- Navigate to the location where the XML metadata file is stored.
- To upload the file, click Open.
Note: You can also copy and paste the metadata information from the XML file into the metadata contents text boxes in the Config Information section.*Issuer URL Entity ID of the IdP. This field is enabled only when the SSO toggle in the SSO Information section is turned on.
*SSO URL For AppViewX to send the authentication request, enter the URL of the protected endpoint provided by your IdP. This field is enabled only when the SSO toggle in the SSO Information section is turned on.
SLO To enable single log out, turn on the SLO toggle. This will log out the user from AppViewX and the IdP. *SLO URL URL of the IdP protocol endpoint. This field is enabled only when the SSO toggle in the SSO Information section is turned on.
Note: This field is mandatory only when the SLO toggle in the SAML details section is turned on.*Upload certificate To upload a certificate: - Click Browse Certificate.
- Navigate to the location of the .pem certificate file.
- Select the certificate file to be uploaded and click Open.The selected certificate is uploaded.
This field is enabled only when the SSO toggle in the SSO Information section is turned on.
Note: A certificate is to be uploaded only when the certificate of the IDP is not available as a part of the metadata.Local authorization To enable SAML only authentication in IdP and for authorization to be carried out in AppViewX, enable this toggle key. Note: Authorization can be done by assigning user groups manually to the user or enabling birthright role.*: Mandatory fields - To save the SAML authentication settings, click Save.
- To cancel the authentication settings, click Cancel.
Configuring Authentication Settings RBAC Quick Config
-
On the RBAC Journey :: Authentication page, click the
Authentication Settings tab.
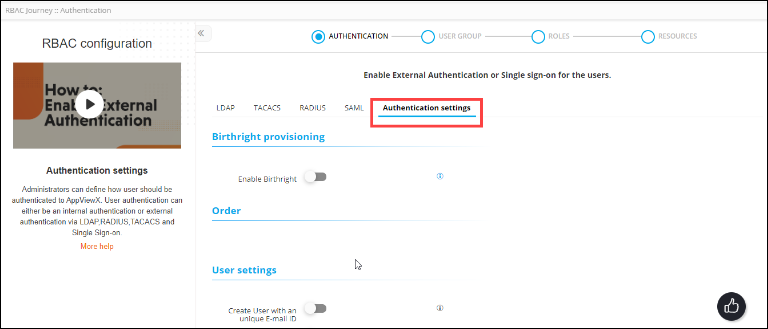
- To enable Birthright provisioning for new users who log into the system with a predefined set of permissions (associated with the user group), turn on the Enable Birthright toggle.
-
To define the order in which the authentication settings will be checked,
in the Order section, drag and drop the
authentication labels to the required corresponding levels.
If the level 1 check is set to Local and the level 2 check is set to LDAP, user credentials will be authenticated locally first and then on the LDAP server.Note: You can also disable, and then enable a level of authentication. To do this, click the green tick
 next to the server name.
 -
In the User settings section, enter the required
field information.
Table 8. Field descriptions for User settings Field Description Create User an unique E-mail ID To ensure that every AppViewX user has a unique email ID, turn on this toggle. Create User on Authorization Failure To create a user even if authorization fails (but the user is authenticated successfully), turn on this toggle. Session Timeout AppViewX lets you set a session timeout limit between 2 and 480 minutes. To set a web session timeout limit, enter the value in minutes. -
If the AppViewX node password has been changed, in the Node
Settings section, enter the updated Node Password.
Note: The value entered in the Node Password field should be the same as the node password. To apply the changes, restart the avx-config-server pod in every datacenter.
- Click Save.