Managing Roles
A set of permissions to execute specific tasks in the application is termed as Roles in AppViewX. Roles can be assigned only to a user group. Users within user groups will inherit role permissions assigned to that group. User groups can be assigned more than one role. A default set of roles is available within the application as per the industry standards.
Accessing the Role Page
| New Menu | Old Menu |
|---|---|
| In the Platform module, from the navigation pane on
the left, under IDENTITY, select Role. The Role page is displayed, with all the roles listed with their Name, Description, and Status. |
From the main navigation menu, select Account >
Role. The Role page is displayed, with all the roles listed with their Name, Description, and Status. |
| For more information on how to switch between menus, click here. | |
- Delegated admins can only view, assign, or modify roles created under their own delegated group.
- Roles from other delegated groups are completely hidden.
- Role assigned to delegated admin can be shown as read only (to view and understand the permissions)
Creating a Role
-
On the Role page, from the top right corner of the screen, click
 (Add) icon.
The Add page is displayed.
(Add) icon.
The Add page is displayed. -
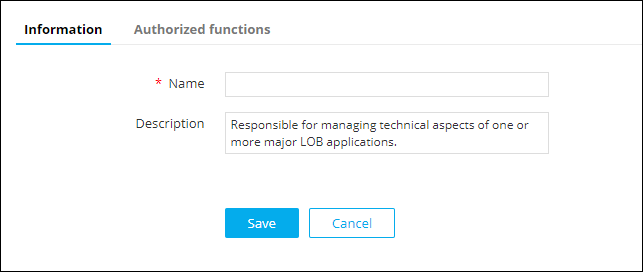
Under the Information tab, enter the following
details:
Table 1. Field descriptions for Information Field Description *Name Name of the role. Description Role/features/functionalities associated with the role. *: Mandatory fields - Click Save.
- In the Authorized functions section, select the checkbox beside the functionalities that you want to associate with the role.
-
To assign functions at a granular level, click the
 icon for the functions' check box and then
select individual sub-options within the functions.
icon for the functions' check box and then
select individual sub-options within the functions.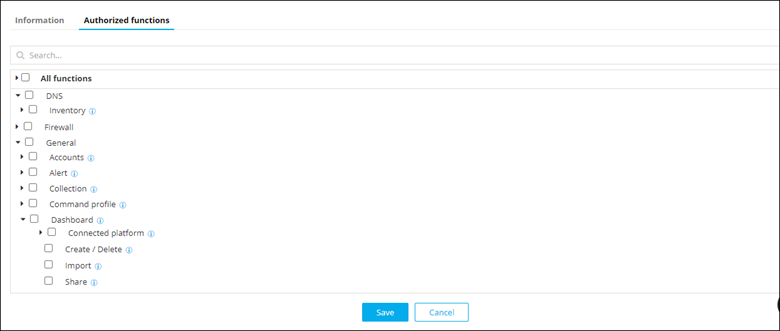
-
Click Save.
Details of the new role are displayed in the list on the Role page.
Cloning a Role
To clone a role:
- On the Role page, for the role you want to clone, select the corresponding check box.
-
From the top right corner of the screen, click
 (Clone) icon.
-
In the Information section, enter a new
Name for the role.
-
Click Save.
The selected role is cloned.
Modifying a Role
-
On the Role page, from the top right corner of the screen, click
 (Modify) icon.
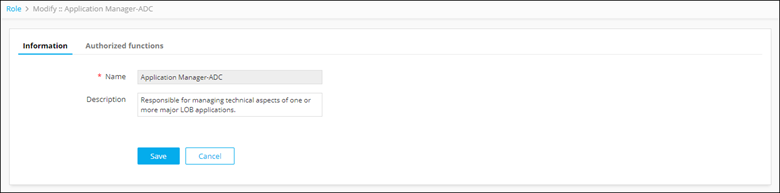
- The Modify :: Application Manager-ADC page is displayed (because we selected the Application Manager role).
-
Modify the details in the Information and
Authorized functions as required.
-
Click Save.
The selected role is modified.
Enabling a Role
- On the Role page, for the role you want to enable, select the corresponding check box.
-
From the top right corner of the screen, click
 (Enable) icon.
-
In the Confirmation dialog box, click Yes.
The selected role is enabled.
Disabling a Role
- On the Role page, for the (enabled) role you want to disable, select the corresponding check box.
-
From the top right corner of the screen, click
 (Disable) icon.
-
In the Confirmation dialog box, click Yes.
The selected role is disabled.
Importing Roles
-
On the Role page, from the top right corner of the screen, click
 (Import) icon.
The Import page is displayed.
(Import) icon.
The Import page is displayed.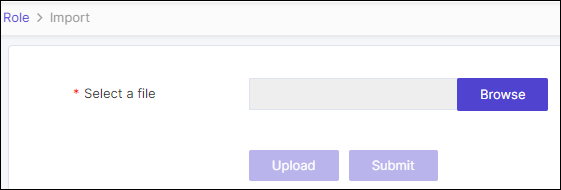
-
Click Browse.
Choose the .csv file for import.
-
Click Upload.
The imported file will be displayed in the list below.
-
Click Submit.
The Role page displays the details of the imported role in the list.
Exporting Roles
-
On the Role page, choose the roles that need to be exported, select
the corresponding check box.
Note: The export roles functionality allows exporting a maximum of ten roles at a time.
-
From the top right corner of the screen, click
 (Export) icon.
Selected roles will be exported in .csv format.
(Export) icon.
Selected roles will be exported in .csv format.
Deleting a Role
To delete a role:
- On the Role page, for the role you want to delete, select the corresponding check box.
-
From the top right corner of the screen, click
 (Delete) icon.
-
In the Confirmation dialog box, click Yes.
The selected role is deleted.