Onboarding Microsoft Azure Settings in AppViewX
Prerequisites for Onboarding Microsoft Azure Settings in AppViewX
- Depending on the service(s) selected for the Azure configuration, ensure
that the corresponding service instance is created in your Microsoft Azure
account.
For links to the complete Microsoft Azure documentation for the supported services, see the References section.
- If credentials for onboarding have to be fetched
from a credential list in CyberArk:
- Ensure that your Microsoft Azure access credentials are saved in your CyberArk account. For instructions on creating Azure access details in the CyberArk account , refer to the documentation here.
- Ensure that CyberArk is integrated with AppViewX and a credential list is created. For instructions, refer to the documentation here.
- For using the Managed Identity credential type,
ensure the following requirements are met:
- The AppViewX Cloud Connector (CC) is installed on the target Azure VM.
- A user-assigned or system-assigned Managed Identity is associated with the Azure VM.
- Strict routing is enabled for the corresponding data center to
ensure secure and consistent communication.
For links to the complete Microsoft Azure documentation on configuring managed identities for Azure VMs, see the References section.
Onboarding Microsoft Azure Settings in AppViewX
-
Go to
 (Menu) > CERT+ >
ADMINISTRATION > Device Management.
The Device :: ADC page is displayed.
(Menu) > CERT+ >
ADMINISTRATION > Device Management.
The Device :: ADC page is displayed. - From the Device :: ADC page, select Cloud.
-
On the Device :: Cloud page, click
 (Add).
The Device :: Cloud > Add page is displayed.
(Add).
The Device :: Cloud > Add page is displayed. - On the Device :: Cloud > Add page, from the list of Vendors, select Azure.
-
Enter/Select the Basic information.
Table 1. Field description for the Basic Information section Field Description Configure Government Cloud To configure Azure Government Cloud for this Microsoft Azure, turn on the Configure Government Cloud toggle. Azure Government Cloud is a specialized cloud computing platform provided by Microsoft, designed specifically for U.S. government agencies and their partners.
While it offers the same core services as the commercial Microsoft Azure cloud, it offers additional complaince, security, and regulatory controls configured to meet the stringent security requirements of its primary use cases.
*Country From the dropdown list, select the country for which the Azure Government Cloud is being configured. Important: In the current implementation, the Azure Government Cloud configuration is supported only for the United States, to serve the U.S. government agencies and their partners with data residency, operations, and complaince as per the U.S. regulations.*Account Type From the dropdown list, select one of the following values: - Single Subscription
- Multi Subscription
*Account Name Enter the customer’s unique account name. Constraints:
- A duplicate account name should not exist in the cloud inventory.
- The account name should include only alphanumeric and period (.) characters.
Description Enter a description of the device to be added. *Data center From the dropdown list, select the data center through which communication with the Certificate Authority will be established. Proxy required To use a proxy server for the communication, select this checkbox. Proxy settings configured in the Platform module will be used for communication. To read more on how proxy settings are configured and managed, click here.
*: Mandatory fields -
Enter/Select the Credential Details.
Table 2. Field description for the Credential Details section Field Description *Credential type From the dropdown list, from the following options, select the authentication method that will be used for integrating Microsoft Azure with AppViewX: - Manual Entry: The required credentials will be entered manually.
- Credential List - CyberArk: The required credentials will be retrieved from CyberArk, a Privileged Access Management (PAM) solution.
- Managed Identity
 : [Read the Managed
Identity prerequisites given above.] An
Azure-assigned Managed Identity is used for Azure
Active Directory (Azure AD) authentication,
fetching tokens automatically without storing
credentials in AppViewX.
: [Read the Managed
Identity prerequisites given above.] An
Azure-assigned Managed Identity is used for Azure
Active Directory (Azure AD) authentication,
fetching tokens automatically without storing
credentials in AppViewX. Managed Identity is an Azure-generated identity that allows resources to authenticate to Azure AD-protected services without storing credentials.
At this time, the Managed Identity credential is not supported for an Azure Government Cloud environment.
- Certificate Authentication: To use a
X.509 certificate for authentication (instead of a
client secret or password), from the dropdown
list, select Certificate
Authentication.
From the certificate and key file uploaded in the Certificate and Key field, a JWT token is generated . The Json Web Token is a digitally signed token containing the details needed to authenticate and authorize a user or application. Certificate authentication using a JWT token is strongly recommended owing to stronger security, low risk of leakage, and better certificate expiry management due to long lived certificates.
*Tenant ID Enter the unique identifier (GUID) of your Azure Active Directory Tenant. Managed Identity Type This field is displayed only when Credential type = Managed Identity. From the dropdown list, from the following options, select how Managed Identity is provisioned and managed for the resource to be onboarded:- User Managed: Use when you need a standalone identity that can be assigned to one or more Azure resources and managed independently.
- System Managed: Use when you want Azure to automatically create and manage an identity that is tied to a single resource’s lifecycle.
*Client ID Enter your Azure client ID (application ID). For Credential type = Managed Identity, this field is displayed only when Managed Identity Type = User Managed. In this case, enter the Client ID of the user-assigned managed identity linked to your Azure resource.
*Client secret Enter your Azure client secret key. *Credential name This field is displayed only when Credential type = Credential List - CyberArk. From the dropdown list, select the CyberArk account with the Microsoft Azure credentials that will be used for onboarding the Azure account in AppViewX.
The options listed in this dropdown list are the existing CyberArk accounts integrated with AppViewX. For instructions on integrating CyberArk with AppViewX, click here.*Certificate and Key This field is displayed only when Credential type = Certificate Authentication. To upload the certificate file that will be used for generating the JWT token:- Click Upload.
- Navigate to the location of the certificate file.
- Select the file for upload and click Open.
- In the Authentication Details dialog box, in the *Enter Password field, enter the certificate key.
- Click Ok.
*: Mandatory fields -
To validate the credential details entered above, click Validate
Credential.
Note: The option to Validate Credential is displayed only for a multi subscription account type.Access to the Discover Resources section is enabled only after the credentials have been validated.
-
Enter/Select the details needed to Discover Resources.
Table 3. Field description for the Discover Resources section Field Description *Services From the following options in the dropdown list, select the service(s) that will be mapped to this setting (for an overview of each supported service, see Azure Subscriptions and Services Supported by AppViewX): - Api Management
- App RegistrationNote: Currently, this service is not supported for multi subscription accounts.
- App Service
- Application Gateway
- Enterprise Application
[For instructions on managing Enterprise Application certificates, click here.]
Note: Currently, this service is not supported for multi subscription accounts. - Front Door
- Key Vault
- Virtual Machines
Starting v2024.1.0.0, Linux-based as well as Windows-based VMs can be discovered.
For instructions on managing the Linux-based/Windows-based server devices onboarded as VMs, click here.
*Subscription ID Note: This field is displayed only when Account Type = Single Subscription.This is an optional field for the following Azure servcies:- App Registration
- Enterprise Application
Subscription Onboarding State Subscription onboarding refers to integrating an Azure subscription with AppViewX. You can choose to onboard all subscriptions at once or onboard only selected ones. From the following options, select a state for onboarding subscriptions discovered from the Azure organization:- Managed: Enables subscription onboarding, allowing Azure cloud resource and certificate discovery instantly
- Unmanaged: Disables
subscription onboarding, preventing resource and
certificate discovery for these projects.
After you have fetched all subscriptions belonging to these projects, you can select individual subscriptions for onboarding, as explained here.
Auto Sync To enable/disable automatic synchronization of the AppViewX inventory with your Azure cloud infrastructure , use the Auto Sync key.
On enabling auto sync, the Schedule Based checkbox is displayed
Schedule Based To specify a schedule for the auto sync: - Click the
 icon.
icon.The Schedule Based Sync window is displayed.
- In the General Information section, enter the details of the sync schedule.
*: Mandatory fields Table 4. Field descriptions for the General Information section Field Description *Frequency of Sync Set the sync frequency using the two dropdown lists for this field. For example, to set the frequency to 1 day: - From the first dropdown list, select 1.
- From the second dropdown list, select Days.
Advance Settings To set the sync frequency for a specific service: - Enable the Advance Settings key.
The Auto Sync Services section is displayed. The services selected for this setting (in the Services field under Discover Resources) are listed in this section.
- To set the frequency for a specific service(s),
select the corresponding checkbox.
The Service Specific Parameters section is displayed with the Frequency of Sync field displayed for each selected service.
- Enter the details of the sync schedule and click
Apply.
The sync frequency is applied to the selected services.
Note: If a service is not selected, the Frequency of Sync set in the General Information section is applied to all services in a setting.
-
For a multi subscription account, after specifying the details for resource
discovery, click Fetch Subscriptions.
- From the subscriptions table, select the checkbox corresponding to the subscription(s) you want to manage.
- From the Actions dropdown menu, select Manage.
-
In the Additional attributes section for the selected services,
select the user permission for Cert sync from the following
options:
- Click Save.
- Return to the Device :: Cloud page.
-
From the table of added devices displayed on the Device :: Cloud
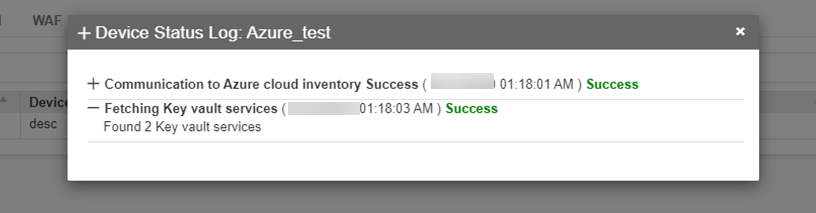
page, from the Status column, click Check.
The status of the added device is displayed.
-
To view the certificates, go to (Menu)
> CERT+ > CERTIFICATE INVENTORY and select the required
certificate type.
Managing Enterprise Application Certificates
- Renewed
- Made active
Renewing an Enterprise Application Self-Signed Certificate
-
Go to (Menu) > CERT+ >
CERTIFICATE INVENTORY > Server.
The Server Certificate page is displayed.
-
Select the Enterprise Application Self-Signed Certificate that you want
to renew.
The holistic view for the selected certificate is displayed.
-
From the
 (More) menu for the
certificate, click Renew.
(More) menu for the
certificate, click Renew.
-
In the Renew dialog box:
- Enter the new Validity for the renewed certificate.
- To make the certificate active, select the Make Certificate Active checkbox.
-
Click Renew.
A request ID, which is the work order ID, is generated automatically, and work order status is displayed adjacent to the certificate in the holistic view. If the approval required option is enabled in the CA policy, the request is moved to the Approve and Implementation stages.
-
In the holistic view, click Approve to proceed.
The Approve dialog box is displayed.
-
Enter your comments in the text field.
Note: If the workflow request has to be approved automatically in the future, click the Schedule later button .
-
Click Yes.
Once the approval process is complete, the Implement option is displayed in the holistic view.
-
Click Implement.
The Implement dialog box is displayed.
-
Enter your comments in the text field.
If the workflow request has to be implemented automatically in the future, click Schedule later .
-
Click Yes.
The renewal process is triggered. After renewal is completed:
- Workflow status is updated to Completed.
- A notification email is sent.
-
To see if the certificate has been made active (if you selected the
checkbox), hover over the application connector for the
certificate.
If the certificate is active, the Is Active field in the tooltip text is set to Yes.
Making an Enterprise Application Self-Signed Certificate Active
- By selecting the Make Certificate Active checkbox
from the Renew dialog box for the self-signed certificate
The instructions for this are given here.
- By selecting the Make Certificate Active option
from the More menu in the holistic view
The instructions for this are given below.
-
Go to (Menu) > CERT+ >
CERTIFICATE INVENTORY > Server.
The Server Certificate page is displayed.
-
Select the Enterprise Application Self-Signed Certificate that you want
to make active.
The holistic view for the selected certificate is displayed.
-
From the (More) menu for the
certificate, click Make Certificate Active.
-
To see if the certificate has been made active, hover over the
application connector for the certificate.
If the certificate is active, the Is Active field in the tooltip text is set to Yes.
Managing Server Devices Onboarded as Azure Virtual Machines
To access the server device inventory, Go to ![]() (Menu) >
CERT+ > ADMINISTRATION >
Device Management and open the
Server tab.
(Menu) >
CERT+ > ADMINISTRATION >
Device Management and open the
Server tab.
To do this:
- Go to the server device inventory.
-
On the Device :: Server page, click the device Name to modify
the device details.
You will be redirected to the Device details page.
-
In the Credentials section, update the device credentials.
For field descriptions and other details, refer from the following links:
References
- Create an Azure Key Vault using the Azure Portal.
- Create an Azure Application Gateway using the Azure Portal.
- Create a Linux Virtual Machine using the Azure Portal.
- Create a Windows Virtual Machine using the Azure Portal.
- Getting Started with the Azure App Service.
- Add an Enterprise Application.
- Create a new Azure API Management Instance by using the Azure Portal.
- Create an Azure Front Door Profile using the Azure Portal.
- Configure managed identities on Azure virtual machines.