
Microsoft Entra ID
The Microsoft Entra ID integration connects Agent Identity Security to your Entra ID tenant to discover users, authenticate through an identity provider, and exchange security events via the Shared Signals Framework (SSF).
Microsoft Entra ID is the most versatile integration template it supports Identity Provider, SSF Receiver, and SSF Transmitter capabilities in a single instance. Agent Identity Security authenticates using an Azure AD app registration.
Prerequisites
- Client ID: Also known as the Application ID. Found on the app registration overview page in the Microsoft Entra admin center.
- Client Secret: The secret key used for authentication. Generated under Certificates & secrets in your app registration.
- Tenant ID: Your Entra ID tenant identifier (Directory ID). Found on the app registration overview page.
Complete the app registration steps in the next section before configuring the integration in Agent Identity Security.
Application Registration
-
Sign in to the Microsoft Entra admin center.
Use an account with permissions to register applications in your tenant.
-
Verify that you are working in the correct tenant.
Check the tenant name displayed in the upper-right corner of the admin center. Switch tenants if needed before proceeding.
-
Select + New registration and configure the following
settings:
Table 1. App registration settings Setting Value Name Enter a descriptive name that identifies this registration. For example: Agent-Identity-Security-Entra-IntegrationSupported account types Select Accounts in this organizational directory only. - Select Register to create the application.
-
On the application overview page, copy and save the Application (client)
ID and Directory (tenant) ID.
You'll need both values when you configure the integration in Agent Identity Security.
-
Create a client secret.
- In the left navigation, select Certificates & secrets.
- Under Client secrets, select + New client secret.
- Enter a description and select an appropriate expiration period.
- Select Add and immediately copy the secret value.
Important: The client secret value is displayed only once. Copy and store it securely before navigating away from this page. You cannot retrieve it later. -
Grant the required API permissions.
- In the left navigation, select API permissions.
-
Select Add a permission.
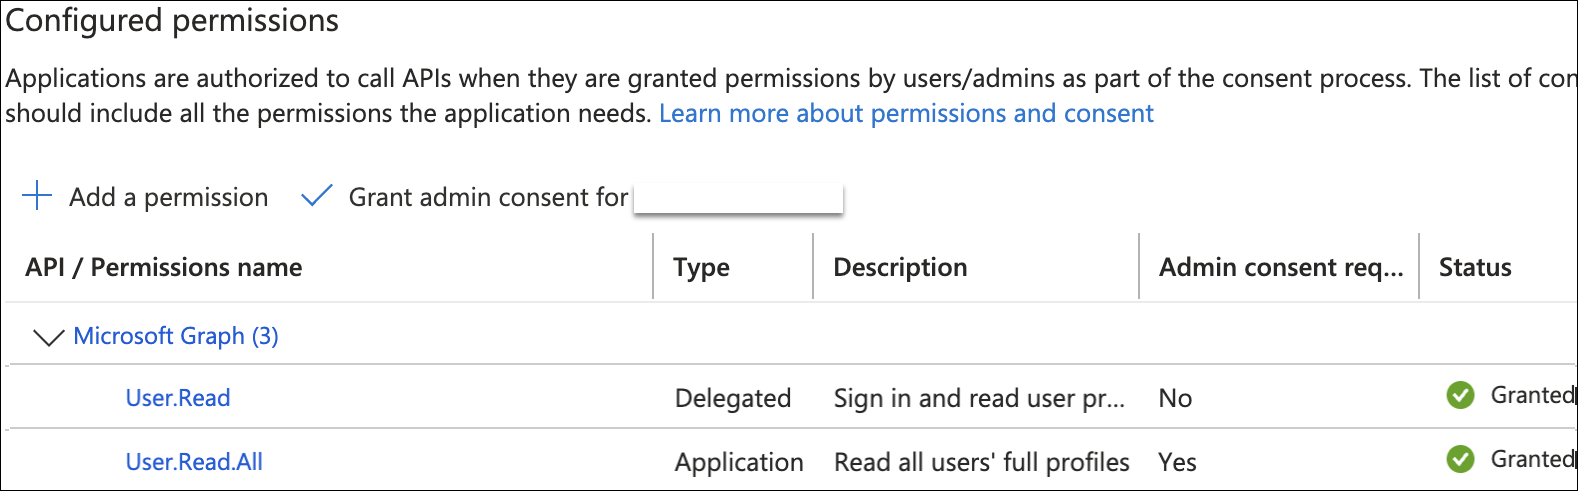
- Select Microsoft Graph, then select Application permissions.
- Under User, select User.Read.All.
- Select Add permissions.
- Select Grant admin consent for <your organization>.
- Select Yes on the confirmation dialog.
Admin consent is required because
User.Read.Allis an application permission. Only a Global Administrator or Privileged Role Administrator can grant admin consent.
Configure the Integration in Agent Identity Security
- In Agent Identity Security, go to Integrations and select Add Integration.
-
In the Integration Catalog, select Microsoft Entra ID.
The Microsoft Entra ID configuration screen opens.
-
Under Instance Details, enter the following:
Table 2. Instance details Field Description *Instance Name A unique name for this integration instance. Description Optional. A description to identify the purpose or environment covered by this instance. -
Under Credentials, enter the values you collected during app
registration:
Table 3. Credentials Field Description *Tenant ID The Azure Active Directory tenant GUID (Directory ID) for the Microsoft 365 tenant where agents operate. *Client ID The Application (client) ID of the Azure AD app registration created for Agent Identity Security. *Client Secret The client secret value from the Azure AD app registration. Stored encrypted; never displayed after saving. * Mandatory fields - Optional: Under SSF Receiver Streams, select Add Receiver Stream to configure receiving security events from Microsoft Entra ID.
- Optional: Under SSF Transmitter Streams, select Add Transmitter Stream to configure sending security events to Microsoft Entra ID.
-
Review the configuration summary and select Test
Configuration.
Agent Identity Security validates the credentials against your Entra ID tenant. A checkmark indicates a successful connection.
-
Select Create Instance.
The integration instance is created and the browser redirects to the Integrations list.
Go to Event Logs to verify that event flow is working as expected.
