Onboarding Cloudflare DNS
Prerequisites
Configure Permissions
| Resource | Permission | Access Level |
|---|---|---|
| Zone | DNS | Edit |
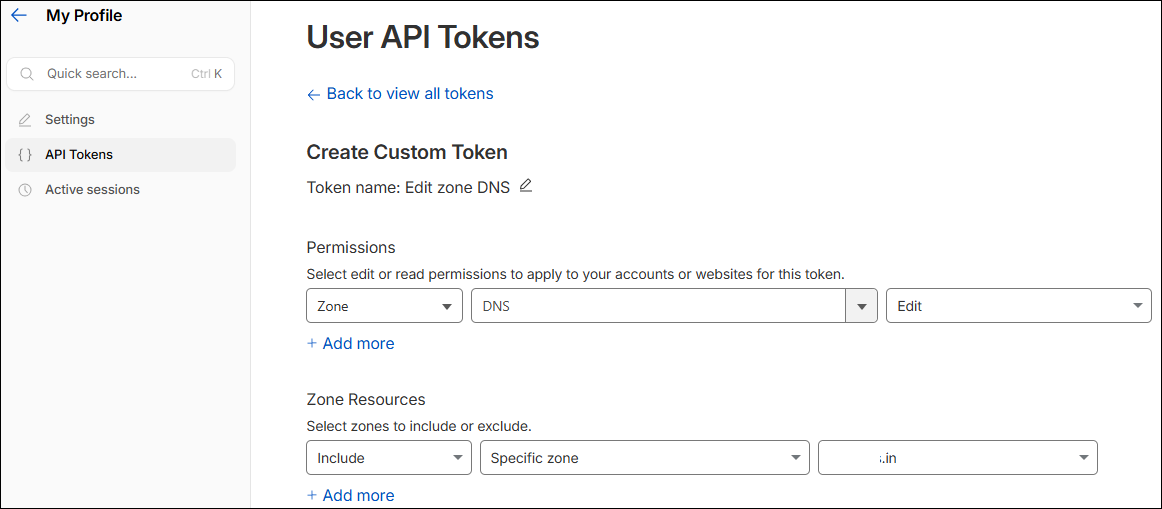 The DNS (Edit) permission enables
AppViewX to create TXT records for DCV, update existing DNS records, delete DNS
records, and read DNS zone details.
The DNS (Edit) permission enables
AppViewX to create TXT records for DCV, update existing DNS records, delete DNS
records, and read DNS zone details.Note: During DNS
automation, AppViewX retrieves the hosted zones list and validates the
existence of zones as a prerequisite before creating DNS
records.
Configure Zone Resources
- Set Include to Specific Zone.
-
Add the required domain(s) that AppViewX will manage.
Note: Restricting access to specific zones limits the token's scope to only the domains required for DCV, following the principle of least privilege.
Cloudflare Account ID
- Login to dash.cloudflare.com.
- Click on any domain.
- On the Overview page, scroll down to the API section on the right panel.
- Copy the Account ID listed alongside the Zone ID.
Configuring Cloudflare DNS
-
Go to
 (.
The Select vendor page is displayed.
(.
The Select vendor page is displayed.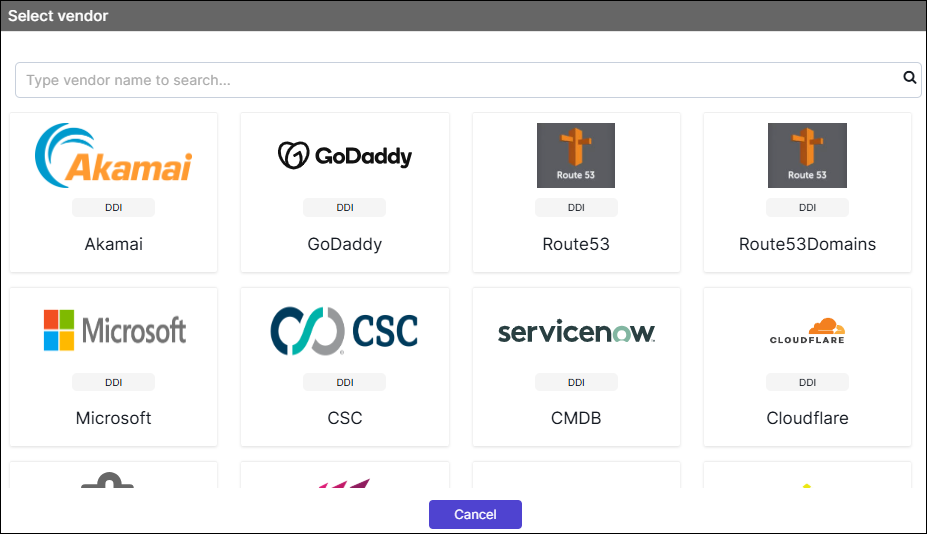
- On the Select Vendor page, click Cloudflare.
-
On the Vendor Configuration page, under the
General section, enter or select the required
field information.
The following table describes the various fields in this section:
Field Description *Name Enter a unique name to identify the vendor account which is being configured. Description Enter a description for the purpose of configuring this vendor, if required. Data center Select a data center from the options available in the dropdown list. *: Mandatory fields -
On the Vendor Configuration page, under the Credentials
section, enter or select the required field information.
The following table describes the various fields in this section:
Field Description Auth Type Displays the Bearer Token method of authentication selected by default. *URL Enter API URL for the vendor with the HTTPS/HTTP protocol. Note: The API URL is same as the Hostname URL.Example: https://api.cloudflare.com/*Token Enter the API token generated in Cloudflare for DNS integration. *Account ID Enter the Cloudflare account ID for API integration. *: Mandatory fields - Enable Use Proxy for the vendor.
- Enable Config sync for parsing the vendor.
- On the Vendor Configuration page, under the Configurations section, turn Off the Enable Advanced Config toggle.
-
Click Finish.
A "Vendor configuration saved successfully" confirmation message is displayed.
Validating the Vendor Configuration
- On the Integration Hub page, locate the configured vendor tile.
- Confirm that a green check mark (✔) appears on the tile this indicates the vendor is active and reachable.
-
Click the View status icon on the tile to open the Vendor Status
Log: (Vendor Name) dialog.
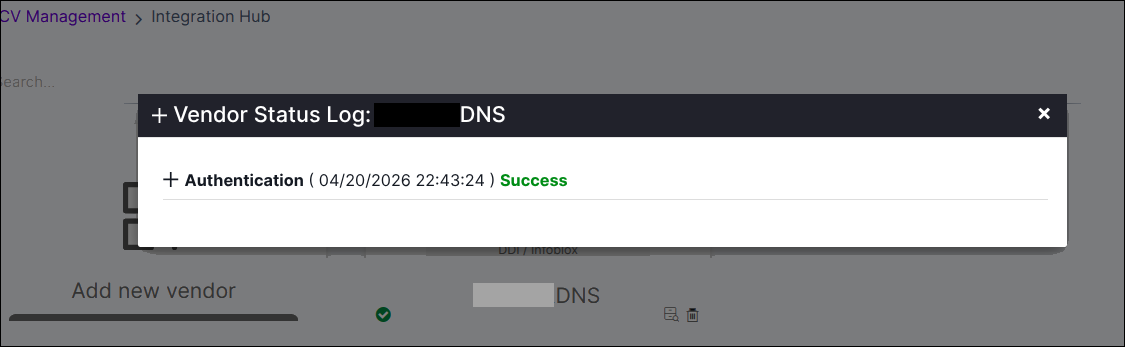
- Verify that the Authentication entry displays a Success status with a recent timestamp.