DCV Management Inventory and Actions
-
Go to
 (Menu) > CERT+ >
ADMINISTRATION > DCV
Management.
The DCV Management inventory is displayed.
(Menu) > CERT+ >
ADMINISTRATION > DCV
Management.
The DCV Management inventory is displayed.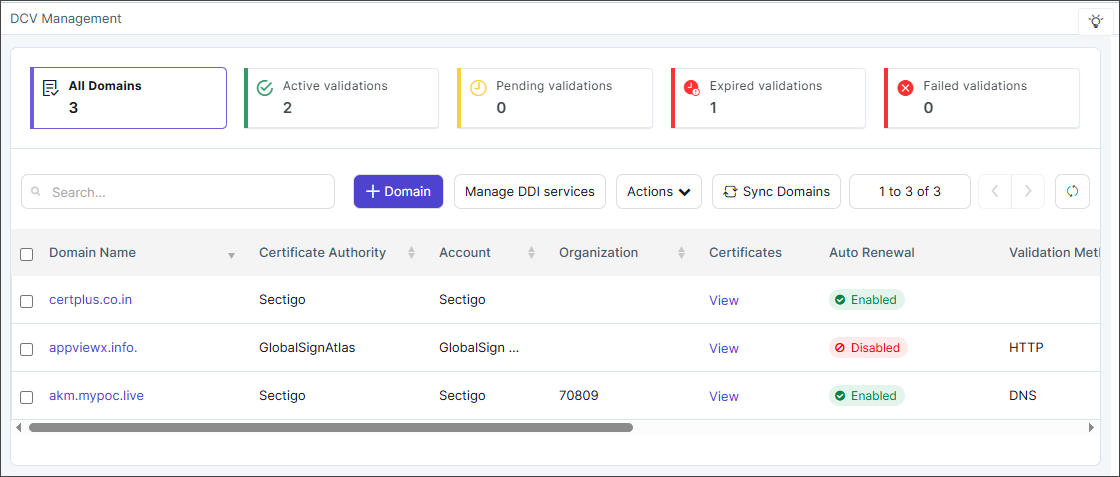
-
To filter the inventory by domain status or to view all domains, click the
applicable filter at the top of the page.
- All Domains
- Active Validations
- Pending Validations
- Expired Validations
- Failed Validations.
-
The following columns are displayed in the DCV management inventory.
Table 1. Column descriptions for the DCV Management page. Column Name Description Domain Name Displays the domain registered for Domain Control Validation (DCV). Certificate Authority Shows the CA responsible for issuing certificates for the domain. Account Indicates the CA account or profile associated with the domain. Organization Specifies the organization to which the domain belongs. Certificates Lists the certificates linked to the domain for validation and renewal. A View link is available in the column details. Clicking this link displays the DCV Management > Certificates page with certificate details as follows:
- Common Name
- Serial Number
- Group
- Discovery Source
- Associated Object
- Valid To (GMT)
- Status
- Certificate Authority
Auto Renewal Shows whether automatic domain revalidation and renewal are Enabled or Disabled. Validation Method Displays the method used for domain validation (e.g., DNS, HTTP). Request Info Provides details about the latest validation or renewal request. A request number link, R:XXX is available in the details, for example, R:123. Clicking this link displays the DCV Management > View Work Order Status, that contains the detailed workflow steps for any of the actions taken.
Renewal Schedule Indicates the configured schedule or frequency for domain revalidation. Expiration Date Shows the date when the current domain validation will expire. Validation Status Displays the current validation state of the domain—Active, Pending, and Expired. The status values are clickable and displays the validation flow in a pop-up window. Refer the note below.
Note: AppViewX introduces a pre-validation step to verify the availability of the DCV token before initiating the CA validation request. The system performs a global DNS or HTTP lookup to confirm that the DCV token is publicly accessible from external resolvers or endpoints. AppViewX proceeds with the CA DCV validation request only after this pre-validation succeeds. Internal DCV validation is performed using two methods:- HTTP-based validation, which uses a curl-based check
to verify the HTTP challenge response on the target
domain.
curl -s -L --max-time 10 <http url> - DNS-based validation, which uses the dig command to
confirm the presence of the required DNS challenge
records.
Where, <recordName> is DomainName and<Record Type> is TXT or CNAMEdig +short <recordName> <Record Type>
-
Use the following options to modify the inventory view:
Icons/Fields Actions Search field Type text related to the column information to display specific records 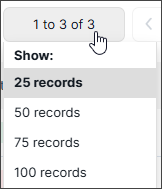 (Show
Records)
(Show
Records)Select the number of records to be displayed on the page.  (Page
Navigation)
(Page
Navigation)Move to the next or previous pages using the right and left arrow keys respectively.  (Refresh)
 Refreshes the page to display the latest information. - Click the +Domain button to add a new domain. Refer to the section Adding a New Domain for more details.
- Click the Manage DDI Services button to manage DDI devices. Refer to the section DDI Vendor Configuration.
- Click Actions dropdown to perform Renew, Set Auto Renewal and Delete operations on the domain.
- Click the Sync Domains button to retrieve and update all active domains available in the CA settings, ensuring that the DCV Management page reflects the latest domain information from the configured Certificate Authorities.
Renewal Action
- Automated renewal – Triggered a configured number of days before expiry, where AppViewX retrieves the challenge and completes the validation automatically (DNS-based).
- Manual renewal – Initiated by the user, who must complete the challenge (DNS or HTTP-based) to proceed with re-validation.
The AppViewX platform initiates the renewal workflow by requesting a new validation challenge from the Certificate Authority. The challenge is then fulfilled through the same mechanisms used during initial domain validation, such as DNS or HTTP based methods. Once the Certificate Authority confirms successful validation renewal, the AppViewX Platform updates the corresponding domain records and provides a notification to the user regarding the completed renewal process.
Failure handling:
- Failed automated renewals will fall back to manual re-validation
- If no action is taken on manual renewals, users continue to receive expiry alerts
-
Select the check box(es) next to a valid domain in the inventory.
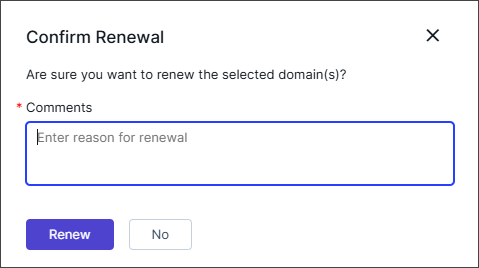
The Confirm Renewal pop-up is displayed.
- For single selection, the pop-up displayed is as shown below.
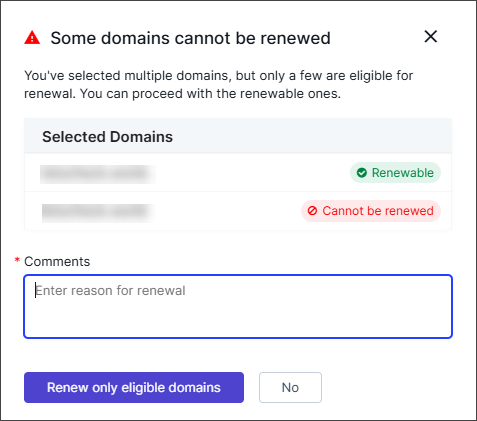
- For multiple selection, the pop-up displayed is as shown below. Only
the eligible domains will be set up for renewal.
- For single selection, the pop-up displayed is as shown below.
- In the Confirm Renewal pop-up's Comments field, enter the reason for renewal.
-
Click Renew or Renew only eligible domains.
The renew action is triggered successfully.Note: If the renewal workflow fails for any reason, the Validation Status column displays Pending along with a Validate link. In such scenarios, select the Validate link and Confirm the action in the Confirm Validation pop-up to initiate validation. The status is updated to either Active or Failed only after the validation process is successfully completed.
Auto Renewal Action
-
Select
the check box(es) next to a valid domain in the
inventory.
The Set auto renewal pop-up is displayed.
- In the Set auto renewal pop-up's Renew before expiry field, enter the number of days before domain expiry to trigger renewal.
-
Click Set.
The auto renewal action is scheduled.
Delete Action
In the case of bulk deletion, the platform processes consolidated results, logs an audit trail entry for every deleted domain, and provides the user with a summary notification that includes the total number of domains requested for deletion, the number of successful deletions, and details of any failures returned by the CA.
-
Select
the check box(es) next to a valid domain in the
inventory.
The Delete domain(s) pop-up is displayed.
- In the Delete domain(s) pop-up's Comments field, enter the reason for deletion.
-
Click Delete.
The domain(s) are deleted successfully.