Onboarding a Cross Account in AppViewX
You can onboard the following AWS account types to AppViewX: a standalone account (all resources are available in the same account) and a cross or federated account (resources are distributed across multiple accounts).
Prerequisites for Onboarding a AWS Cross Account in AppViewX
- Ensure that the following configurations are done on the AWS Management
Console:
- In your AWS master account:
- Create an IAM user in the AWS master account.
- Generate user identity.
- Attach policies to the created user.
For the AWS IAM permissions to be added for the master account, click here.
- In your AWS child account:
- Create a role in the child account in AWS.
- Attach policies to the created role.
For the AWS IAM permissions to be added for the child account, click here.
- Create an EC2 role. This will be used to manage the existing EC2 instance in the AppViewX device inventory.
- Attach policies to the EC2 role.
For the AWS IAM permissions for the EC2 policy, click here.
For the AWS IAM permissions for the EC2 role, click here.
- If account specific S3 buckets have been deployed for EC2
integration, ensure that the bucket names are suffixed with the
corresponding account number.
For instruction on creating an S3 bucket in your AWS account, see References.
Note: For detailed instructions, you can access the corresponding AWS documentation using the references given here. - In your AWS master account:
- If credentials for onboarding have to be fetched from a credential list in
CyberArk:
- Ensure that your AWS access credentials are saved in your CyberArk
account. For instructions on creating AWS access details in the
CyberArk account , refer to the documentation here.Important: For this use case, in the Account Parameters, the Password field must be considered a mandatory parameter. This field is used to specify the AWS access secret key information.
- Ensure that CyberArk is integrated with AppViewX and a credential list is created. For instructions, refer to the documentation here.
- Ensure that your AWS access credentials are saved in your CyberArk
account. For instructions on creating AWS access details in the
CyberArk account , refer to the documentation here.
Onboarding a Cross Account in AppViewX
- Organization-based: A centralized discovery mechanism that automatically finds and accesses resources across accounts in your AWS Organization using built-in trust and roles
- IAM Policy-based: A more flexible discovery mechanism that allows to connect to only the required accounts by manually configuring roles and permissions
Onboarding a Cross Account in AppViewX for Organization-based Discovery
-
Go to
 (Menu) > CERT+ >
ADMINISTRATION > Device Management.
The Device :: ADC page is displayed.
(Menu) > CERT+ >
ADMINISTRATION > Device Management.
The Device :: ADC page is displayed. - From the Device :: ADC page, select Cloud.
-
On to the Device :: Cloud page and click
 (Add).
The Device :: Cloud > Add page is displayed.
(Add).
The Device :: Cloud > Add page is displayed. - On the Device :: Cloud > Add page, from the list of Vendors, select AWS.
-
Enter/Select the Basic information.
Table 1. Field description for the Basic Information section Field Description *Account Type From the dropdown list, from the following options, select Cross or Federated. *Account name Enter your AWS account name. Constraints:
- A duplicate account name should not exist in the cloud inventory.
- The account name should include only alphanumeric and period (.) characters.
Description Enter a description of the device to be added. *Account number Enter your AWS account number. *Data center From the dropdown list, select the data center through which communication with the Certificate Authority will be established. Proxy required To use a proxy server for communication, select this checkbox. Proxy settings configured in the Platform module will be used for communication. To read more on how proxy settings are configured and managed, click here.
*: Mandatory fields -
Enter/Select the Credentials-related information.
Table 2. Field description for the Credentials section Field Description *Credential type From the dropdown list, from the following options, select the authentication method that will be used for integrating AWS with AppViewX: - Manual Entry: The required credentials will be entered manually.
- Credential List - CyberArk: The required credentials will be retrieved from CyberArk, a Privileged Access Management (PAM) solution.
- IAM ROLE ACCESS
 : An IAM role-based
approach is used for authentication instead of
direct access keys.Access is provided based on IAM roles. To enable this feature in your SaaS environment:
: An IAM role-based
approach is used for authentication instead of
direct access keys.Access is provided based on IAM roles. To enable this feature in your SaaS environment:- Create a role in one of your AWS accounts that trusts the AppViewX AWS account.
- From AppViewX, assume the role created in your account.
- Using the assumed role from the above step, assume the roles created in the respective child accounts to perform the required CLM actions.
*Access key This field is displayed when Credential type = Manual Entry. Enter the access key generated for your AWS account.
*Secret key This field is displayed when Credential type = Manual Entry. Enter the secret key generated for your AWS account.
Download Cloud Formation Template (CFT) For Credential type = IAM ROLE ACCESS, to download the CloudFormation template, click the Download Cloud Formation Template link that is displayed below the Credential Type dropdown list. 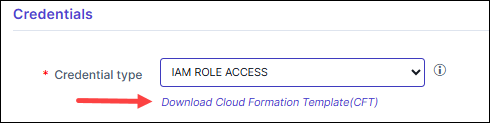 The downloaded CloudFormation template is pre-configured with the AppViewX AWS account details that need to be trusted. Ensure that you:
- Use the downloaded template to create a role in any of your AWS accounts.
- Provide a unique string as the External ID for the role you are creating.
*Master Account Role Enter the Amazon Resource Name (ARN) of the AWS IAM role created using the downloaded CloudFormation Template. The IAM role input for this field can be:- a simple name (as a alpha-numeric string)
- an identifier in a full path format (e.g.,
/service-prefix/role-name)
AWS allows roles to be created within paths to help manage large numbers of roles and delegate permissions. With path support, users can onboard resources where the IAM Role is nested.
*External Id Enter the unique identifier generated to establish a secure trust relationship between AWS and AppViewX. *Credential List This field is displayed when Credential type = Credential List - CyberArk. From the dropdown list, select the CyberArk account with the AWS credentials that will be used for onboarding the standalone account.
The options listed in this dropdown list are the existing CyberArk accounts integrated with AppViewX. For instructions on integrating CyberArk with AppViewX, click here.*: Mandatory fields -
Enter/Select the information required to Discover
Resources.
Table 3. Field description for the Discover Resources section Field Description Auto Discover Resources To discover all the cross or federated/child accounts for the master account details provided, enable this field. Advanced Settings To customize the auto discovery process, enable this field. Auto Discovery Mode* To onboard a cross account for organization-based discovery: - Select Organization Based
Discovery.
The Organization based Discovery dialog box is displayed.
- Enter/Select the details required to configure organization-based discovery.
Note: For the Auto Discovery Mode, you can select both options, Organization Based Discovery as well as Policy Based Discovery. For instructions on configuring Policy Based Discovery, click here.Service* From the Select the Service(s) dropdown list, select the services required for the CLM operations.
Tip: To select all services, select the Select all check box displayed at the beginning of the list of services.Note:- When ACM (Certificate Authority) is selected from the Service dropdown list, an additional set of fields is displayed under the section ACM Certificate Authority Serviceto configure the ACM services. These fields are explained in the table in Step 10.
- When Amazon Private CA is selected from the Service dropdown list, an additional set of fields is displayed under the section ACM Private CA. These fields are explained in the table in Step 11.
- When the EC2(EC2 Instance) service is selected, an additional set of fields is displayed to configure the EC2 services. These fields are explained in the EC2 Services table in Step 7.
Service Region* To select a service region:
- To fetch the service regions for the account
information provided, click Fetch
Region.
The retrieved service regions are populated in the Select the Region(s) dropdown list.
- From the Select the Region(s) dropdown list, select the required service region.
Cert Sync* Select from one of the following options:
- Managed: AppViewX will connect with the customer’s AWS account and discover certificates. These certificates will be added to the inventory. Users with the relevant permissions can then perform the required certificate-related actions.
- Monitored: AppViewX will connect with the customer’s AWS account and discover certificates. These certificates will be added to the inventory where the users will be allowed to only view the certificates.
- Ignored: AppViewX will connect with the customer’s AWS account but certificate discovery will be disabled.
Auto Sync To enable/disable automatic synchronization, use the Auto Sync key.
If Auto Sync is enabled, select the checkbox for the type of synchronization from the following options:
*: Mandatory fields - Select Organization Based
Discovery.
-
Enter/Select the required details in the ACM Certificate Authority
Service section.
Note: This section is displayed only when one or both ACM services are selected from the Services dropdown list.
Table 4. Field description for the ACM Certificate Authority Service Field Description Role Setting Preference* Note: This field is displayed only when both auto discovery modes (Organization Based Discovery and IAM Policy Based Discovery) are selected.From the dropdown list, select one of the following options:
- Organization Based Discovery
- IAM Policy Based Discovery
Route53 Zone Auto Approval To support DNS validation as an automatic process, enable this toggle. *: Mandatory fields -
Enter/Select the required details in the ACM Private CA
section.
Note: This section is displayed only when the ACM (Amazon Private CA) service is selected for a Cross or Federated account.
Table 5. Field description for the ACM Private CA section Field Description CA Operation Mode* From the following options, select one/both operation mode(s) for discovering all the certificates enrolled by the Private Certificate Authority: - ACM
- PCA
S3 Bucket* NOTE: This field is displayed only when the PCA operation mode is selected. -
Enter the S3 bucket name.
-
Click
 .
.The ARN Advanced Settings action pane is displayed.
-
In the ARN Advanced Settings action pane, enter the following details:
Field Description Role ARN* Amazon Resource Name of the role that the caller is assuming The IAM role input for this field can be:- a simple name (as a alpha-numeric string)
- an identifier in a full path format (e.g.,
/service-prefix/role-name)
AWS allows roles to be created within paths to help manage large numbers of roles and delegate permissions. With path support, users can onboard resources where the IAM Role is nested.
Role Session name Role Session name is an identifier for the assumed role session.
Use the Role Session name to uniquely identify a session when the same rule is assumed by different principals or for different reasons.Duration Seconds Enter the duration, in seconds, for which the credentials should remain valid.
Acceptable durations for IAM user sessions:
-
Minimum: 900 seconds (15 minutes)
-
Maximum: 129,600 seconds (36 hours)
External Id External Id is a unique identifier that might be required when you assume a role in another account. Source Identity The source identity is specified by the principal that is calling the AssumeRole operation. Session Tags Session Tags are key-value pairs that you pass when you assume an IAM role or federate a user in AWS STS.
To create a session tag:
-
In the Enter Key field, enter a key for the key-value pair.
-
In the Enter Value field, enter a value for the key-value pair.
-
Click Add.
The added key-value pair is shown in the table below the fields.
- Click Apply.
Discover Certificate To enable instant certificate discovery at the time of device addition, select this checkbox. *: Mandatory fields -
Enter/Select the required details in the EC2 Services
section.
Table 6. Field description for the EC2 Services section Field Description Communication mode By default, the SSM communication mode is selected. Certificate Discovery Mode By default, the File System Scanning certificate discovery mode is selected. *S3 Deployment Type From the dropdown list, from the following options, select the deployment type used for the S3 bucket that will be used for the EC2 integration: - Centralized: Select this if the S3 bucket that will be used for the EC2 integration is managed centrally across all accounts.
- Account Specific: Select this if each account manages individual S3 buckets.
*S3 Bucket Name Enter the name of the S3 bucket that will be used for EC2 integration. For account specific S3 buckets, enter the bucket name without the account number suffix. AppViewX will automatically append the account number based on the value entered here.
To configure the ARN advanced settings for the specified S3 bucket, follow the instructions given below:- Click .
The ARN Advanced Settings dialog box is displayed.
- In the ARN Advanced Settings dialog
box, enter the following details:
Field Description Role ARN* Amazon Resource Name of the role that the caller is assuming The IAM role input for this field can be:- a simple name (as a alpha-numeric string)
- an identifier in a full path format (e.g.,
/service-prefix/role-name)
AWS allows roles to be created within paths to help manage large numbers of roles and delegate permissions. With path support, users can onboard resources where the IAM Role is nested.
Role Session name* Role Session name is an identifier for the assumed role session. Use the Role Session name to uniquely identify a session when the same rule is assumed by different principals or for different reasons.
Duration Seconds Enter the duration, in seconds, for which the credentials should remain valid. Acceptable durations for IAM user sessions:- Minimum: 900 seconds (15 minutes)
- Maximum: 129,600 seconds (36 hours)
- Default: 3600 seconds (1 hour)
External Id External Id is a unique identifier that might be required when you assume a role in another account. Source Identity The source identity is specified by the principal that is calling the AssumeRole operation. Session Tags Session Tags are key-value pairs that you pass when you assume an IAM role or federate a user in AWS STS. To create a session tag:- In the Enter Key field, enter a key for the key-value pair.
- In the Enter Value field, enter a value for the key-value pair.
- Click Add.
The added key-value pair is shown in the table below the fields.
*: Mandatory fields -
To add the new device to the cloud device inventory, click
Add.
Tip: To select multiple services for a device, after you click Add, go back to the Services dropdown list and select the next service you want to enable for the device. Enter/select the rest of the details and click Add. Repeat this process for as many services you want to enable for the new device. The table is populated with a separate entry for each service.
- Details of the child accounts for the added master account are displayed in the inner inventory table at the bottom of the page. The details captured in the inner inventory are explained here.
- Details of the master account are listed on the CERT+ > Administration > Certificate Authority > <Selected CA> page.
Note: For a public Certificate Authority, only the child account details are listed on the CERT+ > Administration > Certificate Authority > Amazon > ACM CA page. There is no inner inventory for a public certificate authority. -
After enabling all the services for the new device, click
Save.
- On saving the device, through SSM, AppViewX will communicate with EC2 instances through SSM.
- AppViewX will discover the processes from these instances and manage them in the Server device inventory.
Once all the details are entered, you can add them to the Apache Linux server.
Note: Apart from the Apache and Tomcat processes vendor, the rest of the processes will be managed in the server inventory only as "Generic Linux".
Configuring Organization Based Discovery
-
In the Organization based discovery popup
window, under Organisation Accounts, enter/select the
discovery details.
Table 7. Field description for the Organisation Accounts section Field Description Role Name* Enter the IAM role name for the target account here. The IAM role input for this field can be:- a simple name (as a alpha-numeric string)
- an identifier in a full path format (e.g.,
/service-prefix/role-name)
AWS allows roles to be created within paths to help manage large numbers of roles and delegate permissions. With path support, users can onboard resources where the IAM Role is nested.
Account Number* By default, the AWS account number is automatically fetched from the value entered in the Account Number field in the Basic information section.
To enter a different account number:
- From the Account Number
field in the Organization based discovery
popup window, click
Self.

- Enter the required account number.
Role Session Name Role Session Name is an identifier for the assumed role session.
Use the Role Session Name to uniquely identify a session when the same rule is assumed by different principals or for different reasons.
Duration Seconds Enter the duration, in seconds, for which the credentials should remain valid.
Acceptable durations for IAM user sessions:- Minimum: 900 seconds (15 minutes)
- Maximum: 129,600 seconds (36 hours)
- Default: 3600 seconds (1 hour)
External Id External Id is a unique identifier that might be required when you assume a role in another account. Source Identity The source identity is specified by the principal that is calling the AssumeRole operation. Session Tags Session Tags are key-value pairs that you pass when you assume an IAM role or federate a user in AWS STS.
To create a session tag:- In the Enter Key field, enter a key for the key-value pair.
- In the Enter Value field, enter a value for the key-value pair.
- Click Add.
The added key-value pair is shown in the table below the fields.
*: Mandatory fields -
Enter/Select the required details in the Child Accounts
section.
Table 8. Field description for the Child Accounts section Field Description Role Name* Enter the IAM role name for the target account here. The IAM role input for this field can be:- a simple name (as a alpha-numeric string)
- an identifier in a full path format (e.g.,
/service-prefix/role-name)
AWS allows roles to be created within paths to help manage large numbers of roles and delegate permissions. With path support, users can onboard resources where the IAM Role is nested.
Role Session Name Role Session Name is an identifier for the assumed role session.
Use the Role Session Name to uniquely identify a session when the same rule is assumed by different principals or for different reasons.
Duration Seconds Enter the duration, in seconds, for which the credentials should remain valid.
Acceptable durations for IAM user sessions:- Minimum: 900 seconds (15 minutes)
- Maximum: 129,600 seconds (36 hours)
- Default: 3600 seconds (1 hour)
External Id External Id is a unique identifier that might be required when you assume a role in another account. Source Identity The source identity is specified by the principal that is calling the AssumeRole operation. Session Tags Session Tags are key-value pairs that you pass when you assume an IAM role or federate a user in AWS STS.
To create a session tag:- In the Enter Key field, enter a key for the key-value pair.
- In the Enter Value field, enter a value for the key-value pair.
- Click Add.
The added key-value pair is shown in the table below the fields.
*: Mandatory fields -
Click Save.
The Organization based discovery popup window is closed and you will be navigated back to the Discover resources section.Note:
- If the popup is closed without values entered for at least one field, then the Organization based discovery checkbox will be unchecked.
- Values once saved in the popup will be stored and made available on the screen always, regardless of the number of times the Organization based discovery checkbox is checked or unchecked, unless the values are updated.
Configuring Trigger Based Sync
-
In the Discover Resources section, enable Auto
Sync and select Trigger
Based.
The Trigger Based Sync popup window is displayed.
-
Enter/Select the required Queue Parameter details.
Table 9. Field description for the Queue Parameter section Field Description SQS URL* Enter the URL of the SQS queue. Dead Letter Queue Enter the URL of the Dead Letter Queue.
Note: This field is optional and can be used for user reference purposes only. Currently, AppViewX does not have any insights based on DLQ messages.*: Mandatory fields -
Enter/Select the STS Token details.
Table 10. Field description for the STS Token section Field Description Role ARN* Enter the Amazon Resource Name that will interact with the SQS queue through the AWS STS. The IAM role input for this field can be:- a simple name (as a alpha-numeric string)
- an identifier in a full path format (e.g.,
/service-prefix/role-name)
AWS allows roles to be created within paths to help manage large numbers of roles and delegate permissions. With path support, users can onboard resources where the IAM Role is nested.
Role Session name Role Session Name is an identifier for the assumed role session.
Use the Role Session Name to uniquely identify a session when the same rule is assumed by different principals or for different reasons.
Duration Seconds Enter the duration, in seconds, for which the credentials should remain valid.
Acceptable durations for IAM user sessions:- Minimum: 900 seconds (15 minutes)
- Maximum: 129,600 seconds (36 hours)
- Default: 3600 seconds (1 hour)
External Id External Id is a unique identifier that might be required when you assume a role in another account. Source Identity The source identity is specified by the principal that is calling the AssumeRole operation. Session Tags Session Tags are key-value pairs that you pass when you assume an IAM role or federate a user in AWS STS.
To create a session tag:- In the Enter Key field, enter a key for the key-value pair.
- In the Enter Value field, enter a value for the key-value pair.
- Click Add.
The added key-value pair is shown in the table below the fields.
*: Mandatory fields -
Enter/Select the SQS Attributes.
Table 11. Field description for the SQS Attributes section Field Description SQS Polling Interval* Enter an interval value for the SQS message polling from AppViewX. Max Number of Messages* Enter the maximum number of messages that will be returned by the queue per request. Visibility Timeout in Minutes* After messages are retrieved by a ReceiveMessage request, they need to be made invisible to subsequent retrieve requests for a custom duration.
In this field, enter this duration in minutes.
Wait time in seconds* Enter a duration, in seconds, for which a call will wait for a message to arrive in the queue before returning. *: Mandatory fields - In the Auto Sync Services section, select the list of services for which the trigger-based sync mechanism is required.
-
In the Service Specific Parameters section, from the
EC2 Sync Delay Time dropdown list, select
the delay interval (in hours) for the synchronization of EC2
instances when they are discovered for the first time.
Note: This section is displayed only if the EC2 service is selected in the Auto Sync Services section.
- Click Apply.
Configuring Schedule Based Sync
-
In the Discover Resources section, enable Auto
Sync and select Schedule
Based.
The Schedule Based Sync popup window is displayed.
-
Enter/Select the General Information.
Table 12. Field description for the General Information section Field Description Frequency of Sync* To schedule the sync, set a frequency using the two dropdown lists for this field. For example, to set the frequency to 1 day:
- From the first dropdown list, select 1.
- From the second dropdown list, select
Days.

Advance Settings For the current release, this field is set to Off and is disabled. This field and the associated features will be enabled in the upcoming release. *: Mandatory fields - Click Apply.
Onboarding a Cross Account in AppViewX for IAM Policy-based Discovery
-
Go to (Menu) > CERT+ >
ADMINISTRATION > Device Management.
The Device :: ADC page is displayed.
- From the Device :: ADC page, select Cloud.
-
On to the Device :: Cloud page and click (Add).
The Device :: Cloud > Add page is displayed.
- On the Device :: Cloud > Add page, from the list of Vendors, select AWS.
-
Enter/Select the Basic information.
Table 13. Field description for the Basic Information section Field Description *Account Type From the dropdown list, from the following options, select Cross or Federated. *Account name Enter your AWS account name. Constraints:
- A duplicate account name should not exist in the cloud inventory.
- The account name should include only alphanumeric and period (.) characters.
Description Enter a description of the device to be added. *Account number Enter your AWS account number. *Data center From the dropdown list, select the data center through which communication with the Certificate Authority will be established. Proxy required To use a proxy server for communication, select this checkbox. Proxy settings configured in the Platform module will be used for communication. To read more on how proxy settings are configured and managed, click here.
*: Mandatory fields -
Enter/Select the Credentials-related information.
Table 14. Field description for the Credentials section Field Description *Credential type From the dropdown list, from the following options, select the authentication method that will be used for integrating AWS with AppViewX: - Manual Entry: The required credentials will be entered manually.
- Credential List - CyberArk: The required credentials will be retrieved from CyberArk, a Privileged Access Management (PAM) solution.
- IAM ROLE ACCESS: An IAM role-based
approach is used for authentication instead of
direct access keys.Access is provided based on IAM roles. To enable this feature in your SaaS environment:
- Create a role in one of your AWS accounts that trusts the AppViewX AWS account.
- From AppViewX, assume the role created in your account.
- Using the assumed role from the above step, assume the roles created in the respective child accounts to perform the required CLM actions.
*Access key This field is displayed when Credential type = Manual Entry. Enter the access key generated for your AWS account.
*Secret key This field is displayed when Credential type = Manual Entry. Enter the secret key generated for your AWS account.
Download Cloud Formation Template (CFT) For Credential type = IAM ROLE ACCESS, to download the CloudFormation template, click the Download Cloud Formation Template link that is displayed below the Credential Type dropdown list. The downloaded CloudFormation template is pre-configured with the AppViewX AWS account details that need to be trusted. Ensure that you:- Use the downloaded template to create a role in any of your AWS accounts.
- Provide a unique string as the External ID for the role you are creating.
*Master Account Role Enter the Amazon Resource Name (ARN) of the AWS IAM role created using the downloaded CloudFormation Template. The IAM role input for this field can be:- a simple name (as a alpha-numeric string)
- an identifier in a full path format (e.g.,
/service-prefix/role-name)
AWS allows roles to be created within paths to help manage large numbers of roles and delegate permissions. With path support, users can onboard resources where the IAM Role is nested.
*External Id Enter the unique identifier generated to establish a secure trust relationship between AWS and AppViewX. *Credential List This field is displayed when Credential type = Credential List - CyberArk. From the dropdown list, select the CyberArk account with the AWS credentials that will be used for onboarding the standalone account.
The options listed in this dropdown list are the existing CyberArk accounts integrated with AppViewX. For instructions on integrating CyberArk with AppViewX, click here.*: Mandatory fields -
Enter/Select the information required to Discover
Resources.
Table 15. Field description for the Discover Resources section Field Description Auto Discover Resources To discover all the cross or federated/child accounts for the master account details provided, enable this field. Advanced Settings To customize the auto discovery process, enable this field. Auto Discovery Mode* To onboard a cross account for IAM policy-based discovery: - Select Policy Based
Discovery.
The Policy based Discovery dialog box is displayed.
- Enter/Select the details required to configure IAM policy-based discovery.
Note: For the Auto Discovery Mode, you can select both options, Organization Based Discovery as well as Policy Based Discovery. For instructions on configuring Organization Based Discovery, click here.Service* From the Select the Service(s) dropdown list, select the services required for the CLM operations.
Tip: To select all services, select the Select all check box displayed at the beginning of the list of services.Note:- When ACM (Certificate Authority) is selected from the Service dropdown list, an additional set of fields is displayed under the section ACM Certificate Authority Serviceto configure the ACM services. These fields are explained in the table in Step 10.
- When Amazon Private CA is selected from the Service dropdown list, an additional set of fields is displayed under the section ACM Private CA. These fields are explained in the table in Step 11.
- When the EC2(EC2 Instance) service is selected, an additional set of fields is displayed to configure the EC2 services. These fields are explained in the EC2 Services table in Step 7.
Service Region* To select a service region:
- To fetch the service regions for the account
information provided, click Fetch
Region.
The retrieved service regions are populated in the Select the Region(s) dropdown list.
- From the Select the Region(s) dropdown list, select the required service region.
Cert Sync* Select from one of the following options:
- Managed: AppViewX will connect with the customer’s AWS account and discover certificates. These certificates will be added to the inventory. Users with the relevant permissions can then perform the required certificate-related actions.
- Monitored: AppViewX will connect with the customer’s AWS account and discover certificates. These certificates will be added to the inventory where the users will be allowed to only view the certificates.
- Ignored: AppViewX will connect with the customer’s AWS account but certificate discovery will be disabled.
Auto Sync To enable/disable automatic synchronization, use the Auto Sync key.
If Auto Sync is enabled, select the checkbox for the type of synchronization from the following options:
*: Mandatory fields - Select Policy Based
Discovery.
-
Enter/Select the required details in the ACM Certificate Authority
Service section.
Note: This section is displayed only when one or both ACM services are selected from the Services dropdown list.
Table 16. Field description for the ACM Certificate Authority Service Field Description Role Setting Preference* Note: This field is displayed only when both auto discovery modes (Organization Based Discovery and IAM Policy Based Discovery) are selected.From the dropdown list, select one of the following options:
- Organization Based Discovery
- IAM Policy Based Discovery
Route53 Zone Auto Approval To support DNS validation as an automatic process, enable this toggle. *: Mandatory fields -
Enter/Select the required details in the ACM Private CA
section.
Note: This section is displayed only when the ACM (Amazon Private CA) service is selected for a Cross or Federated account.
Table 17. Field description for the ACM Private CA section Field Description CA Operation Mode* From the following options, select one/both operation mode(s) for discovering all the certificates enrolled by the Private Certificate Authority:
-
ACM
-
PCA
S3 Bucket* NOTE: This field is displayed only when the PCA operation mode is selected.
-
Enter the S3 bucket name.
-
Click
.The ARN Advanced Settings action pane is displayed.
-
In the ARN Advanced Settings action pane, enter the following details:
Field Description Role ARN* Amazon Resource Name of the role that the caller is assuming The IAM role input for this field can be:- a simple name (as a alpha-numeric string)
- an identifier in a full path format (e.g.,
/service-prefix/role-name)
AWS allows roles to be created within paths to help manage large numbers of roles and delegate permissions. With path support, users can onboard resources where the IAM Role is nested.
Role Session name Role Session name is an identifier for the assumed role session.
Use the Role Session name to uniquely identify a session when the same rule is assumed by different principals or for different reasons.Duration Seconds Enter the duration, in seconds, for which the credentials should remain valid.
Acceptable durations for IAM user sessions:
-
Minimum: 900 seconds (15 minutes)
-
Maximum: 129,600 seconds (36 hours)
External Id External Id is a unique identifier that might be required when you assume a role in another account. Source Identity The source identity is specified by the principal that is calling the AssumeRole operation. Session Tags Session Tags are key-value pairs that you pass when you assume an IAM role or federate a user in AWS STS.
To create a session tag:
-
In the Enter Key field, enter a key for the key-value pair.
-
In the Enter Value field, enter a value for the key-value pair.
-
Click Add.
The added key-value pair is shown in the table below the fields.
- Click Apply.
Discover Certificate To enable instant certificate discovery at the time of device addition, select this checkbox. *: Mandatory fields -
-
Enter/Select the required details in the EC2 Services
section.
Table 18. Field description for the EC2 Services section Field Description Communication mode By default, the SSM communication mode is selected. Certificate Discovery Mode By default, the File System Scanning certificate discovery mode is selected. *S3 Deployment Type From the dropdown list, from the following options, select the deployment type used for the S3 bucket that will be used for the EC2 integration: - Centralized: Select this if the S3 bucket that will be used for the EC2 integration is managed centrally across all accounts.
- Account Specific: Select this if each account manages individual S3 buckets.
*S3 Bucket Name Enter the name of the S3 bucket that will be used for EC2 integration. For account specific S3 buckets, enter the bucket name without the account number suffix. AppViewX will automatically append the account number based on the value entered here.
To configure the ARN advanced settings for the specified S3 bucket, follow the instructions given below:- Click .
The ARN Advanced Settings dialog box is displayed.
- In the ARN Advanced Settings dialog
box, enter the following details:
Field Description Role ARN* Amazon Resource Name of the role that the caller is assuming The IAM role input for this field can be:- a simple name (as a alpha-numeric string)
- an identifier in a full path format (e.g.,
/service-prefix/role-name)
AWS allows roles to be created within paths to help manage large numbers of roles and delegate permissions. With path support, users can onboard resources where the IAM Role is nested.
Role Session name* Role Session name is an identifier for the assumed role session. Use the Role Session name to uniquely identify a session when the same rule is assumed by different principals or for different reasons.
Duration Seconds Enter the duration, in seconds, for which the credentials should remain valid. Acceptable durations for IAM user sessions:- Minimum: 900 seconds (15 minutes)
- Maximum: 129,600 seconds (36 hours)
- Default: 3600 seconds (1 hour)
External Id External Id is a unique identifier that might be required when you assume a role in another account. Source Identity The source identity is specified by the principal that is calling the AssumeRole operation. Session Tags Session Tags are key-value pairs that you pass when you assume an IAM role or federate a user in AWS STS. To create a session tag:- In the Enter Key field, enter a key for the key-value pair.
- In the Enter Value field, enter a value for the key-value pair.
- Click Add.
The added key-value pair is shown in the table below the fields.
*: Mandatory fields -
To add the new device to the cloud device inventory, click
Add.
Tip: To select multiple services for a device, after you click Add, go back to the Services dropdown list and select the next service you want to enable for the device. Enter/select the rest of the details and click Add. Repeat this process for as many services you want to enable for the new device. The table is populated with a separate entry for each service.
- Details of the child accounts for the added master account are displayed in the inner inventory table at the bottom of the page. The details captured in the inner inventory are explained here.
- Details of the master account are listed on the CERT+ > Administration > Certificate Authority > <Selected CA> page.
Note: For a public Certificate Authority, only the child account details are listed on the CERT+ > Administration > Certificate Authority > Amazon > ACM CA page. There is no inner inventory for a public certificate authority. -
After enabling all the services for the new device, click
Save.
- On saving the device, through SSM, AppViewX will communicate with EC2 instances through SSM.
- AppViewX will discover the processes from these instances and manage them in the Server device inventory.
Once all the details are entered, you can add them to the Apache Linux server.
Note: Apart from the Apache and Tomcat processes vendor, the rest of the processes will be managed in the server inventory only as "Generic Linux".
Configuring IAM Policy Based Discovery
-
In the IAM Policy based discovery popup
window enter/select the Child Accounts details.
Table 19. Field description for the Child Accounts section Field Description Role Session Name Role Session Name is an identifier for the assumed role session.
Use the Role Session Name to uniquely identify a session when the same rule is assumed by different principals or for different reasons.
Duration Seconds Enter the duration, in seconds, for which the credentials should remain valid.
Acceptable durations for IAM user sessions:- Minimum: 900 seconds (15 minutes)
- Maximum: 129,600 seconds (36 hours)
- Default: 3600 seconds (1 hour)
External Id External Id is a unique identifier that might be required when you assume a role in another account. Source Identity The source identity is specified by the principal that is calling the AssumeRole operation. Session Tags Session Tags are key-value pairs that you pass when you assume an IAM role or federate a user in AWS STS.
To create a session tag:- In the Enter Key field, enter a key for the key-value pair.
- In the Enter Value field, enter a value for the key-value pair.
- Click Add.
The added key-value pair is shown in the table below the fields.
-
Click Save.
The IAM Policy based discovery popup window is closed and you will be navigated back to the Discover resources section.Note:
- If the popup is closed without values entered for at least one field, then theIAM Policy based discovery checkbox will be unchecked.
- Values once saved in the popup will be stored and made available on the screen always, regardless of the number of times the IAM Policy Based Discovery checkbox is checked or unchecked, unless the values are updated.
Configuring Trigger Based Sync
-
In the Discover Resources section, enable Auto
Sync and select Trigger
Based.
The Trigger Based Sync popup window is displayed.
-
Enter/Select the required Queue Parameter details.
Table 20. Field description for the Queue Parameter section Field Description SQS URL* Enter the URL of the SQS queue. Dead Letter Queue Enter the URL of the Dead Letter Queue.
Note: This field is optional and can be used for user reference purposes only. Currently, AppViewX does not have any insights based on DLQ messages.*: Mandatory fields -
Enter/Select the STS Token details.
Table 21. Field description for the STS Token section Field Description Role ARN* Enter the Amazon Resource Name that will interact with the SQS queue through the AWS STS. The IAM role input for this field can be:- a simple name (as a alpha-numeric string)
- an identifier in a full path format (e.g.,
/service-prefix/role-name)
AWS allows roles to be created within paths to help manage large numbers of roles and delegate permissions. With path support, users can onboard resources where the IAM Role is nested.
Role Session name Role Session Name is an identifier for the assumed role session.
Use the Role Session Name to uniquely identify a session when the same rule is assumed by different principals or for different reasons.
Duration Seconds Enter the duration, in seconds, for which the credentials should remain valid.
Acceptable durations for IAM user sessions:- Minimum: 900 seconds (15 minutes)
- Maximum: 129,600 seconds (36 hours)
- Default: 3600 seconds (1 hour)
External Id External Id is a unique identifier that might be required when you assume a role in another account. Source Identity The source identity is specified by the principal that is calling the AssumeRole operation. Session Tags Session Tags are key-value pairs that you pass when you assume an IAM role or federate a user in AWS STS.
To create a session tag:- In the Enter Key field, enter a key for the key-value pair.
- In the Enter Value field, enter a value for the key-value pair.
- Click Add.
The added key-value pair is shown in the table below the fields.
*: Mandatory fields -
Enter/Select the SQS Attributes.
Table 22. Field description for the SQS Attributes section Field Description SQS Polling Interval* Enter an interval value for the SQS message polling from AppViewX. Max Number of Messages* Enter the maximum number of messages that will be returned by the queue per request. Visibility Timeout in Minutes* After messages are retrieved by a ReceiveMessage request, they need to be made invisible to subsequent retrieve requests for a custom duration.
In this field, enter this duration in minutes.
Wait time in seconds* Enter a duration, in seconds, for which a call will wait for a message to arrive in the queue before returning. *: Mandatory fields - In the Auto Sync Services section, select the list of services for which the trigger-based sync mechanism is required.
-
In the Service Specific Parameters section, from the
EC2 Sync Delay Time dropdown list, select
the delay interval (in hours) for the synchronization of EC2
instances when they are discovered for the first time.
Note: This section is displayed only if the EC2 service is selected in the Auto Sync Services section.
- Click Apply.
Configuring Schedule Based Sync
-
In the Discover Resources section, enable Auto
Sync and select Schedule
Based.
The Schedule Based Sync popup window is displayed.
-
Enter/Select the General Information.
Table 23. Field description for the General Information section Field Description Frequency of Sync* To schedule the sync, set a frequency using the two dropdown lists for this field. For example, to set the frequency to 1 day:
- From the first dropdown list, select 1.
- From the second dropdown list, select
Days.
Advance Settings For the current release, this field is set to Off and is disabled. This field and the associated features will be enabled in the upcoming release. *: Mandatory fields - Click Apply.
AWS IAM Prerequisites for Master Account
Permissions for Discovering Child Accounts using Policy-based Discovery
{
  "Version": "2012-10-17",
  "Statement": [
    {
      "Sid": "VisualEditor0",
      "Effect": "Allow",
      "Action": [
        "iam:GetPolicyVersion",
        "iam:GetPolicy",
        "iam:GetUserPolicy",
        "iam:ListGroupsForUser",
        "iam:ListGroupPolicies",
        "iam:ListAttachedUserPolicies",
        "iam:ListAttachedGroupPolicies",
        "iam:ListUserPolicies",
        "iam:GetGroupPolicy",
        "iam:GetUser"
      ],
      "Resource": "*"
    }
  ]
}
Permissions for Discovering Child Accounts using AWS Organization Services
{
    "Version": "2012-10-17",
    "Statement": [
        {
            "Sid": "VisualEditor0",
            "Effect": "Allow",
            "Action": [
                "organizations:Describe*",
                "organizations:List*"
            ],
            "Resource": "*"
        }
    ]
}
Permissions for Enabling Assume Role Access to all AWS Accounts
{
  "Version": "2012-10-17",
  "Statement": [
    {
      "Sid": "VisualEditor0",
      "Effect": "Allow",
      "Action": "sts:AssumeRole",
      "Resource": [
        "arn:aws:iam::<child account 1>:role/<Assume-role>",
        "arn:aws:iam::<child account 2>:role/< Assume-role>",
        "arn:aws:iam::<child account 3>:role/< Assume-role>"
      ]
    }
  ]
}
Permissions for Enabling Assume Role Access for a Specific Child Account
{
  "Version": "2012-10-17",
  "Statement": [
    {
      "Sid": "VisualEditor0",
      "Effect": "Allow",
      "Action": [
        "sts:AssumeRole"
      ],
      "Resource": "arn:aws:iam::<child-account>:role/AppViewX"
    }
  ]
}
Permissions for Enabling S3 Bucket Access to the AppViewX Platform
{
    "Version": "2012-10-17",
    "Statement": [
        {
            "Sid": "VisualEditor0",
            "Effect": "Allow",
            "Action": [
                "sts:AssumeRole"
            ],
            "Resource": "arn:aws:iam::<child-account>:role/AppViewX-S3-Bucket-Access"
        }
    ]
}
Permissions for Accessing Organization Services to Discover AWS Accounts
{
  "Version": "2012-10-17",
  "Statement": [
    {
      "Sid": "VisualEditor0",
      "Effect": "Allow",
      "Action": [
        "sts:AssumeRole"
      ],
      "Resource": "arn:aws:iam::<child-account>:role/AppViewX"
    }
  ]
}
AWS IAM Prerequisites for Child Account
Permissions for Establishing a Trust Relationship in Child Accounts
{
  "Version": "2012-10-17",
  "Statement": [
    {
      "Effect": "Allow",
      "Principal": {
        "AWS": "arn:aws:iam::master-account-number:root"
      },
      "Action": "sts:AssumeRole",
      "Condition": {}
    }
  ]
}
Permissions for Discovering and Managing SSL Certificates in ACM
{
    "Version": "2012-10-17",
    "Statement": [
        {
            "Sid": "VisualEditor0",
            "Effect": "Allow",
            "Action": [
                "acm:DescribeCertificate",
                "acm:RequestCertificate",
                "acm:GetCertificate",
                "ec2:DescribeRegions",
                "acm:ListCertificates",
                "acm:ImportCertificate",
                "acm:AddTagsToCertificate",
                "acm:ListTagsForCertificate",
                "acm:RemoveTagsFromCertificate"
            ],
            "Resource": "*"
        }
    ]
}
Permissions for Discovering and Managing SSL Certificates in CloudFront
{
    "Version": "2012-10-17",
    "Statement": [
        {
            "Sid": "VisualEditor0",
            "Effect": "Allow",
            "Action": [
                "iam:GetServerCertificate",
                "acm:GetCertificate",
                "acm:ListCertificates",
                "iam:ListServerCertificates",
                "ec2:DescribeRegions",
                "cloudfront:ListDistributions",
                "acm:ImportCertificate",
                "acm:AddTagsToCertificate",
                "acm:ListTagsForCertificate",
                "acm:RemoveTagsFromCertificate",
                "cloudfront:UpdateDistribution",
                "cloudfront:GetDistributionConfig",
                "cloudfront:ListTagsForResource",
                "iam:UploadServerCertificate",
                "iam:ListServerCertificateTags",
                "iam:TagServerCertificate",
                "iam:UntagServerCertificate"
            ],
            "Resource": "*"
        }
    ]
}
Permissions for Managing SSM Permissions for the EC2 Policy
{
    "Version": "2012-10-17",
    "Statement": [
        {
            "Sid": "VisualEditor0",
            "Effect": "Allow",
            "Action": [
                "ssm:SendCommand",
		 "ssm:DescribeDocument",
		 "ec2:DescribeInstances",
		 "s3:ListAllMyBuckets",
		 "ssm:DescribeInstanceInformation",
		 "ssm:GetDocument",
		 "ssm:CreateDocument",
		 "ssm:GetCommandInvocation",
		 "ec2:DescribeRegions"
            ],
            "Resource": "*"
        }
    ]
}
Permissions for Managing SSM Permissions for EC2 Role
{
    "Version": "2012-10-17",
    "Statement": [
        {
            "Action": [
                "ssm:DescribeDocument",
                "ec2messages:GetEndpoint",
                "ec2messages:GetMessages",
                "ssmmessages:OpenControlChannel",
                "ec2messages:DeleteMessage",
                "ssm:UpdateInstanceInformation",
                "ec2messages:FailMessage",
                "ssmmessages:OpenDataChannel",
                "ssm:GetDocument",
                "ssm:ListTagsForResource",
                "ec2messages:AcknowledgeMessage",
                "ssmmessages:CreateControlChannel",
                "ssmmessages:CreateDataChannel",
                "ec2messages:SendReply"
            ],
            "Resource": "*",
            "Effect": "Allow"
        },
        {
            "Action": [
                "s3:PutObject",
                "s3:GetEncryptionConfiguration",
                "s3:PutObjectAcl"
            ],
            "Resource": [
                "arn:aws:s3:::appviewx-s3/*",
                "arn:aws:s3:::appviewx-s3"
            ],
            "Effect": "Allow"
        }
    ]
}
Permissions for Enabling S3 Bucket Access to AppViewX
{
    "Version": "2012-10-17",
    "Statement": [
        {
            "Sid": "VisualEditor0",
            "Effect": "Allow",
            "Action": [
               "s3:GetObject",
		 "s3:ListBucket",
		 "s3:DeleteObject",
		 "s3:GetBucketLocation"
            ],
            "Resource": [
                "arn:aws:s3:::appviewx-s3/*",
                "arn:aws:s3:::appviewx-s3"
            ],
        }
    ]
}
Permissions for Discovering and Managing SSL Certificates in ELB
{
    "Version": "2012-10-17",
    "Statement": [
        {
            "Sid": "VisualEditor0",
            "Effect": "Allow",
            "Action": [
                "iam:GetServerCertificate",
                "elasticloadbalancing:ModifyListener",
                "ec2:DescribeInstances",
                "iam:ListServerCertificates",
                "elasticloadbalancing:DescribeTags",
                "ec2:DescribeRegions",
                "elasticloadbalancing:SetLoadBalancerListenerSSLCertificate",
                "iam:UploadServerCertificate",
                "iam:ListServerCertificateTags",
                "iam:TagServerCertificate",
                "iam:UntagServerCertificate",
                "elasticloadbalancing:DescribeLoadBalancerAttributes",
                "elasticloadbalancing:DescribeLoadBalancers",
                "elasticloadbalancing:DescribeListeners",
                "ec2:DescribeAvailabilityZones",
                "acm:GetCertificate",
                "elasticloadbalancing:DescribeTargetHealth",
                "acm:ListCertificates",
                "elasticloadbalancing:DescribeTargetGroups",
                "acm:ImportCertificate",
                "acm:AddTagsToCertificate",
                "acm:ListTagsForCertificate",
                "acm:RemoveTagsFromCertificate",
                "elasticloadbalancing:AddListenerCertificates",
                "elasticloadbalancing:DescribeListenerCertificates"
            ],
            "Resource": "*"
        }
    ]
}
Permissions for Discovering and Managing Certificates in IAM
{
    "Version": "2012-10-17",
    "Statement": [
        {
            "Sid": "VisualEditor0",
            "Effect": "Allow",
            "Action": [
                "iam:GetServerCertificate",
                "iam:ListServerCertificates",
                "iam:UploadServerCertificate",
                "iam:ListServerCertificateTags",
                "iam:TagServerCertificate",
                "iam:UntagServerCertificate",
                "ec2:DescribeRegions"
            ],
            "Resource": "*"
        }
    ]
}
Permissions for Discovering and Managing Private CA Certificates
{
    "Version": "2012-10-17",
    "Statement": [
        {
            "Sid": "VisualEditor0",
            "Effect": "Allow",
            "Action": [
                "acm:DescribeCertificate",
                "acm:RequestCertificate",
                "acm:GetCertificate",
                "acm:RenewCertificate",
                "ec2:DescribeRegions",
                "acm:ListCertificates",
                "acm:ImportCertificate",
                "acm:AddTagsToCertificate",
                "acm:ListTagsForCertificate",
                "acm:RemoveTagsFromCertificate",
                "acm-pca:CreateCertificateAuthorityAuditReport",
		"acm-pca:DescribeCertificateAuthorityAuditReport,
		"acm-pca:GetCertificate",
		"acm-pca:ListCertificateAuthorities",
		"acm-pca:IssueCertificate",
		"acm-pca:RevokeCertificate",
		"s3:GetBucketLocation",
		"s3:GetObject"
            ],
            "Resource": "*"
        }
    ]
}
Permissions for Discovering and Managing SSL Certificates in SM
{
    "Version": "2012-10-17",
    "Statement": [
        {
            "Sid": "VisualEditor0",
            "Effect": "Allow",
            "Action": [
                "secretsmanager:GetSecretValue",
                "secretsmanager:DescribeSecret",
                "secretsmanager:CreateSecret",
                "secretsmanager:UpdateSecret",
                "secretsmanager:PutSecretValue",
                "secretsmanager:ListSecrets"
            ],
            "Resource": "*"
        }
    ]
}
Account Level/Inner Inventory
| Field | Description |
|---|---|
| Account Name | Name of the account to which the cloud device belongs |
| Role Name | Role name of the account creator |
| Service Region | The service region selected for the account |
| Service | Service integrated for the cloud device |
| Status | Status of the discovered accounts. This field
takes the following values:
|
| Resource Discovery Status |
Note: Resource discovery status is not
applicable for master accounts. For master accounts, the
resource discovery status is set to Not
Applicable.
This field indicates the status of the resource discovery for
the individual entities belonging to a discovered account
using the following values:
|
| Cert Discovery Status |
Note: Cert discovery status is not
applicable for master accounts. For master accounts, the
cert discovery status is set to Not
Applicable.
This field indicates the status of the certificate discovery
for the individual entities belonging to a discovered
account using the following values:
Note: The cert discovery status is based
on the status of only those entities for which the cert
discovery status is not Not Applicable.
|
| Cert sync | Cert sync type (Managed, Monitored, Ignored) selected for the entity |
| State | Outcome of the device addition (Success, Failed) |