Licenses for SaaS 
Accessing the License Page
| New Menu | Old Menu |
|---|---|
| In the Platform module, from the navigation pane on
the left, under SYSTEM ADMINISTRATION, select
License. The Settings :: License page is displayed with the License tab open by default. |
|
| For more information on how to switch between menus, click here. | |
| License Detail | Description |
|---|---|
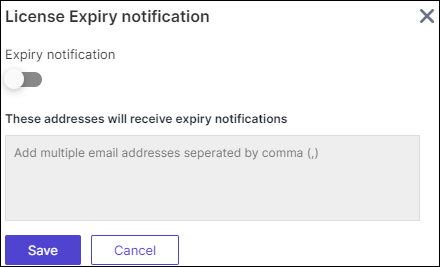
| Expiry notification | On the top right corner of the screen. Click
Expiry notification to enable the
expiry notification by including email addresses to receive
license expiration notifications from AppViewX.
The following license expiry notifications are
sent to the email address:
|
| Refresh | Click  (Refresh) icon to update the license details.
 |
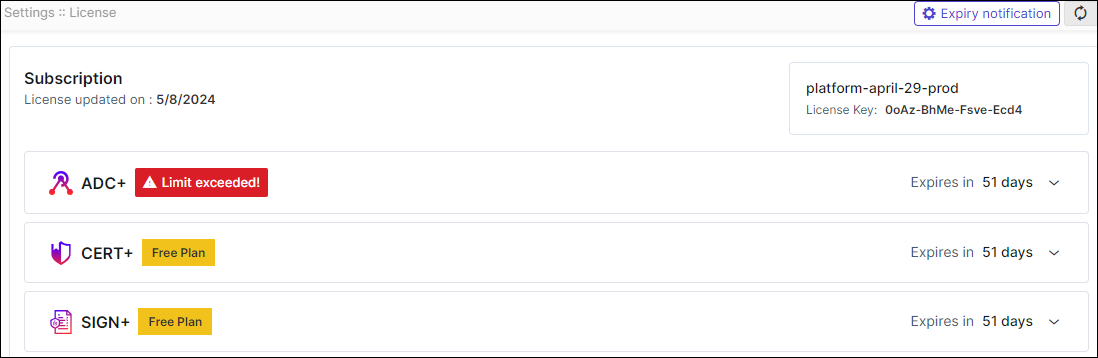
| Subscription | This includes the details of license of AppViewX products subscribed by the user. |
| License updated on | Displays the date on which the license was last updated. |
| Account Name | Displays the associated account name. |
| License Key | Displays the License key details of the user. The key is
generated by the customer perspective. Using which License Key
of "16 digit Alphanumeric" value is generated by the sales team.
Only License Key generated with installation key can be applied
in the respective instance of the product. Note: Consider only the license key which is
provided by the sales team. |
| Product Name | This includes the details of subscribed licenses of all
AppViewX products. Note: Products under the
Free Plan are indicated with a Free Plan
flag next to the product name. |
| Expires in | Displays the remaining days until the respective products expire. |
| ADC+ | |
| Nodes | All the ADC devices (Independent devices, Controllers, Nodes within controllers) that are onboarded in the inventory. |
| Objects | All the ADC Applications (Unique GTM WideIPs, LTM VIPs) discovered from the onboarded ADC devices. |
| CERT+ | |
| Managed Device Certificates Instances | Managed Device Certificates Instances includes all certificates (Client, Code Signing, and Device) excluding Server and OTHERS types, from the inventory in the "Managed" state. |
| Managed Server Certificates Instances | Managed Server Certificates Instances include only server certificates from the inventory in the "Managed" state. |
| Managed Certificates Instances | Managed Certificate instance includes all certificates (Server, Client, Code Signing, and others) present in the certificate inventory in the "Managed" state. |
| Monitored Certificates Instances | Monitored Certificate Instances include all certificates (Server, Client, Code Signing, and others) present in the certificate inventory in the "Monitored" state. |
| DDI+ | |
| Managed Domains | Each DDI+ license subscription allows the user a number of managed domains that can be used. The number displays DDI+ managed domains currently in use. |
| PKI+ | |
| Certificates Issued | Certificates issued are the total number of certificates
which includes the number of certificates issued and all CAs
created in PKI. Note: The certificate count
begins from the day the project is initialized in Google
Cloud Platform (GCP)and is maintained for a year from that
date. The count is reset annually. |
| Total CA(s) | Total CA is Number of CAs created from AppViewX. Each PKI+ license subscription allows the user a number of total CAs using this license. This is the number of total CAs used. |
| SIGN+ | |
| Signature Count | Total count of signing requests executed using the signing policy. |
License Alerts
 Reaching Limit!
 If the usage reaches 90% of the threshold limit, then “Reaching Limit!” alert will be displayed.
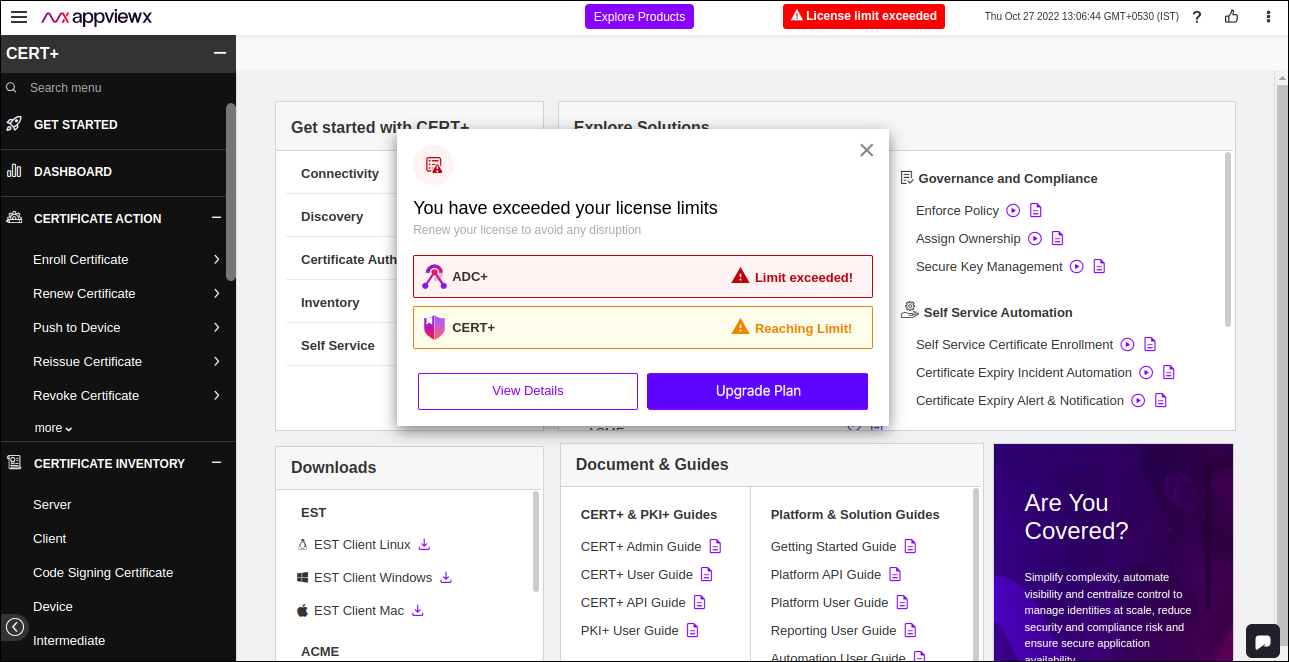
 Limit exceeded!
If the usage exceeds the threshold limit, then “Limit exceeded!” alert will be displayed.
- You will see a header alert message while logging In, if the license
limit is exceeded.
Upgrading Licenses for SaaS
To upgrade a license:
- On the Settings :: License page, to upgrade a license, click on the Product Name you would like Upgrade Plan.
-
Click Upgrade Plan.
Upon clicking Upgrade Plan, AppViewX generates the SFDC ticket, ensuring that the sales team is promptly notified and gets in touch with you shortly.You will be redirected to the AppViewX Upgrade page to select a time slot to contact with the sales team.
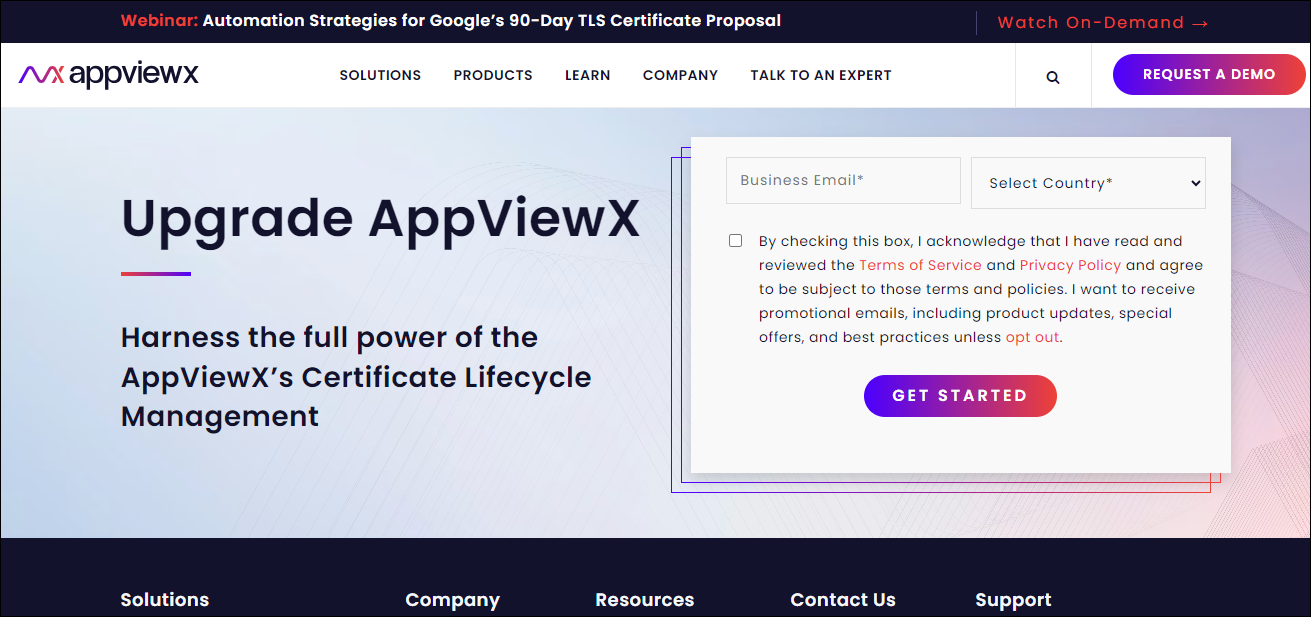
- Enter the Business Email* and Select Country* from the dropdown.
- Select the checkbox to acknowledge the Terms of Service and Privacy Policy.
-
Click GET STARTED.
What time works best for a quick call? Popup is displayed.
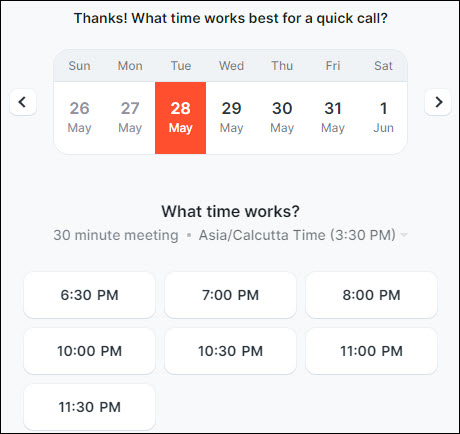
- Select a feasible date and time for the sales team to connect.
-
A meeting invite will be sent to your registered email address.
The salesperson details and invite information will be displayed on the screen.