Array
Before You Begin
Prerequisites
- Version Supported: Rel.APV.10.4.2.93
- IP Address/FQDN: IP address and FQDN
- User Privilege: api access
- Enable Password: NA
- License Check: No
- Services and Ports for AppViewX Communication: A port needs to be
specified for API access.Note: Any port no. can be used.
- Internet Access/Proxy if Required: NA
- Location from which Certificates are discovered if managed: NA
| Browsers | Version |
|---|---|
| Internet Explorer | v11.0.9600.18817 or later |
| Firefox | v74.0.1 (64-bit) or later |
| Google Chrome | 117.0.5938.134 (Official Build) (64-bit) or later |
- ADC > Inventory > Add / Modify
- ADC > Device group > Add / Modify
- Old menu: menu > Accounts > Role
- New menu: menu > Platform > IDENTITY > Role
Adding Array Device
To add an Array device:
- Go to Menu > ADC+ > ASSET MANAGEMENT.
-
Perform one of the followings:
-
Click Device Inventory, and then select Add (+) icon to navigate to the Device details page.
-
Click Onboard Device in the left navigation panel.
-
-
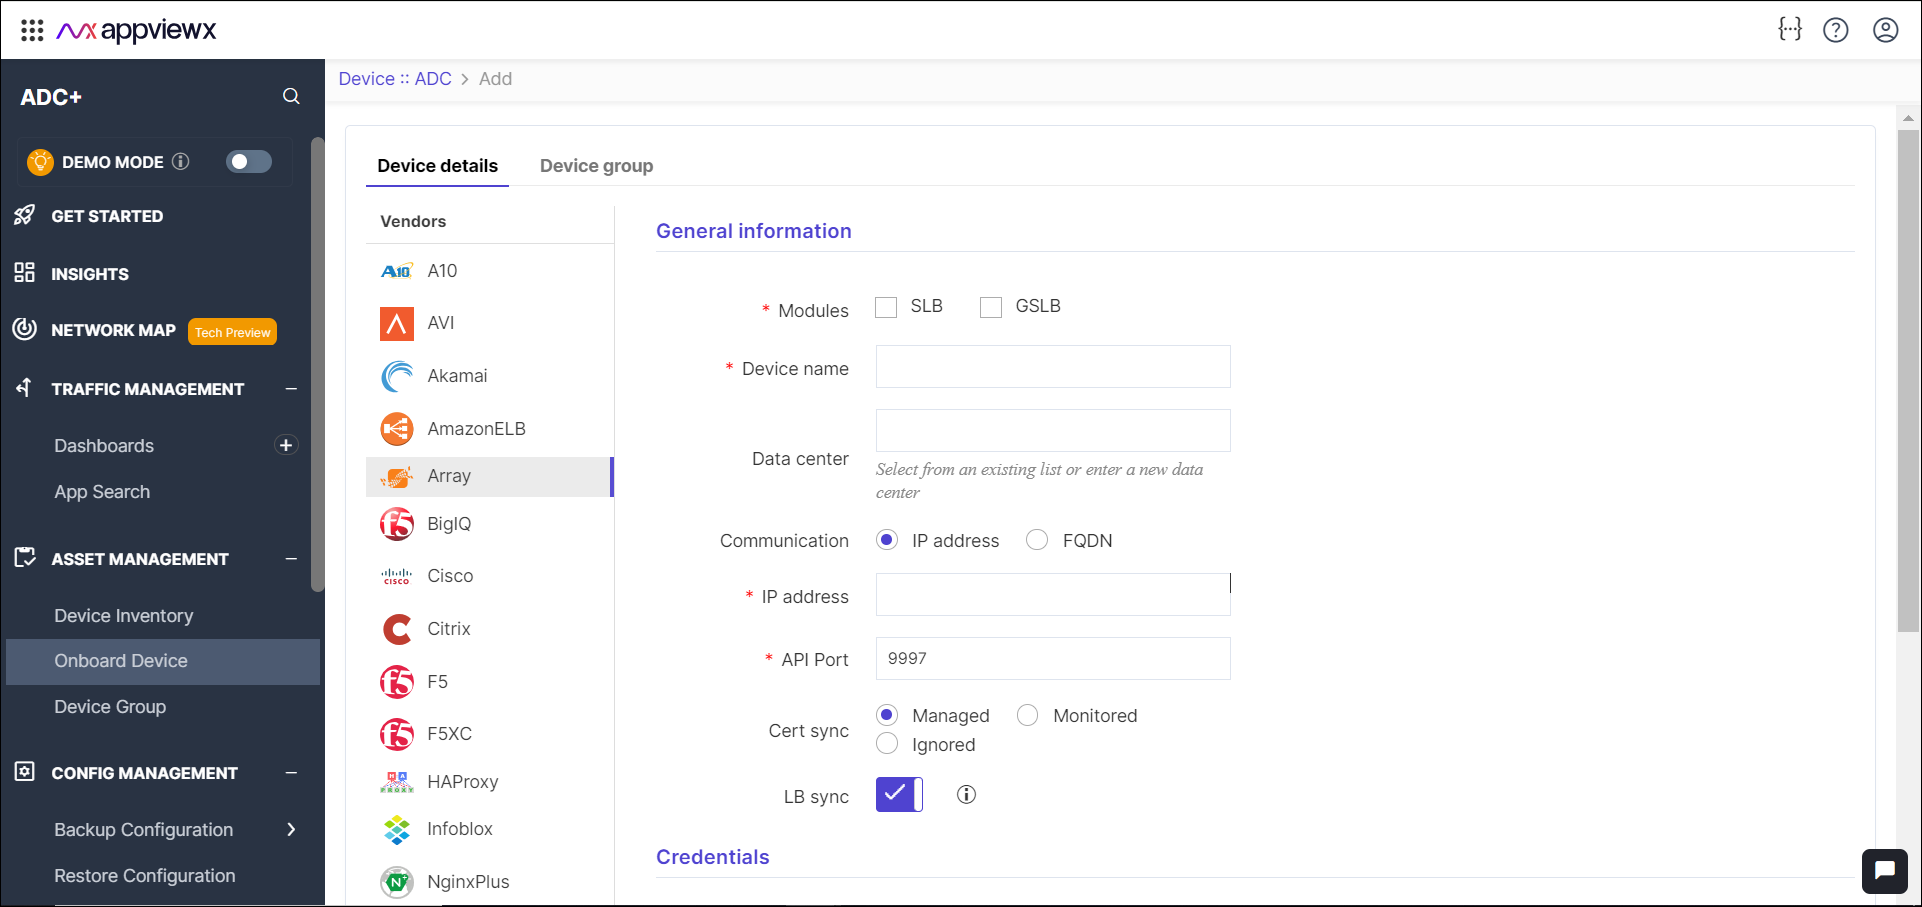
In the Device details page, select Array from
the left sidebar.
-
Enter or select the field information in the General
information section.
Table 1. General information Section - Field and Description Table Name Description *Modules Select modules checkbox. The values are - SLB
- GSLB
*Device name Unique name of the device to be added. Note: Device names can only contain alphanumeric characters, '-' , '_' , '.' , '*' , '|' , '!' and spaces.Data center Enter the Datacenter name where the device is configured. The default value is Absecon. Note: Data center name can only contain alphanumeric characters, '-' , '_' , '.' , '*' , ':' , '|' and spaces.Communication Select the communication method for accessing devices, either through an IP address or FQDN. *IP Address Enter the IPv4 address of the device. Note: The IP address must be in the correct format.*API Port Enter the communication port of the device. Note: Only the numbers are allowed.Cert Sync Select the certificate sync option: -
Managed: The certificates of the device can be managed.
- Monitored: The certificates of the device can be monitored.
- Ignored: The certificate sync can be ignored.
LB Sync By default, this option is enabled to discover and manage the load balancer configurations. If not required, you can disable this option. *: Mandatory fields -
Enter or select the field information in the Credentials
section. You can select Manual Entry or Credentials
List.
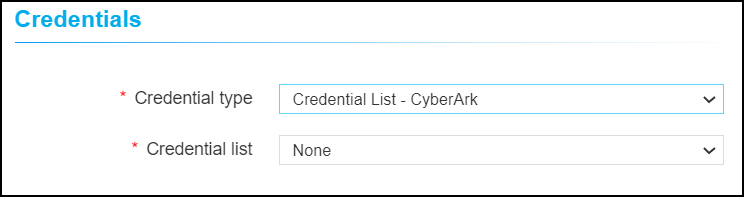
Table 2. Credentials Section - Field and Description Table Name Description *Credential type Manual entry: The user should enter the username and password.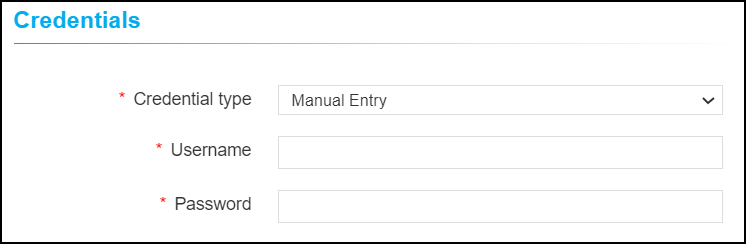
Credential List: The user can select the credential details which are already stored in the credential inventory page.
*Username Enter the user name of the device. *Password Enter the password of the device. *: Mandatory fields -
Enter or select the field information in the Secondary device
information section.
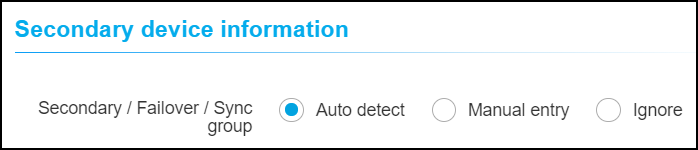
Table 3. Secondary device information Section - Field and Description Table Name Description *Secondary / Failover / Sync group Auto detect: The user should select this option to auto-detect and add the peer devices in the inventory page.
Manual entry: The user can use this option to add the peer devices manually.
Ignore: The user can use this option to ignore the auto-detection of the peer devices.
*: Mandatory fields - Click Save.
Validating the Array Device Addition
After adding the device, you can validate the device by searching device in the device inventory.
- Go to Menu > ADC+ > ASSET MANAGEMENT > Device Inventory.
-
Search the device name and validate whether the device is added
successfully.
