Switching from Single Page Layout to Page with tabs Layout
To switch from single page layout to page with tabs/step layout:
-
In the build area, from the top right corner of the screen, click
 (Switch Layout) icon.
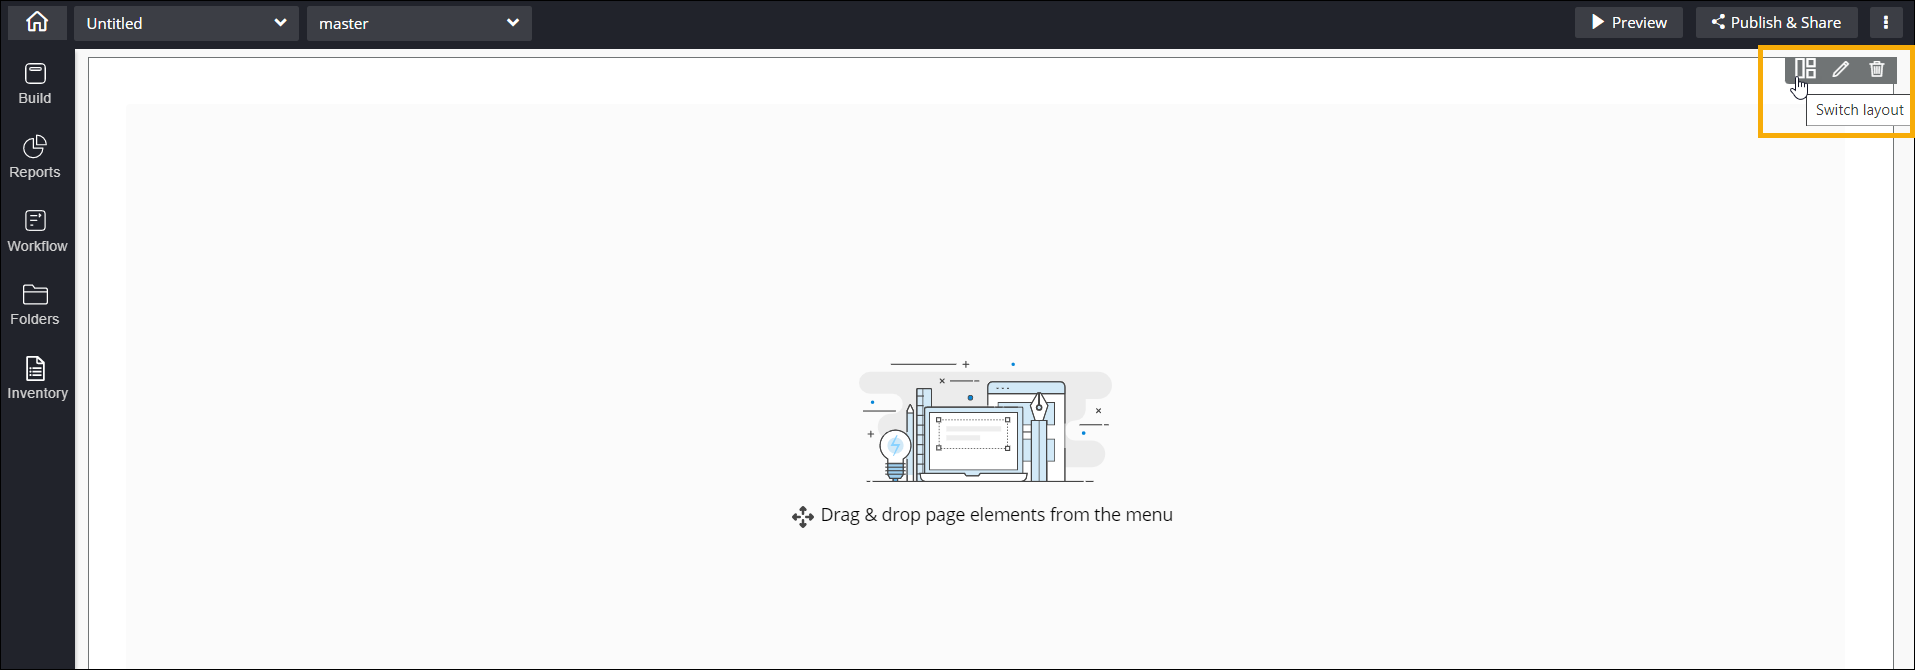
- In the Switch Layout window that is displayed, click Multi Page.
-
Click Yes in the Confirmation pop-up window.
The Tab setup page will be displayed by default..
Multi Page with Tabs
-
To flip between horizontal and vertical tabs, from the top right corner of the
screen, click
 (Flip Right) icon.
-
To add a tab, when tabs are horizontally oriented, click
 (Add) icon.
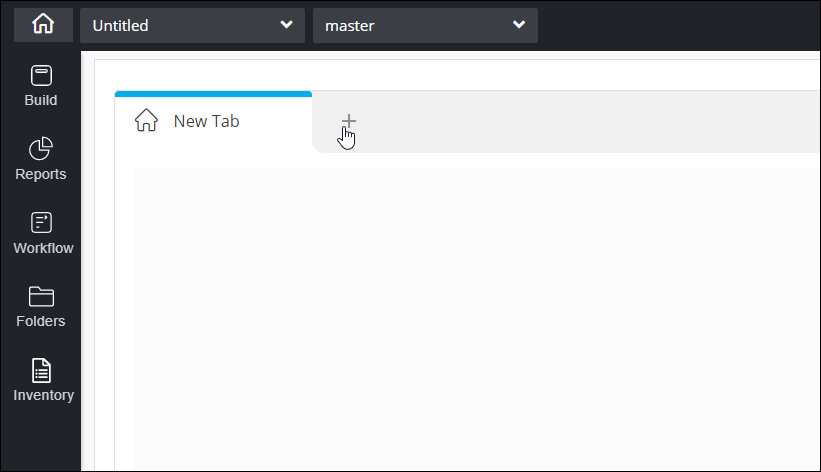
-
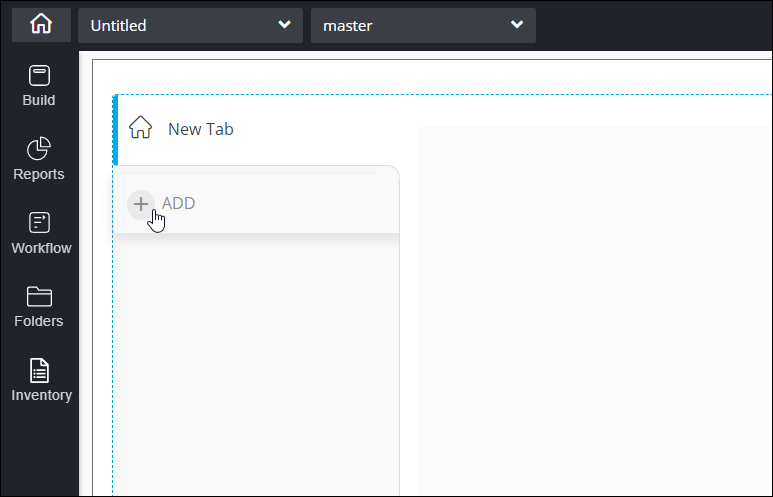
To add a tab, when tabs are vertically oriented, click ADD.
-
To modify the tab, hover your mouse over the tab and click
 (Edit) icon.
 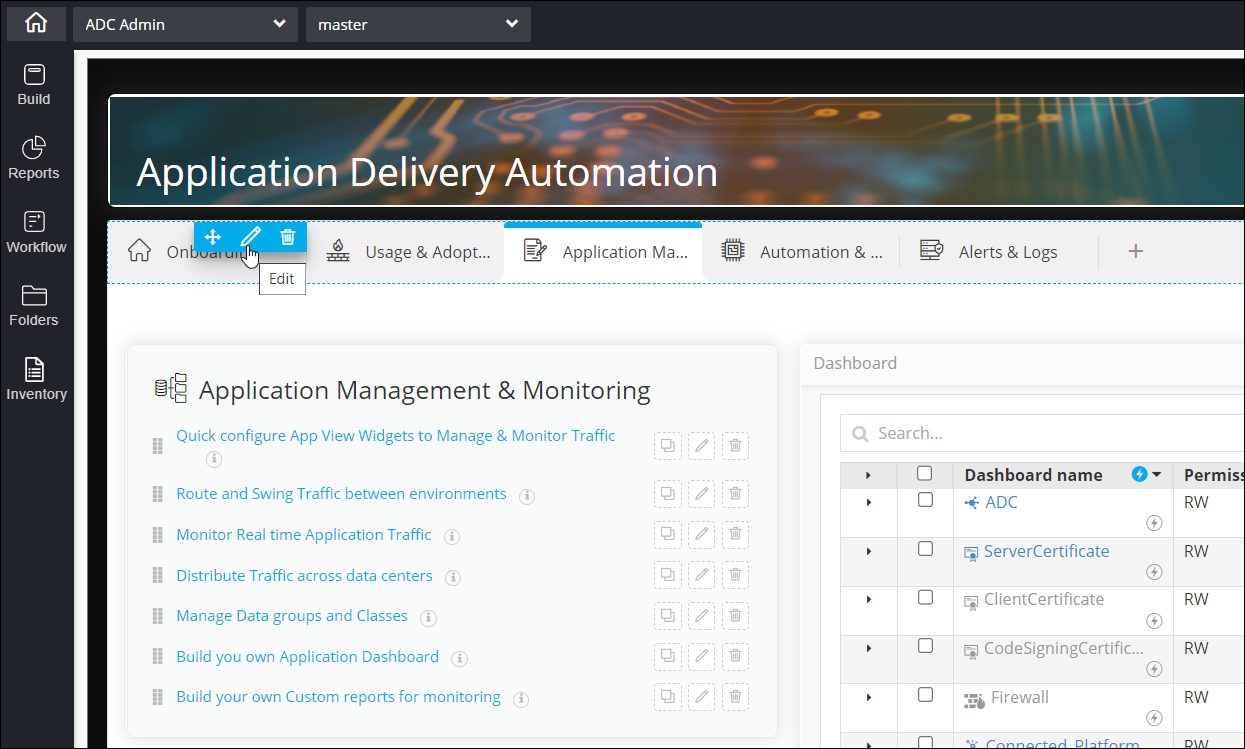 A pop-up window is displayed right below the tab.
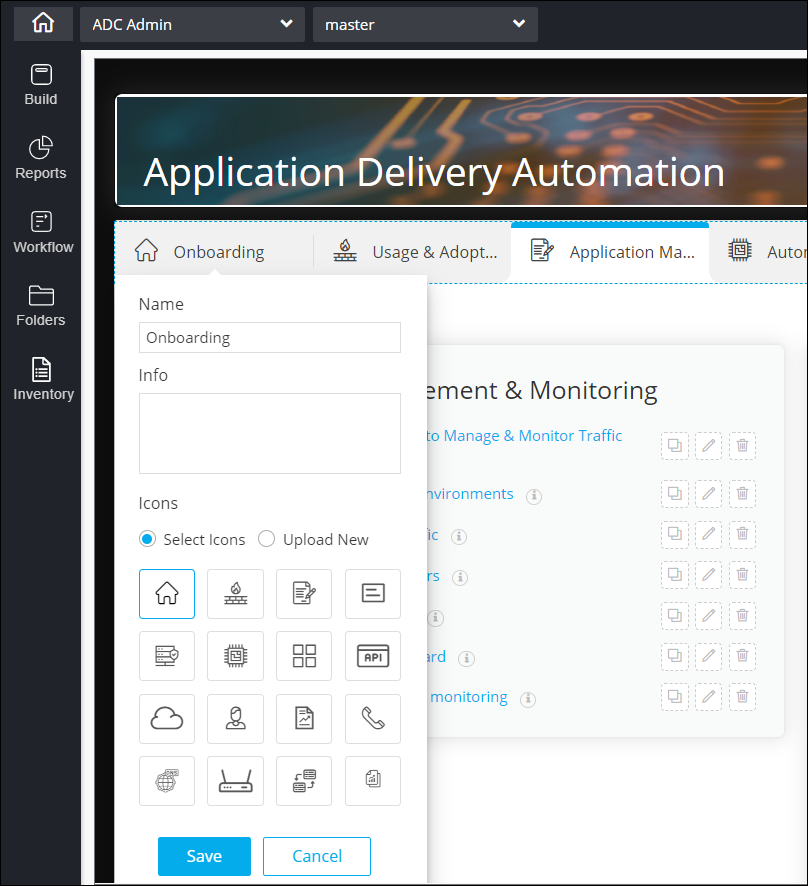
The following options are available here:
- Name - Allows you to change the name of the tab.
- Info - Allows you to add a tool-tip for the tab.
- Icons - Allows you to select an icon for the tab from the options displayed or upload a new icon.
- Click Save.
-
To delete a tab, hover your mouse over the tab and click
 (Delete) icon.
Multi Page with Stepper
-
To switch to the Stepper layout click the (Edit) icon on the
right.
The Layout pop-up is displayed with Properties tab.
-
In the Select Layout Type section, click STEPPER and click Save.
A panel with Step 1 is displayed on the left.Note: Once the STEPPER mode is save, you will not be able to move back to the Tab mode.
-
Click the
(Edit) icon on the panel.
The Stepper pop-up is displayed with Properties tab for the stepper configurations.
-
To change the 'Step 1' label, in the Properties > Stepper
Configurations section, click the arrow icon.
The details screen is displayed.
- Enter the desired name the Name field, and add an appropriate Description in the field given.
- To configure a hook for the footer action, in the Hook type section, click the dropdown to Import or Create New hook.
-
In the Page Link section, the field provided, enter the page link from which
components will be rendered within the stepper.
Note: Pages that are used in the Page Link will not be available in the Build while adding widgets to any of the step pages.
-
To add a new step click + Add and perform steps 4 to 7 to update the step
properties.
Note: The default Step 1 cannot be deleted. Only the added steps can be deleted. A delete option is provided for the added steps.
-
To change the footer action labels, in the Footer action label change field,
click the arrow to expand the details. Enter the new labels in the fields next to
Previous, Next, and Submit.
Note: The footer actions are only visible in the Preview and Publish modes.
-
To add new footer action, in the Add New Footer Action field, click the arrow
to expand the details. Enter the Action Name as desired. In the Redirection
link section, choose Internal or External and enter the URL in the
field provided.
Note: Pages that are used in the Redirection Link will not be available in the Build while adding widgets to any of the step pages.
-
Click Save.
The stepper properties are saved successfully.
- To add widgets/reports to the steps pages, once you have configured the stepper properties, click Build in the grey left panel. Add the widgets and reports as desired.