Upgrade
Note: Ensure that a valid other_user_internal.pem file is
present in the <appviewx installer directory>/scripts
directory of the old installer for the in-place and blue-green deployments, where
the existing setup is live.
-
Create a new folder and place all the upgrade artifacts or downloaded
packages in it.
Note: The AppViewX installation must start from the node that is selected for the primary MongoDB host. For example, the first node specified under the MONGODB_HOST property in the appviewx.conf file.
- SSH to the server in which packages are copied.
- Open the terminal.
-
To extract the contents of the
appviewx_kubernetes_2026.1.0.0.tar.gz file, execute the following
command:
tar -xvf appviewx_kubernetes_2026.1.0.0.tar.gz -
To move the appviewx_kubernetes_addons_2026.1.0.0.tar.gz file
to the appviewx_kubernetes folder, execute the following command:
mv appviewx_kubernetes_addons_2026.1.0.0.tar.gz appviewx_kubernetes/ -
To navigate to the
<InstallerLocation>/appviewx_kubernetes/scripts
directory, execute the following command:
cd <InstallerLocation>/appviewx_kubernetes/scripts
-
To start the upgrade process, use the installer command:
./install.shA welcome screen is displayed with options to Continue with installation or Exit.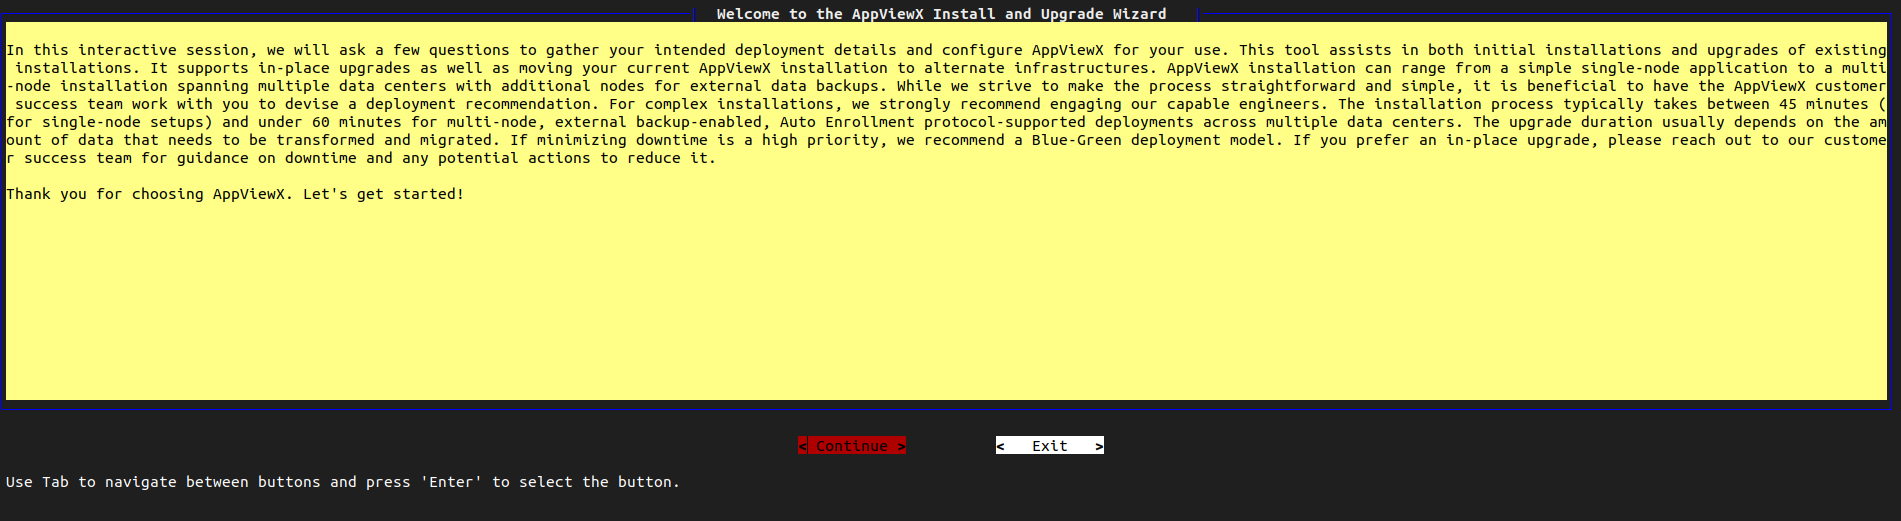
-
Select Continue.
The screen shows the following options:
- 1. Fresh Installation
- 2. Upgrade
- 3. Data Restore
- 4. Collect Logs
- 5. Auto Remediation
- 6. Apply Patch
- 7. Compare Configuration
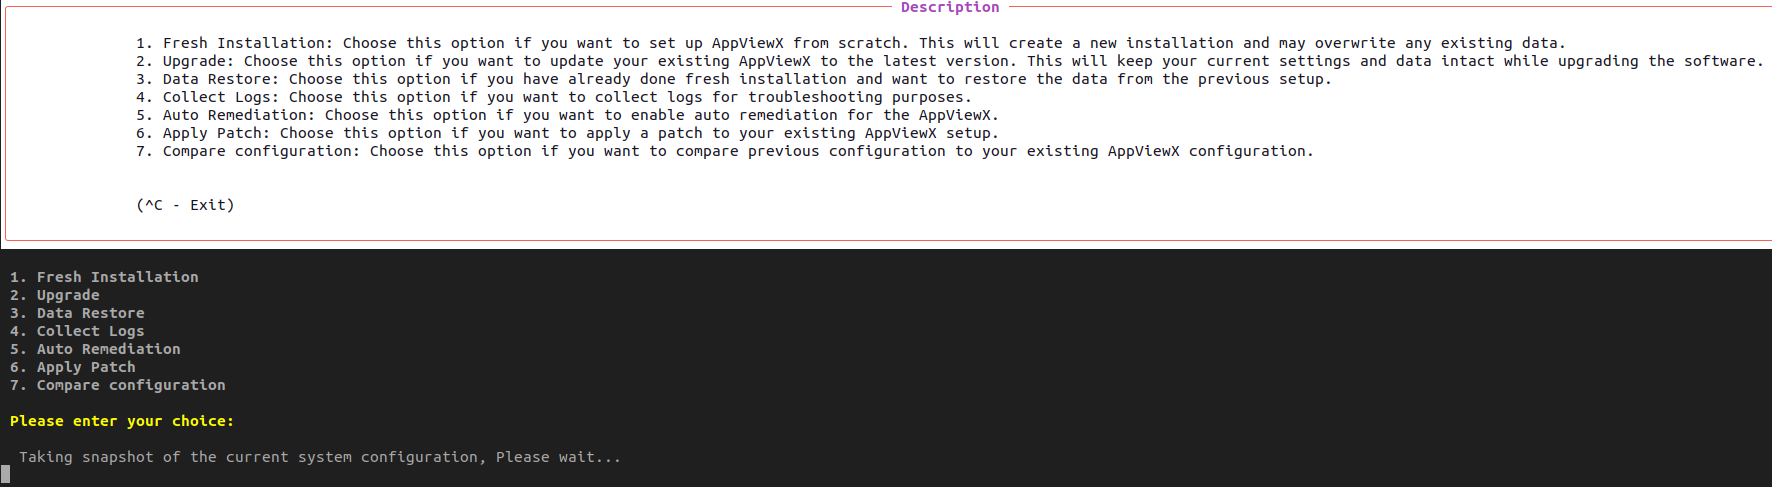
-
To upgrade the AppViewX application, choose option 2.
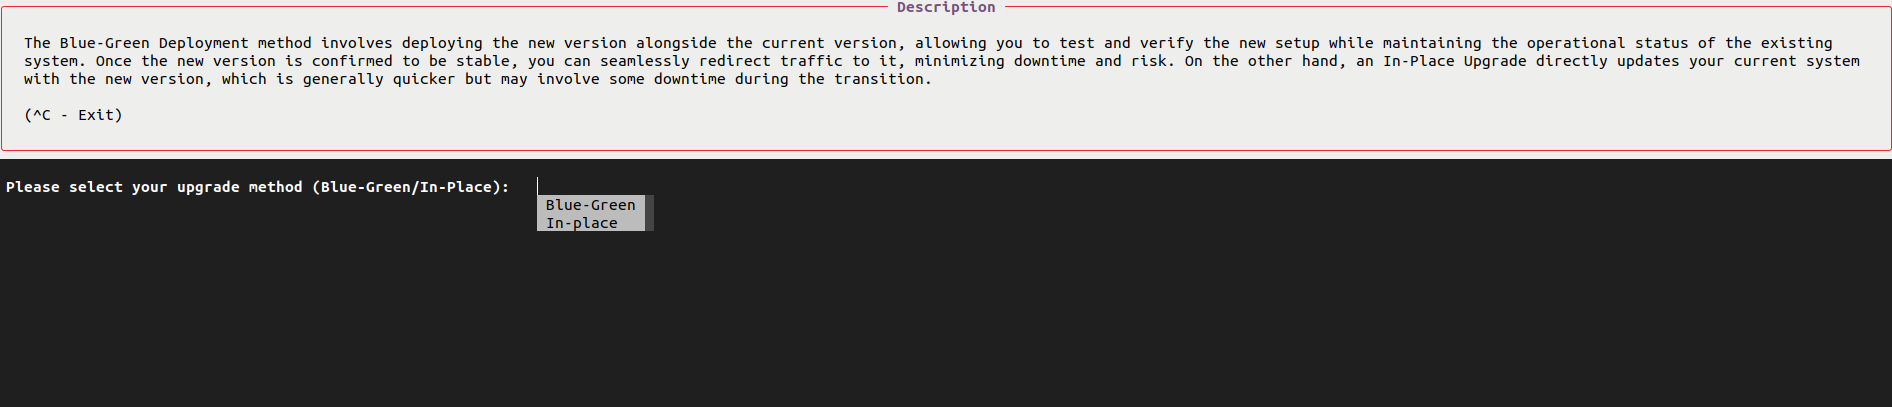
The screen displays a prompt "Please select your upgrade method (Blue-Green/In-Place):"
-
Now, choose between two types: Blue-Green Upgrade and In-Place Upgrade.
Choose the upgrade option based on the current transition type:Note: All prerequisite validations will be carried out during the upgrade, and the
appviewx.conffile can be modified during the interactive question phase.- Blue-Green: If this option is selected, prepare the previous
installer node details, installer path, and decide whether to take new
hot backups or use an existing backup for the migration. There are two
options
- Select Yes if you are retaining the same design, where both the existing and new clusters have an identical number of nodes, to migrate without modifying the configuration.
- Select No to allow the system to automatically generate
the
appviewx.conffile based on the inputs provided.
- In-Place: This option involves downtime, so ensure that the necessary downtime is planned and approved before proceeding with the in-place upgrade. The in-place upgrade retains the existing configuration, but validations will take place during the interactive questions and confirmations. You may add or remove nodes during the interactive questions phase.
- Blue-Green: If this option is selected, prepare the previous
installer node details, installer path, and decide whether to take new
hot backups or use an existing backup for the migration. There are two
options
-
You will be prompted with the following questions:
- Do you have an external Signed certificate for Appviewx Web UI? If you have such a certificate (.p12) for AppViewX Web GUI, please respond with Yes.
- Would you like to enable HSM plugin ? If you have already installed HSM as per the prerequisites, respond with Yes.
-
After the upgrade completes, to clean up the temporary data run the command
below:
source appviewx.conf./appviewx.sh --run-on-all "rm -rf $INSTALLATION_PATH/appviewx_dependencies/seed/*"