Fresh Installation
-
Copy all the downloaded packages to the server.
Note: The AppViewX installation must start from the node that is selected for the primary MongoDB host. For example, the first node specified under the MONGODB_HOST property in the appviewx.conf file.
- SSH to the server in which packages are copied.
- Open the terminal.
-
To extract the contents of the
appviewx_kubernetes_2026.1.0.0.tar.gz file, execute the following
command:
tar -xvf appviewx_kubernetes_2026.1.0.0.tar.gz -
To move the appviewx_kubernetes_addons_2026.1.0.0.tar.gz file
to the appviewx_kubernetes folder, execute the following command:
mv appviewx_kubernetes_addons_2026.1.0.0.tar.gz appviewx_kubernetes/ -
To navigate to the
<InstallerLocation>/appviewx_kubernetes/scripts
directory, execute the following command:
cd <InstallerLocation>/appviewx_kubernetes/scripts
-
To start the installation process, run the command:
./install.shThe following welcome screen is displayed.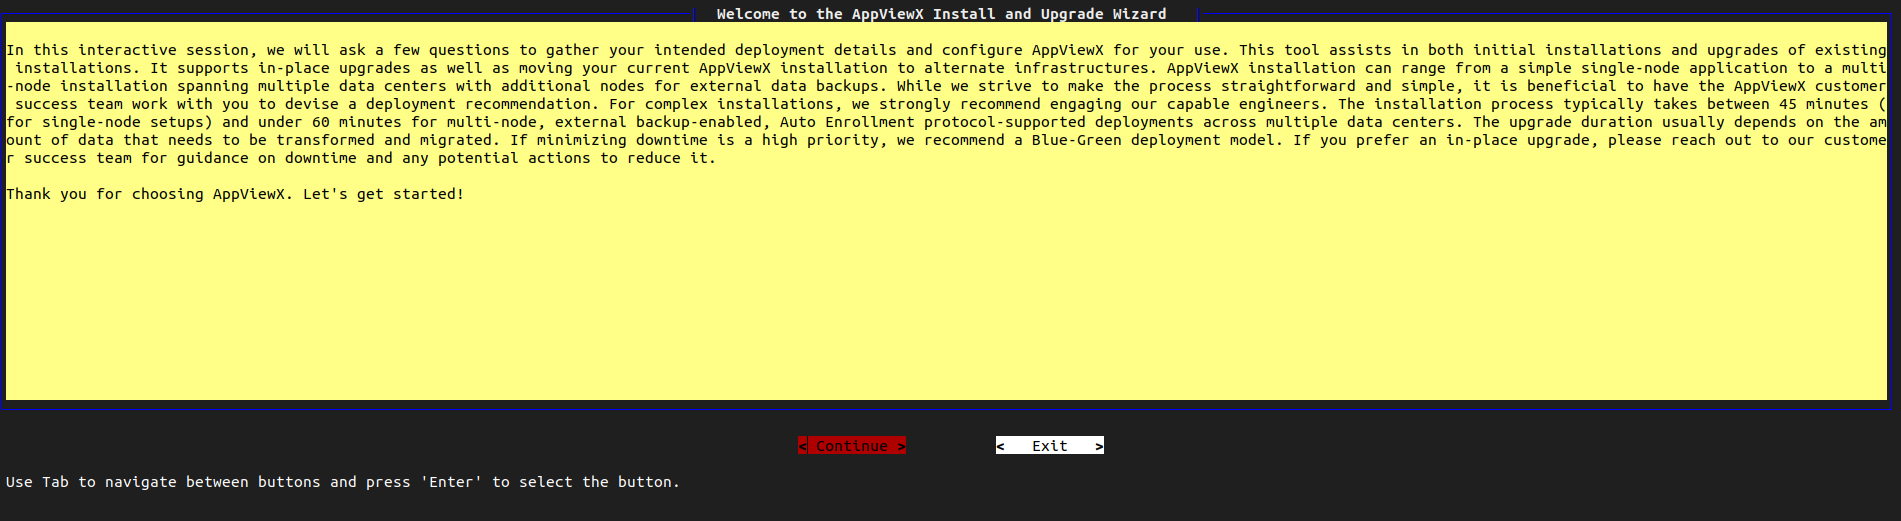
-
Select Continue.
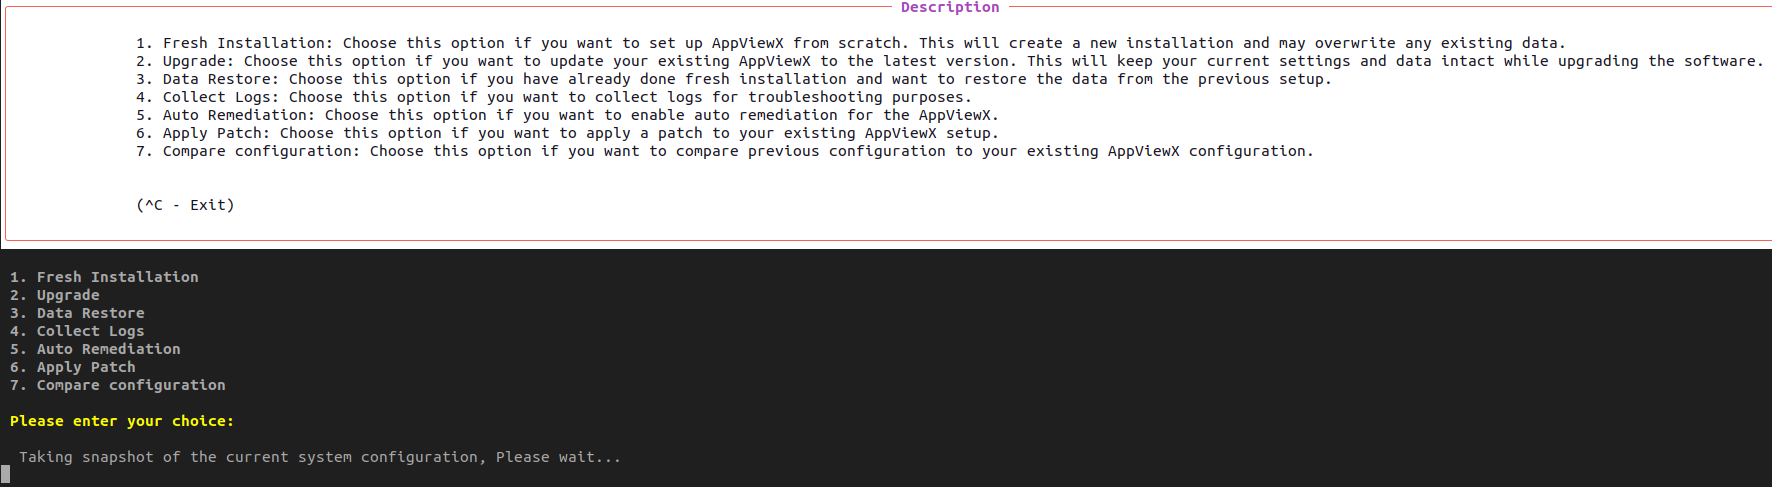
The screen shows the following options:
- 1. Fresh Installation
- 2. Upgrade
- 3. Data Restore
- 4. Collect Logs
- 5. Auto Remediation
- 6. Apply Patch
- 7. Compare Configuration
-
To install the AppViewX application from scratch, Enter 1 (Fresh
Installation).
Note: In case the application is already installed, you will be prompted to uninstall and the proceed with the installation.

-
Follow the interactive steps provided by the Terminal UI to configure the
settings for generating the appviewx.conf file.
 Note: If an appviewx.conf file already exists, you will be prompted to continue with the existing file. However, validations will occur for each configuration step.
 -
You will be prompted with the following questions:
- Do you have an external Signed certificate for Appviewx Web UI? If you have such a certificate (.p12) for AppViewX Web GUI, please respond with Yes.
- Would you like to enable HSM plugin ? If you have already installed HSM as per the prerequisites, respond with Yes.
- Ensure all required inputs are provided, and the system will automatically generate the configuration file, ready for use.
-
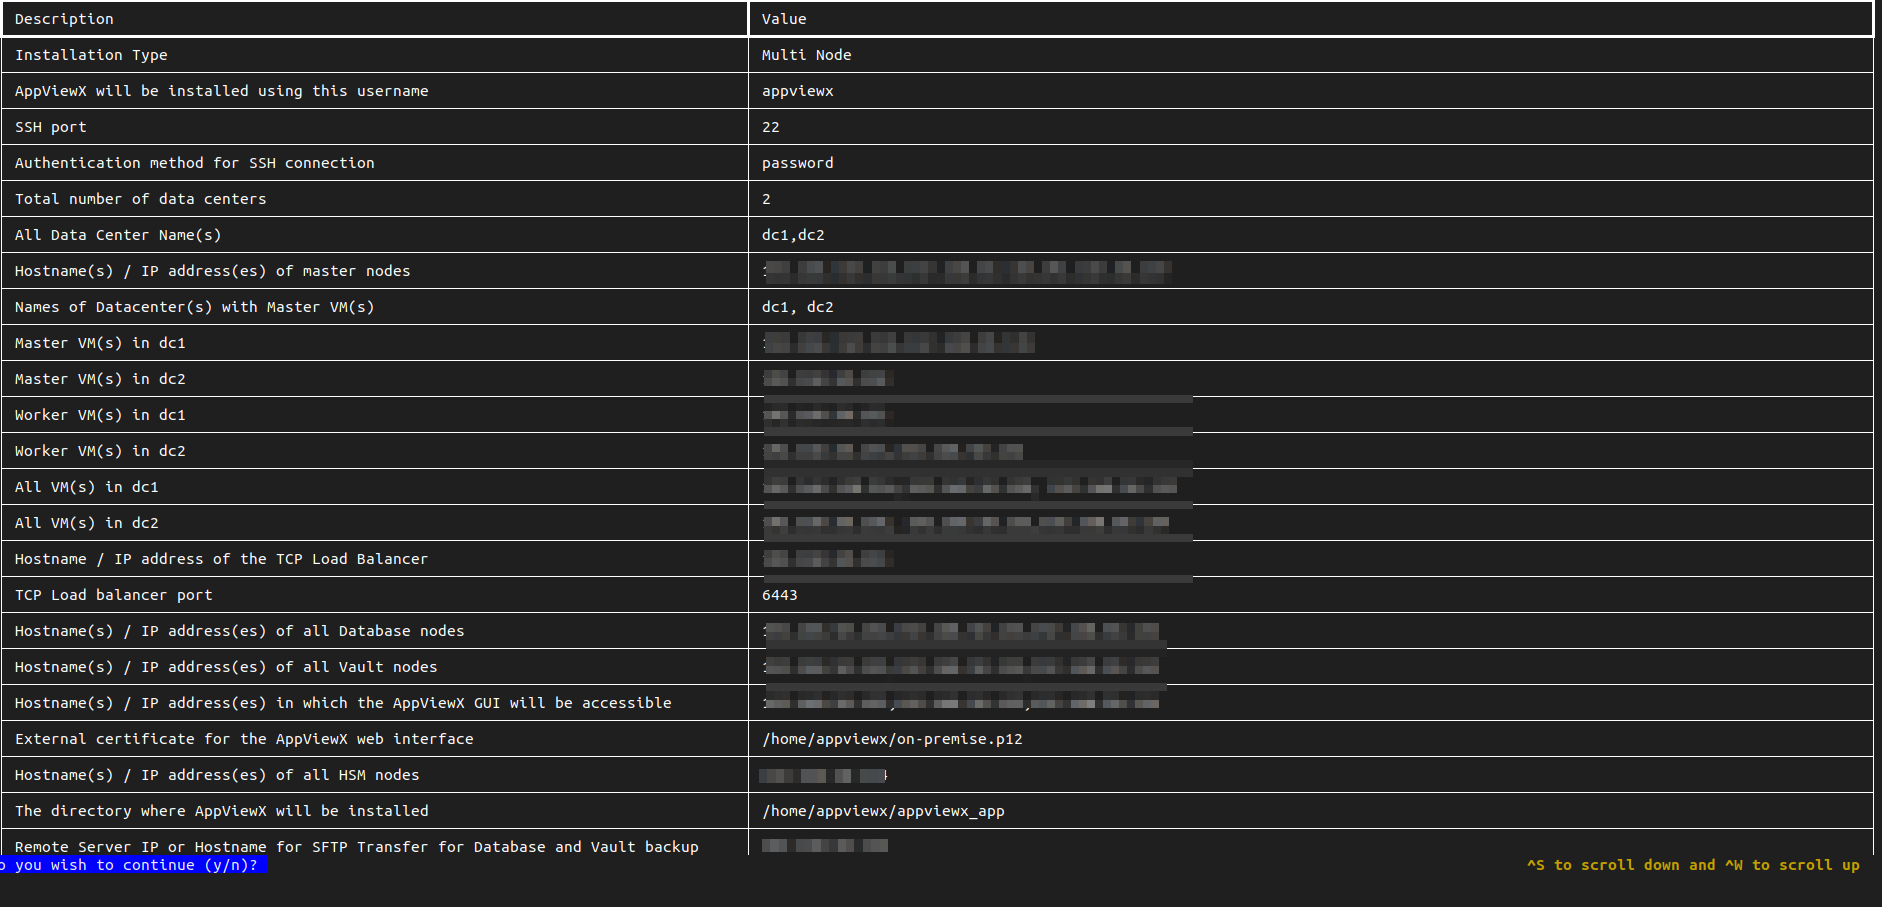
Once all the questions are answered, you will be prompted with a final table
displaying the provided details. Review the information carefully, and type
'y' to proceed with the prerequisites validation.
-
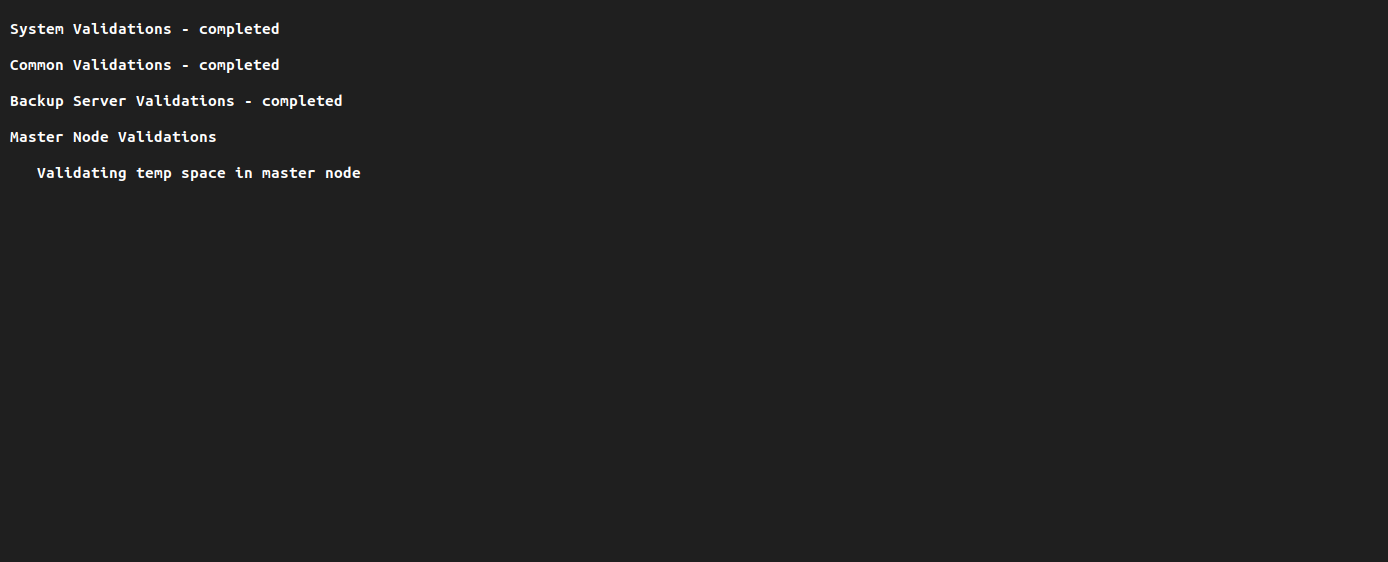
Prerequisites validation - The prerequisites validation will be
performed based on the information provided.
-
Configuring Prerequisites - If any prerequisites are missing, the
Prerequisite Configure option allows the installer to automatically install or
configure the necessary packages. Press ‘y’ to continue with the
configuration.
 Note: Installing these prerequisite packages requires internet access or proxy access to download and install the missing packages.
 -
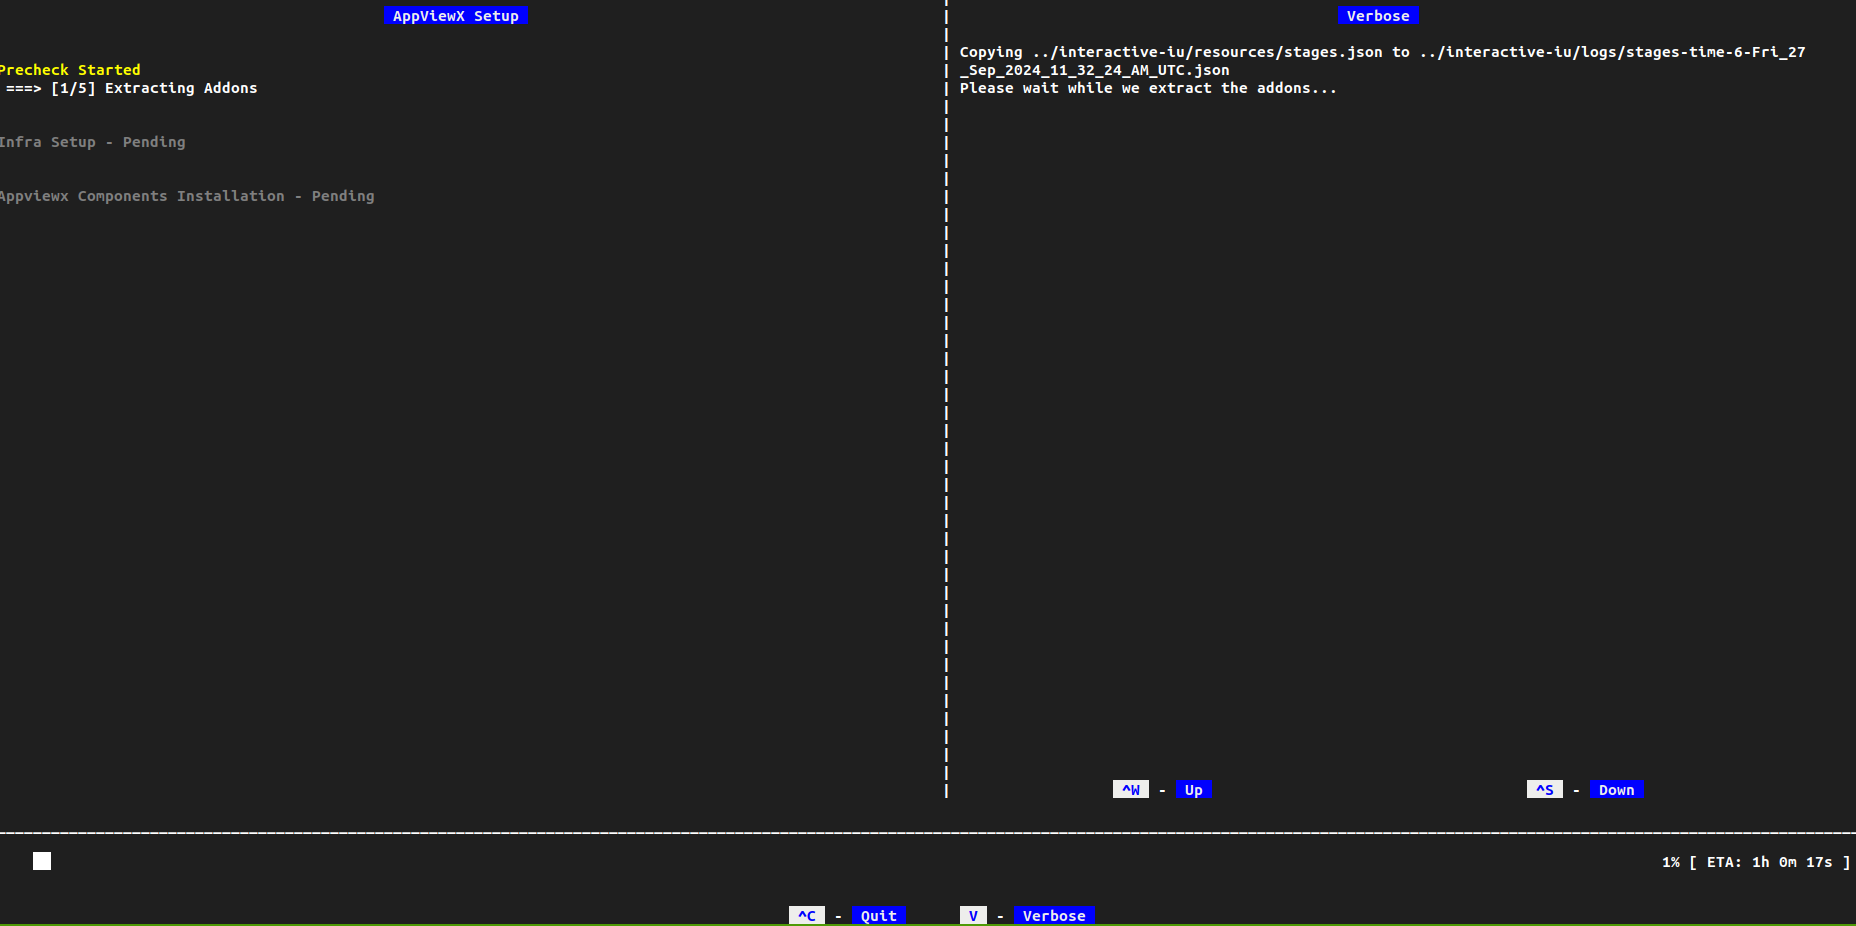
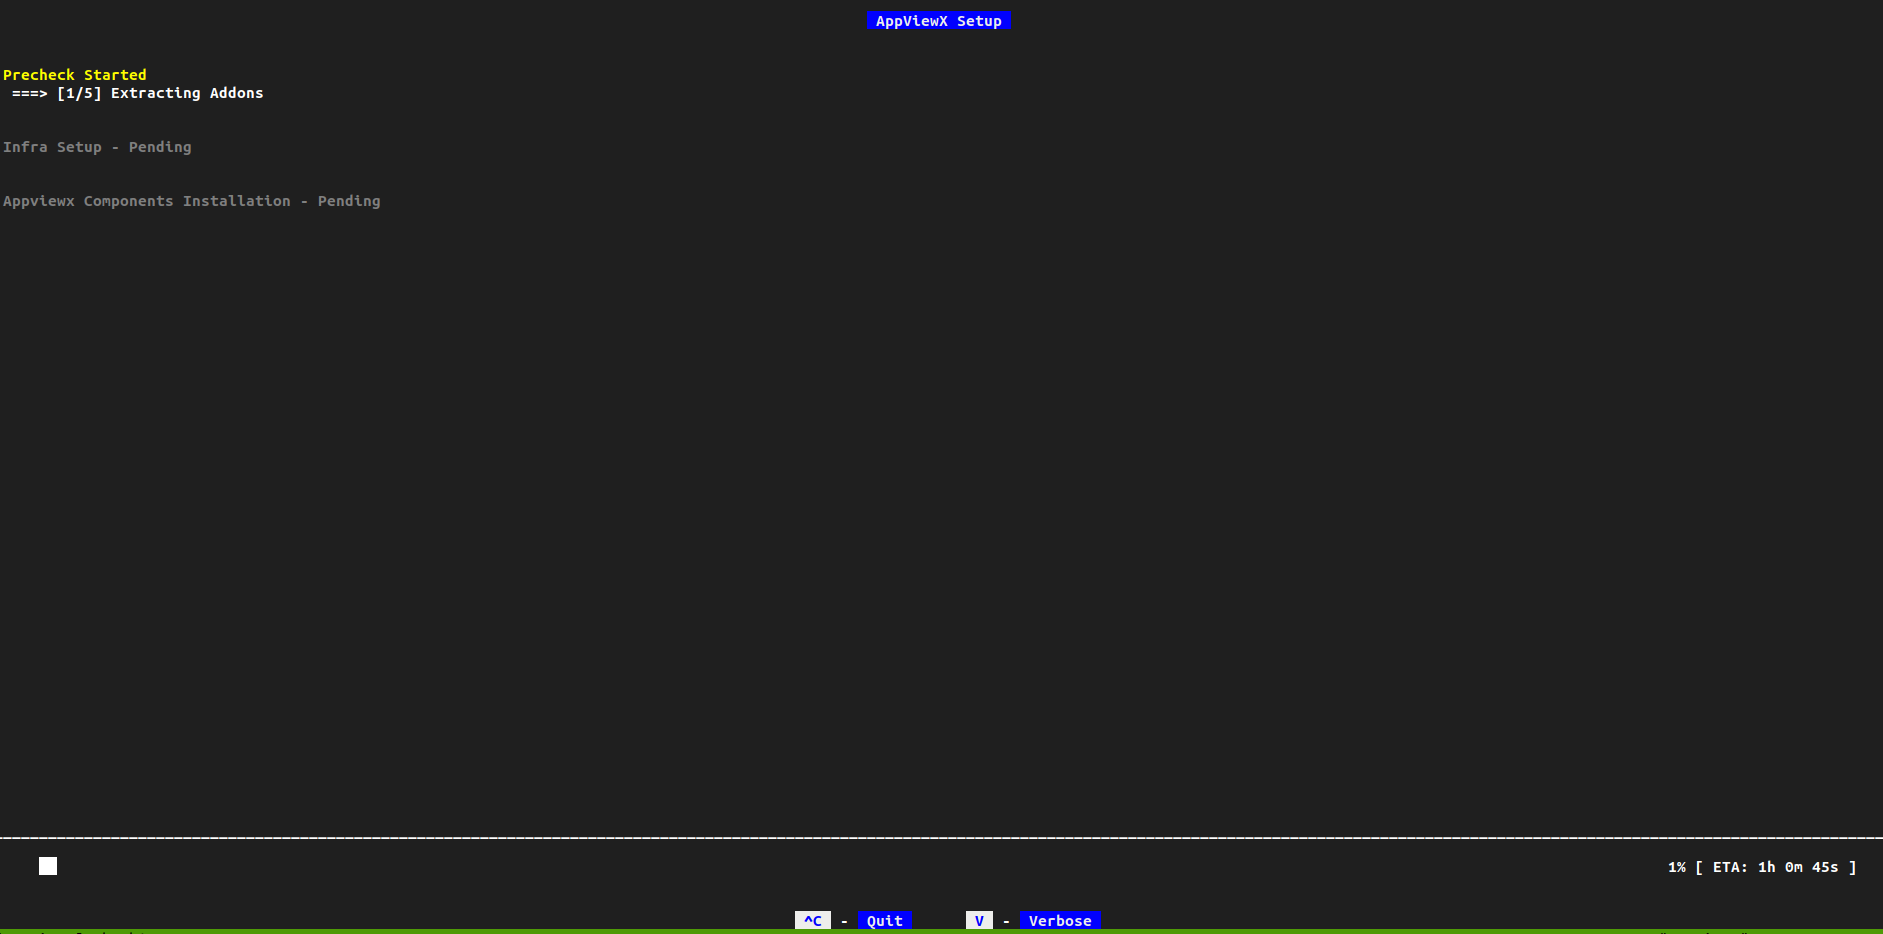
Once all the prerequisites are validated, the AppViewX installation will be
triggered.
-
To view the verbose logs, press ‘v.’