Configuring Alerts
ACF permissions for New users to view Alerts
- All - Allows the user to view all alerts for the product line, including other users' actions. Recommended for admins or users needing full visibility
- Group - Allows the user to view only alerts from their own user group. Used to restrict visibility to group-specific alerts only.
- Self - Allows the user to view only their own activity alerts for maximum privacy
Configuring Certificate Alerts
- Certificates need to be validated
- Certificates are set to expire
- Certificates cannot be synchronized.
To configure certificate alerts:
-
To access the navigation pane, in the top-left corner of the screen, hover
the mouse pointer over the
 (Menu) icon.
-
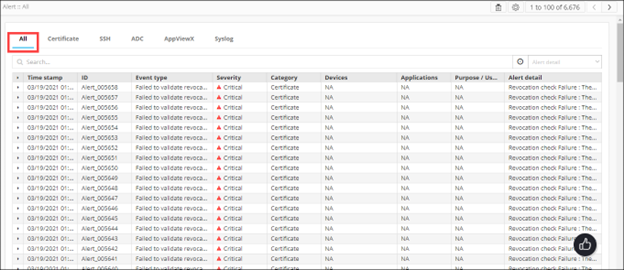
From the menu displayed, click Alert.
The Alert :: All page is displayed (by default).
-
From the top-right corner of the screen, click
 (Settings) icon.
-
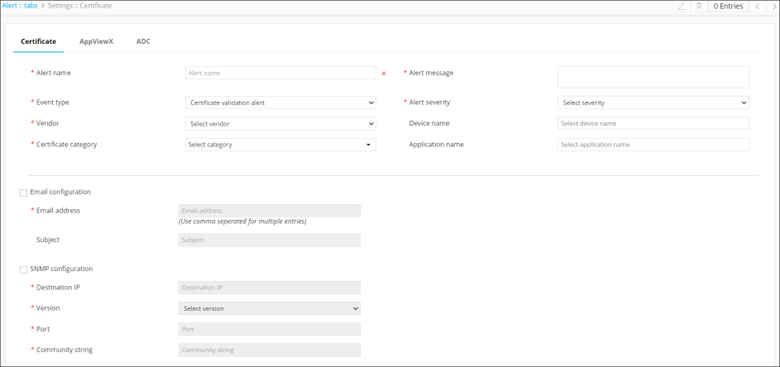
The Settings :: Certificate page is displayed, with the
Certificate tab open by default.
-
To configure certificate alerts, enter the following details:
Table 1. Field descriptions for Certificate Alerts Field Description *Alert name Enter the name you want to give this alert. *Alert message Enter the message that will be displayed with the alert, to describe the alert. The alert message cannot be longer than 64 words. This field is not displayed when configuring the certificate expiry alert.
*Event type From the drop-down menu, select the event type that will trigger this alert from the following options: - Certificate validation alert (default)
- Certificate expiry alert
- Certificate sync alert.
*Alert severity From the drop-down menu, select a severity for the alert from the following options: - Critical
- Major
- Notification.
Vendor From the drop-down menu, select the vendor name for whose device/application you are creating the alert. This field is not displayed when configuring the certificate expiry alert.
Device name Enter the name of the device associated with the certificate you are creating the alert for. This field is not displayed when configuring the certificate expiry alert.
*Certificate category From the drop-down menu, select a certificate category from the following options: - Server
- Client
- Device
- Code Signing.
*Expires in (days) Enter the number of days till the certificate expires. This field is displayed only when configuring certificate expiry alerts.
Email configuration To send the certificate alert as an email, select this check box. *Email address To send the certificate alert as an email, enter the email address to which this specific certificate alert will be sent. Note: Separate multiple email addresses with a comma.Subject To send the certificate alert as an email, enter a subject line. SNMP configuration To use the Simple Network Management Protocol for sending the alert, select this check box. *Destination IP Enter the destination IP address for the alert. *Version From the drop-down menu, from the following options, select the SNMP version to be used: - V1
- V2.
*Port Enter the port number to be used for the alert. *Community string Enter the community string for the alert. The community string is similar to a user ID or password that allows users access to the requested information on the device.
* : Mandatory fields -
To save the certificate alerts configuration details, click Add.
The saved details are displayed in the table shown at the bottom of the screen.
Configuring Syslog Alerts
To configure syslog alerts:
-
On the Alert :: All page, from the top-right corner of the screen,
click
(Settings) icon.
The Settings :: Certificate page is displayed with the Certificate tab open by default.
-
To configure Syslog alerts, click Syslog.
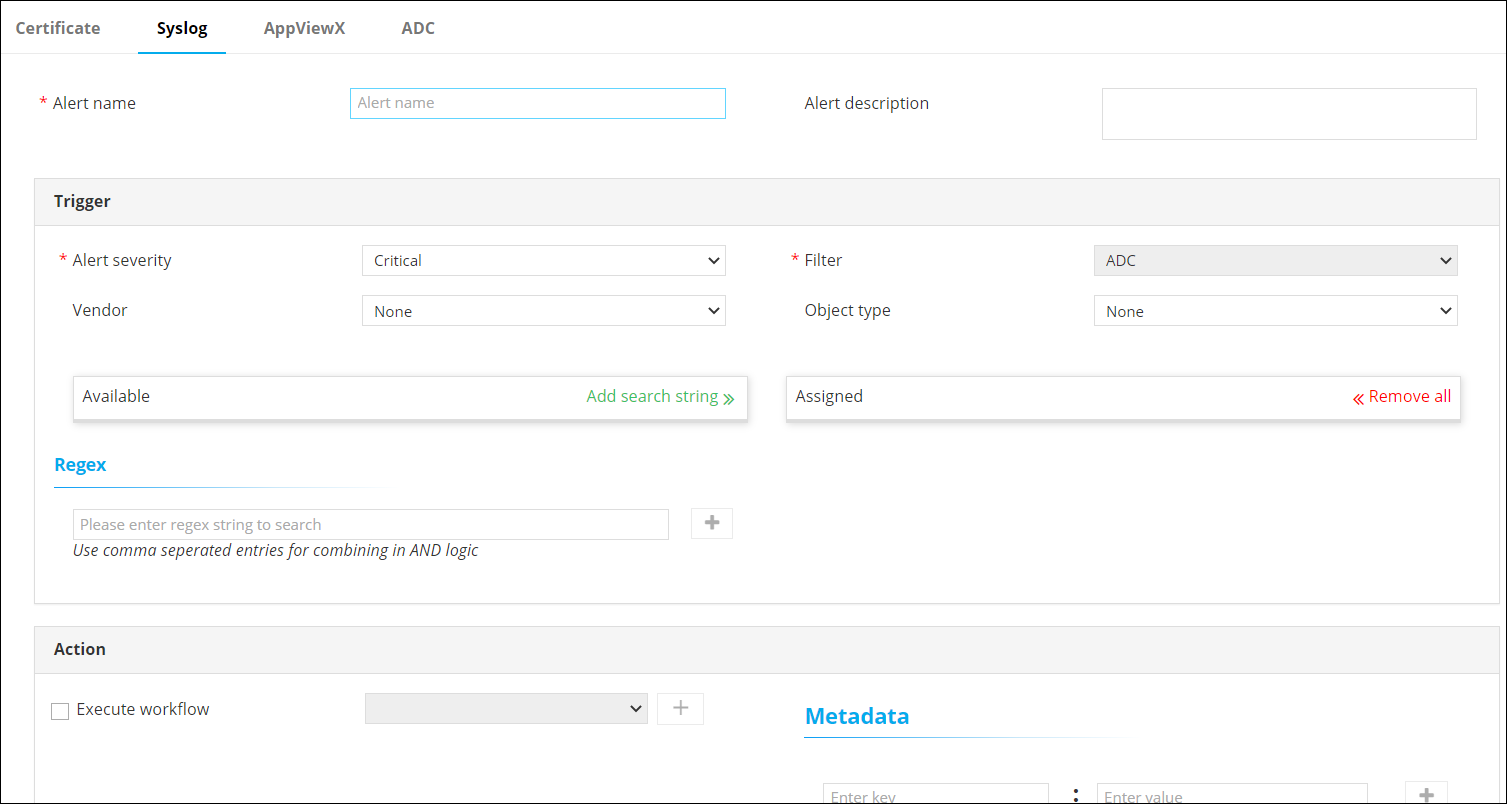
The Settings :: Syslog page is displayed.
-
Enter the following details:
Table 2. Field descriptions for Syslog Field Description *Alert name Enter the name you want to give this alert. Alert description Enter a description for the alert. * : Mandatory fields -
In the Trigger section, enter the following details:
Table 3. Field descriptions for Trigger Field Description *Alert severity From the drop-down, from the options given below, select a severity for the alert: - Critical
- Fatal
- Major
- Minor
- Notification.
Filter For syslog alerts, the filter is set to ADC, because syslog alerts are parsed only through ADC devices. Vendor ADC module vendor (A10, Citrix, or F5) Object type Object type for ADC (FQDN, Service IP, VirtualService, ServiceGroup, Server, VirtualServer, or Device) Available Depending on the Object type and Vendor selected, a list of all available ADC objects or devices is displayed here. Add search string Instead of adding devices manually, AppViewX lets you automatically assign all existing devices or objects that match your criteria. To do this:
- In the Available section, in the Search field, enter the search criteria.
- Click Add search string.
Note: The benefit of using a search string rather than selecting devices manually is that the search string continues to work in the background and auto-assigns all new devices that match the search criteria.Assigned To add an object to the Assigned column, click the check box corresponding to that object. Regex Enter single/multiple regex patterns/strings. Note: When entering multiple regex patterns/strings, separate the regex strings using commas. The comma works as the BOOLEAN AND operator.* : Mandatory fields -
In the Action section, enter the following details:
Table 4. Field descriptions for Action Field Description Execute workflow To select the workflow to trigger: - Select the Execute workflow check box.
- From the drop-down menu, select the workflow to trigger.
Metadata AppViewX lets you define a metadata condition based on which the workflow will be triggered. To define a metadata key-value pair for this condition: - In the Enter key field, enter the key.
- In the Enter value field, enter the key value.
To add another key-value pair:- Click
 (Add) icon.
 - In the Enter key field, enter the key.
- In the Enter value field, enter the key value.
To delete a key-value pair: For the key-value pair you want to delete, click
 (Delete) icon.
 - To send the Syslog alert as an email, execute the steps for configuring SMTP for email alerting.
-
Enter the following details:
Table 5. Field descriptions for SMTP email alerting Field Description Email configuration To send the syslog alert as an email, select this check box. Email configuration To send the syslog alert as an email, enter the email address to which this specific syslog alert will be sent. Note: Separate multiple email addresses with a comma.Email configuration To send the syslog alert as an email, enter a subject line. * : Mandatory fields -
To use the Simple Network Management Protocol (SNMP) to send the alert,
enter the following details:
Table 6. Field descriptions for Simple Network Management Protocol Field Description SNMP configuration To use the Simple Network Management Protocol for sending the alert, select this check box. *Destination IP Enter the destination IP address for the alert. *Version From the drop-down menu, from the following options, select the SNMP version to be used: - V1
- V2.
*Port Enter the port number to be used for the alert. *Community string Enter the community string for the alert. The community string is similar to a user ID or password that allows users access to the requested information on the device.
* : Mandatory fields -
To save the Syslog alerts configuration details, click Add.
The saved details are displayed in the table shown at the bottom of the screen.
Configuring AppViewX Alerts
-
On the Alert :: All page, from the top-right corner of the screen,
click (Settings) icon.
The Settings :: Certificate page is displayed with the Certificate tab open by default.
-
To configure AppViewX alerts, click AppViewX.
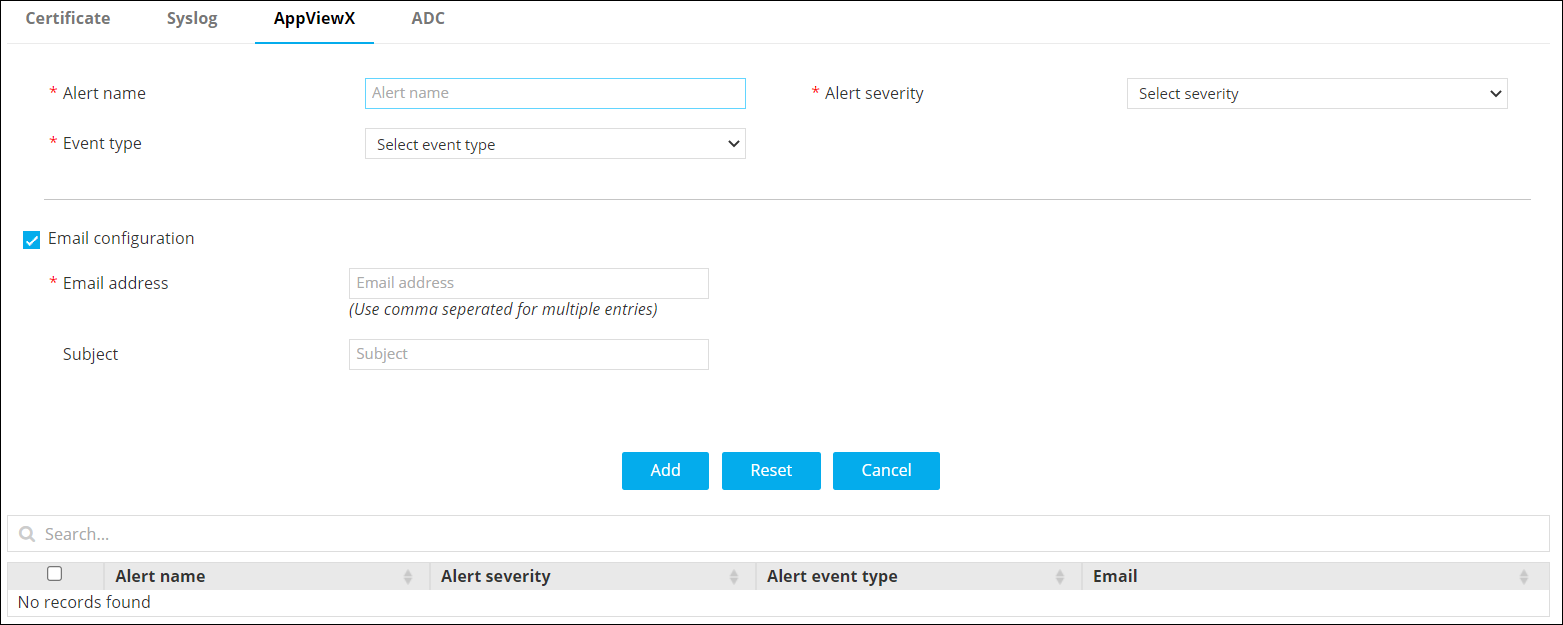
The Settings :: AppViewX page is displayed.
-
Enter the following details:
Table 7. Field descriptions for AppViewX Alerts Field Description *Alert name Enter the name you want to give this alert. *Alert severity From the drop-down menu, select a severity for the alert from the following options: - Critical
- Fatal
- Major
- Minor
- Notification.
*Event type From the drop-down menu, from the following options, select the event type that will trigger this alert: - Infrastructure
- Application Discovery.
Email configuration To send the certificate alert as an email, select this check box. Note: For AppViewX alerts, this feature is enabled by default.*Email address To send the certificate alert as an email, enter the email address to which this specific certificate alert will be sent. Note: Separate multiple email addresses with a comma.Subject To send the certificate alert as an email, enter a subject line. * : Mandatory fields -
To save the alert to the AppViewX system, click Add.
The saved details are displayed in the table shown at the bottom of the screen.
Configuring ADC Alerts
-
On the Alert :: All page, from the top-right corner of the screen,
click
(Settings) icon.
The Settings :: Certificate page is displayed with the Certificate tab open by default.
-
To configure ADC alerts, click ADC.
The Settings :: ADC page is displayed.
-
Enter the following details:
Table 8. Field descriptions for ADC alerts Field Description *Alert name Enter the name you want to give this alert. *Alert message Enter the message that will be displayed with this alert. * : Mandatory fields -
In the Trigger section, enter the following details:
Table 9. Field descriptions for Trigger Field Description *Alert category From the drop-down menu, select one of the following alert categories: - Threshold alert
- Application alert
- Device alert.
*Alert severity From the drop-down, from the options given below, select a severity for the alert: - Critical
- Fatal
- Major
- Minor
- Notification.
Vendor From the drop-down menu, select the vendor whose device or devices you want to set an alert for. Object type From the drop-down menu, select the vendor object that you want to set an alert for. The contents of this field will vary depending on the vendor selected.
Detail contains This field is applicable only for the Device Alert category. Available Depending on the Object type and Vendor selected, a list of all available ADC objects or devices is displayed here. To add an object/device to the alert, click
 for that
object/device.
for that
object/device.Add search string Instead of adding devices manually, AppViewX lets you automatically assign all existing devices or objects that match your criteria. To do this:
- In the Available section, in the Search field, enter the search criteria.
- Click Add search string.
Note: The benefit of using a search string rather than selecting devices manually is that the search string continues to work in the background and auto-assigns all new devices that match the search criteria.Assigned To add an object to the Assigned column, click the check box corresponding to that object. -
In the Alert condition section, enter the following details:
Table 10. Field descriptions for Alert condition Field Description *Alert interval From the drop-down menu, from the following options, select how often you want the system to check for breaches of the threshold levels that you are about to define: - 10 seconds
- 20 seconds
- 30 seconds
- 40 seconds
- 50 seconds
- 60 seconds.
*Cool off period From the drop-down menu, from the following options, select how much time the system should wait before sending another alert about a continuing threshold breach: - 10 minutes
- 20 minutes
- 30 minutes.
* : Mandatory fields Note: This section is applicable only for the Threshold Alert category. -
In the Statistics section, define the conditions that will generate
an alert by selecting values in the Statistics, Operator, and Value fields.
- To add more than one Statistics conditions, click
 (Add) icon.
 - To delete a condition, click
 (Delete) icon.
- To add more than one Statistics conditions, click
- In the Action section, to send the syslog alert as an email, execute the steps for configuring SMTP for email alerting.
-
Enter the following details:
Table 11. Field descriptions for Action Field Description Email configuration To send the syslog alert as an email, select this check box. *Email address To send the syslog alert as an email, enter the email address to which this specific syslog alert will be sent. Note: Separate multiple email addresses with a comma.Subject To send the syslog alert as an email, enter a subject line. * : Mandatory fields -
To use the Simple Network Management Protocol (SNMP) to send the alert,
enter the following details:
Table 12. Field descriptions for Simple Network Management Protocol Field Description SNMP configuration To use the Simple Network Management Protocol for sending the alert, select this check box. *Destination IP Enter the destination IP address for the alert. *Version From the drop-down menu, from the following options, select the SNMP version to be used: - V1
- V2
*Port Enter the port number to be used for the alert. *Community string Enter the community string for the alert. The community string is similar to a user ID or password that allows users access to the requested information on the device. * : Mandatory fields -
To save the ADC alert configure above, click Add.
The saved details are displayed in the table shown at the bottom of the screen.
Editing Alerts
- Go to the Alert :: All page and select the relevant tab for the alert you want to edit.
- Scroll to the bottom of the page for the table that records all the alerts that have been configured for that category.
- From the table, to select the alert you want to edit, select the check box corresponding to that alert.
-
From the top-right corner of the screen, click
 (Edit) icon.
- The fields are populated with the details of the alert.
- Update the required fields and click Update.
Deleting Alerts
- Go to the Alert :: All page and select the relevant tab for the alert you want to delete.
- Scroll to the bottom of the page for the table that records all the alerts that have been configured for that category.
- From the table, to select the alert you want to delete, select the check box corresponding to that alert.
-
From the top-right corner of the screen, click
 (Delete) icon.
- In the Confirmation dialog box, click Yes.
Searching for Alerts
- Based on a timestamp
- Based on the values recorded for each alert.
Based on a Timestamp
-
From the Search field on the Alert page, click
 (Clock) icon.
Widgets to select the date and time are displayed.
(Clock) icon.
Widgets to select the date and time are displayed.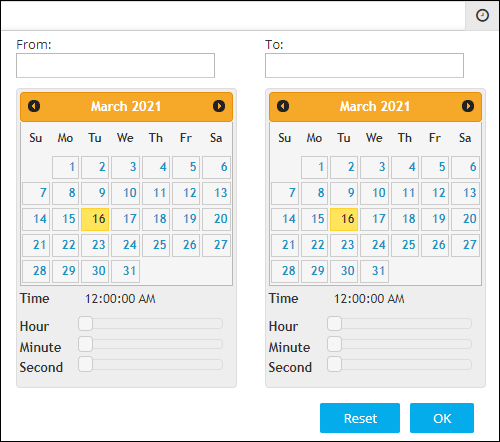
- To select a date range, in the From and To fields, select the required dates.
- To set a time, use the Hour, Minute, and Second slider controls.
- Click OK.
-
The page is updated to display alerts from the selected timestamp.
Note: To view alerts from a specific date to the current date, select only the From date. When the To field is left blank, by default, it is set to the current date.
Based on the Values Recorded for each Alert
-
From the drop-down menu in the Search field, select the category
for searching alerts. For example, to search for alerts with a specific
alert ID, from the drop-down menu, select Alert ID.
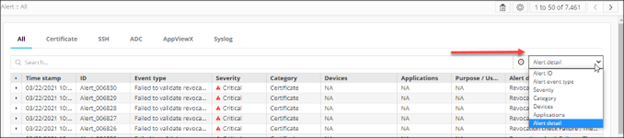
-
In the Search field , enter the search value. For our example,
in the Search field, enter the required alert ID.
The page is updated to display alerts that fulfil the search criteria.