Regenerating Certificates
Regenerating a Server Certificate
-
Go to
 (Menu) > CERT+ > CERTIFICATE
INVENTORY > Server.
The Server Certificate page is displayed.
(Menu) > CERT+ > CERTIFICATE
INVENTORY > Server.
The Server Certificate page is displayed. -
To regenerate a certificate,under Common Name, select the required
certificate name.
The certificate topology view for the selected certificate is displayed.
-
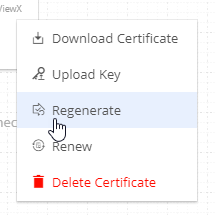
From the
 (More) menu for the
certificate, click Regenerate.
The Server Certificate > Regenerate page is displayed.
(More) menu for the
certificate, click Regenerate.
The Server Certificate > Regenerate page is displayed. -
On the Server Certificate > Regenerate page, modify the required
details in the General Information, CA Details, CSR
Parameters, Attachments, Generic Fields,
Vendor-Specific Details, and Custom Attributes
sections.
Note: For field descriptions, you can refer to the instructions for enrolling a server certificate.
-
Click Regenerate.
The regenerate process is initiated.
-
On the certificate topology view, click Approve to
proceed.
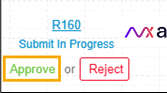
- In the Approve dialog box, enter your Comments.
- Click Yes.
-
If the workflow request has to be approved automatically in the future,
click Schedule later.
- Select the Implementation Time from the calendar field.
- Enter the comments in the field.
- Click Yes.
The approval process is initiated. - On the certificate topology view, click the Implement button to proceed.
- In the Implement dialog box, enter your Comments.
- Click Yes.
-
If the workflow request has to be approved automatically in the future,
click Schedule later.
- Select the Implementation Time from the calendar field.
- Enter the comments in the field.
- Click Yes.
After the certificate regeneration is complete, the status updates to Completed.Note: When generating a new private key on an endpoint, existing keys (including .txt encrypted key files) are not overwritten immediately.Once the certificate is regenerated, AppViewX compares the Extended Key Usage (EKU) and Key Usage (KU) fields between the parent and the regenerated certificates. If a difference is detected, you will be notified via alerts and emails across mediums within the product. Detailed documentation for this is covered in the section Updating the EKU/KU Metrics for Regenerated Certificates.- For non–password-protected certificate types (PEM-.crt, PEM-.cer, PEM-.pem, DER-.der, DER-.cer, PKCS7-.p7b, PKCS7-.p7c), the .txt file is decrypted into the original key filename (keyfile.key) during the push. If a key with the same name already exists, it will be replaced.
- For password-protected certificate types (Default
JKS-.jks, JKS-.keystore, PKCS12-.p12, PKCS12-.pfx):
- During the push , the encrypted .txt file is decrypted into a temporary, timestamped key file (keyfile_.key).
- This decrypted key is then combined with the certificate
to create the final bundled output (e.g.,
.pfx,.jks). - After bundling, the temporary timestamped key file is deleted; Because the decrypted key file is temporary and timestamped, no key replacement occurs, and no existing key files are overwritten.
This is currently applicable for:- Linux vendors - Generic Linux, Apache Linux, Tomcat Linux, and Nginx Linux.
- Windows vendors - Windows Apache, Windows Tomcat, and Microsoft SQL.
Regenerating a Client Certificate
-
Go to (Menu) > CERT+ > CERTIFICATE
INVENTORY > Client.
The Client Certificate page is displayed.
-
To regenerate a certificate,under Common Name, select the required
certificate name.
The certificate topology view for the selected certificate is displayed.
-
From the (More) menu for the
certificate, click Regenerate.
The Client Certificate > Regenerate page is displayed.
-
On the Client Certificate > Regenerate page, modify the required
details in the General Information, CA Details, CSR
Parameters, Attachments, Generic Fields,
Vendor-Specific Details, and Custom Attributes
sections.
Note: For instructions on entering inputs in the above sections, click here.
-
Click Regenerate.
The regenerate process is initiated.
-
On the certificate topology view, click Approve to
proceed.
- In the Approve dialog box, enter your Comments.
- Click Yes.
-
If the workflow request has to be approved automatically in the future,
click Schedule later.
- Select the Implementation Time from the calendar field.
- Enter the comments in the field.
- Click Yes.
The approval process is initiated. - On the certificate topology view, click the Implement button to proceed.
- In the Implement dialog box, enter your Comments.
- Click Yes.
-
If the workflow request has to be approved automatically in the future,
click Schedule later.
- Select the Implementation Time from the calendar field.
- Enter the comments in the field.
- Click Yes.
After the certificate regeneration is complete, the status updates to Completed.Once the certificate is regenerated, AppViewX compares the Extended Key Usage (EKU) and Key Usage (KU) fields between the parent and the regenerated certificates. If a difference is detected, you will be notified via alerts and emails across mediums within the product. Detailed documentation for this is covered in the section Updating the EKU/KU Metrics for Regenerated Certificates.
Regenerating a Code Signing Certificate
-
Go to (Menu) > CERT+ > CERTIFICATE
INVENTORY > Code Signing Certificate.
The Code Signing Certificate page is displayed.
-
To regenerate a certificate, under Common Name, select the required
certificate name.
The certificate topology view for the selected certificate is displayed.
-
From the (More) menu for the
certificate, click Regenerate.
 The Code Signing Certificate > Regenerate page is displayed.
 -
On the Code Signing Certificate > Regenerate page, modify the
required details in the General Information, CA Details,
CSR Parameters, Attachments, Generic Fields,
Vendor-Specific Details, and Custom Attributes
sections.
Note: For instructions on entering inputs in the above sections, click here.
-
Click Regenerate.
The regenerate process is initiated.
-
On the certificate topology view, click Approve to
proceed.
- In the Approve dialog box, enter your Comments.
- Click Yes.
-
If the workflow request has to be approved automatically in the future,
click Schedule later.
- Select the Implementation Time from the calendar field.
- Enter the comments in the field.
- Click Yes.
The approval process is initiated. - On the certificate topology view, click the Implement button to proceed.
- In the Implement dialog box, enter your Comments.
- Click Yes.
-
If the workflow request has to be approved automatically in the future,
click Schedule later.
- Select the Implementation Time from the calendar field.
- Enter the comments in the field.
- Click Yes.
After the certificate regeneration is complete, the status updates to Completed.Once the certificate is regenerated, AppViewX compares the Extended Key Usage (EKU) and Key Usage (KU) fields between the parent and the regenerated certificates. If a difference is detected, you will be notified via alerts and emails across mediums within the product. Detailed documentation for this is covered in the section Updating the EKU/KU Metrics for Regenerated Certificates.
Updating the EKU/KU Metrics for Regenerated Certificates
- Certificate holistic view
A
Click View Changes to view the Key Usage Warning details that list the Removed Usages and Added Usages for the regenerated certificate. icon is displayed in the regenerated
certificate's holistic view in the event a change is detected in the
EKU/KU fields, along with a View Changes
link.
icon is displayed in the regenerated
certificate's holistic view in the event a change is detected in the
EKU/KU fields, along with a View Changes
link. - Email notifications
Details of the changes detected in the EKU/KU fields are appended to the pre-configured certificate regeneration email notifications sent to a user/user group/certificate group.
- In-app notifications
Post issuance of the regenerated certificate, for changes detected in the EKU/KU fields, a notification message is displayed in AppViewX's notification center that details the changes observed.
- Certificate Logs
Details of the changes detected in the EKU/KU fields post certificate regeneration are mentioned in the Log Message field of the certificate logs.