Assigning Roles in ServiceNow
- On the ServiceNow instance, in the filter navigator, type Users.
- From the results displayed in the navigation pane on the left, select Users.
- On the Users page, select a role under the User ID column.
- On the User page, scroll down and click the Roles tab.
- To assign role(s) to this user, under the Roles tab, click Edit.
-
On the Edit members page, search for the role that you want to assign to
the user by typing in the keywords in the Collection search field.
The following roles are available:
- x_avx_appviewx_aut.app_admin: This is an admin role and has access to all the features of the AppViewX plugin such as configuring AppViewX settings, CLM settings, Service Catalog, logs and so on.
- x_avx_appviewx_aut.certificate_request_user: This role will have access only to the Service Catalog and Certificate Requests pages.
-
x_avx_appviewx_aut.super_admin: This is a super admin role and has access to multiple configured domains for the user. It allows configuration of CLM setting records for the domains.
Note: The ServiceNow admin must impersonate as an end user for the enrollment/renewal/revocation of a certificate. Direct enrollment/renewal/revocation of a certificate on behalf of the end user is not permitted. -
Click the role from the roles displayed and click
 to assign it to the user.
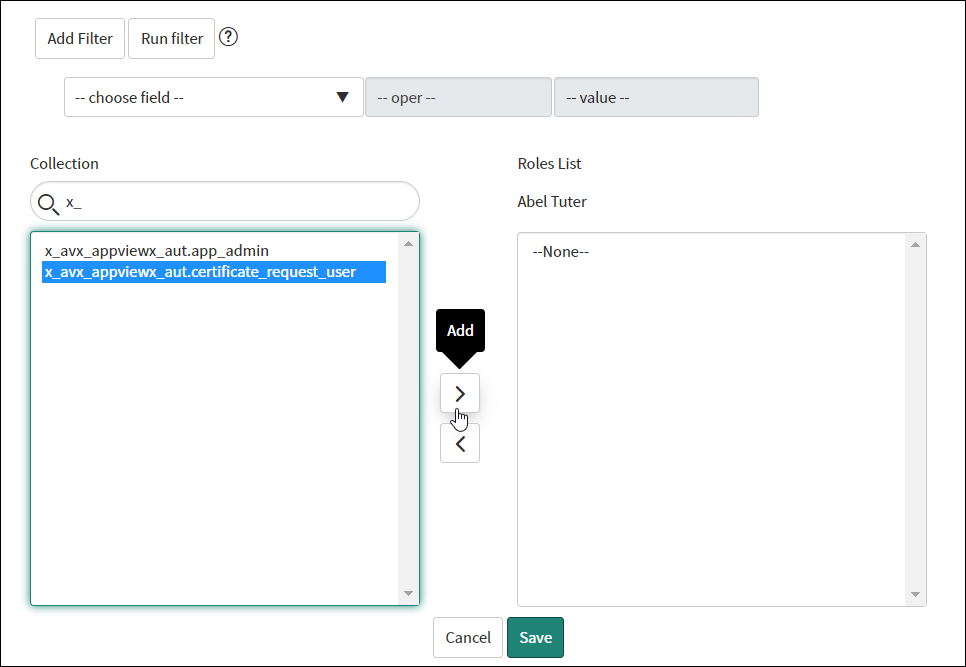
-
To unassign a role from the user, click on the role under the Roles list
box and click
 .
.
- Click Save once the role(s) have been assigned to the user.