AppViewX Integration with JAMF
What is JAMF
- The Industry Standard for Apple Device Management - The various products in the Jamf suite allow for seamless setup and deployment of devices, all offered in a single consolidated solution.
- Cloud-Based Mobility - Jamf Now is the ideal solution for small and medium enterprises as it empowers setting up, protecting, and managing devices right from one product.
- Device Management Tool for The Pros – An ultimate EMM (Enterprise Mobility Management) tool for your users. Jamf Pro features application and device management, deployment, security capabilities, inventory collection, and more.
- Enhanced Identity Management - Jamf Connect offers the flexibility to remotely and centrally manage passwords, groups, and users. It provides access to corporate cloud resources and applications that offer an advanced security and identity approach.
- Mac-Exclusive Endpoint Protection - Jamf Protect, developed natively on the iOS architecture offers deep visibility into any operations or threats at the endpoints. It has a dashboard, extensive reporting, and real-time alerts on the built-in security framework for macOS.
Deployment Models
Jamf Pro can be
configured using computers or mobile devices to communicate directly with a SCEP
server.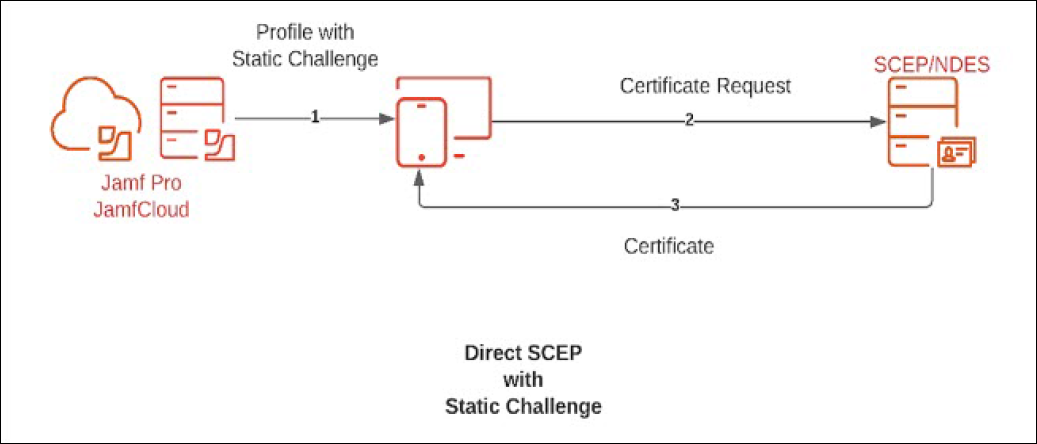
Prerequisites
-
Disabling the checkbox in the Global Management >
PKI Certificates screen.
-
Configure the Challenge Password in the
SCEP Configuration and
AppViewX endpoints.
Note: Challenge Passphrase is mandatory for MAC devices to connect to AppViewX SCEP Node.
- The MAC device should be able to connect to the SCEP server on port 30022.
Direct Communication with SCEP Server
Obtaining the Certificate Thumbprint/Fingerprint
- Log in to the AppViewX platform using valid credentials.
- Hover on the menu icon and select CERT+.
-
Click Certificate Inventory on the left menu and
select the certificate type (Server, Client, or Code Signing).
The certificates with the common names are displayed on the right.
-
From the Common Name column, click on the
desired certificate.
All valid certificates are displayed.
-
Click the desired RA certificate to display the details.
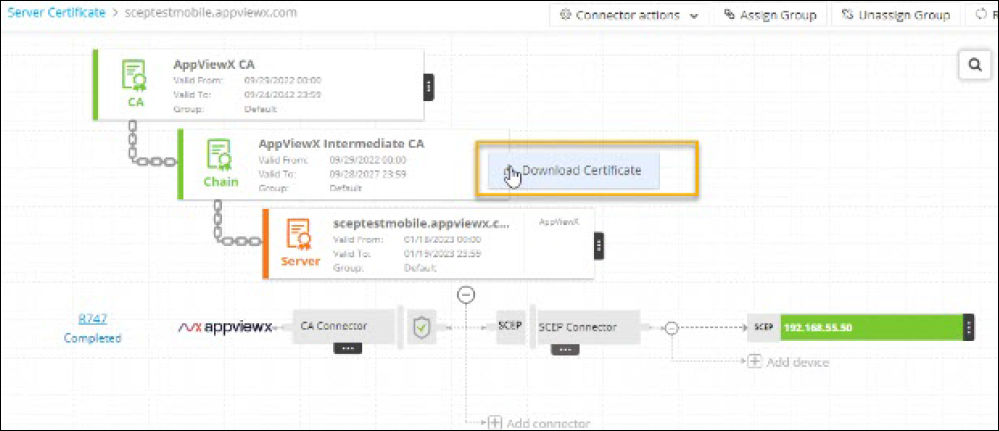
- Click the three dots on the issuer certificate to display the Download Certificate option.
- Click Download Certificate and save the certificate in the desired format.
-
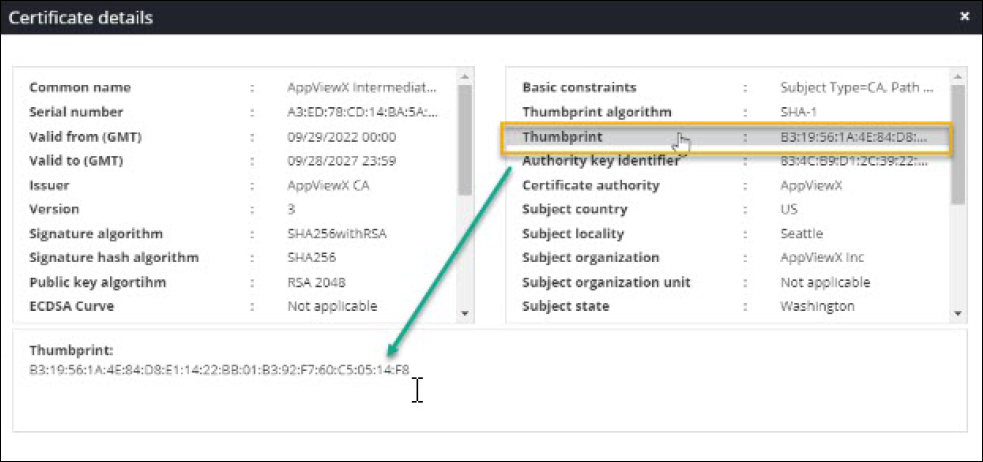
Open the downloaded certificate.
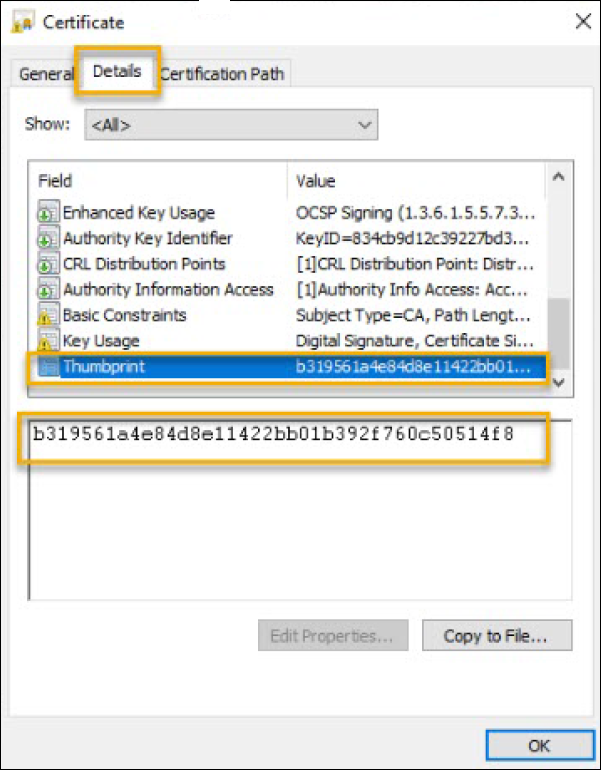
-
Click the Details tab and then select the
Thumbprint field.
The full value is displayed in the section below.
-
Copy this hex value and paste in the text pad. Use this value in the
Fingerprint field in JAMF Pro (described in the section below).
Consequently, another way to obtain the hex value without having to manually delete the colons in the thumbprint can is described below.
-
Execute steps 1 to 5 described above.
-
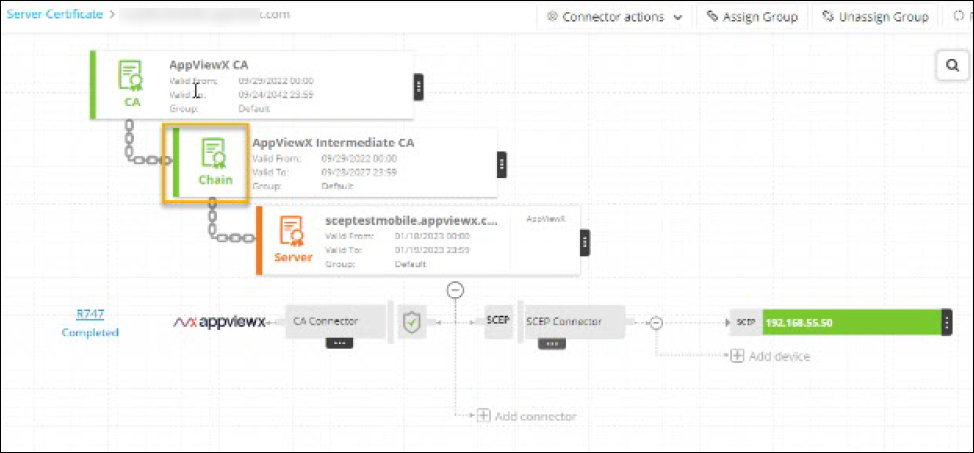
Click the Issuer certificate.
-
In the Certificate Details pop-up, click the
Thumbprint value.
The full value is displayed in the section below.
- Copy this hex value and paste in the text pad. Ensure to remove all the colons before using it in the Fingerprint field in JAMF Pro (described in the section below).
Configuring SCEP
-
Navigate to SCEP Configuration Profiles
screen.
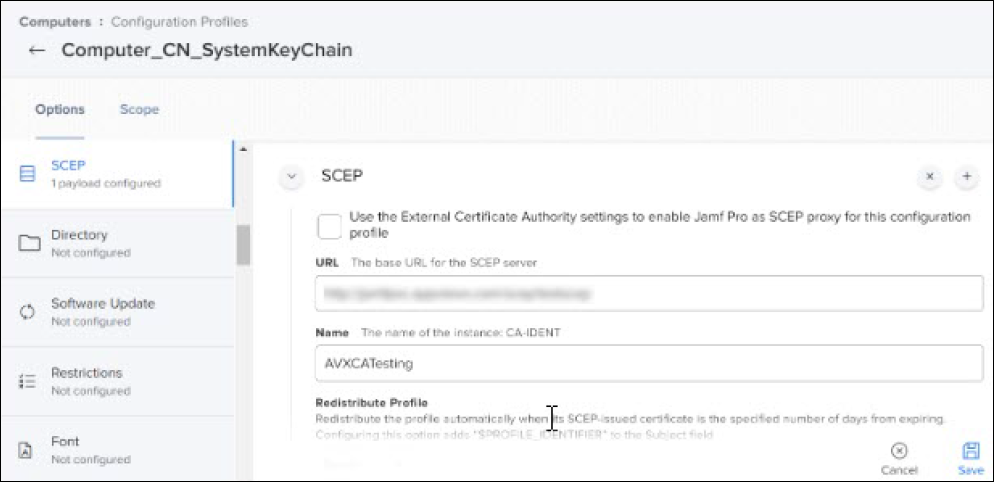
- In the URL field, enter the AppViewX server’s publicly exposed SCEP URL.
- In the Name field, enter the desired name for this configuration.
- From the Redistribute Profile dropdown, choose a value to specify the number of days before the certificate needs to be renewed. For example, if you want a certificate to be renewed 15 days before expiry, then set the Redistribute Profile to 15 days.
- In the Subject field, enter the variable names. The $ (dollar) sign may be used with the variable name. Refer to the Mobile Device Configuration Profiles page to learn about the variable names supported in Jamf.
-
From the Subject Alternative Name Type dropdown,
select None.
-
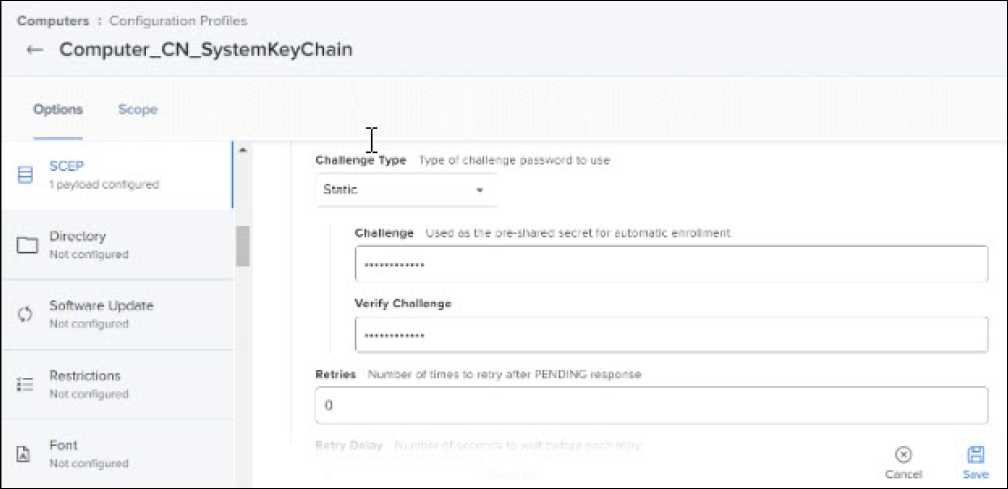
From the Challenge Type dropdown, select the following:
-
In the Challenge and Verify
Challenge fields, enter the AppViewX SCEP Challenge
Password configured in AppViewX SCEP UI.
Note: This is a mandatory step. The Challenge password is mandatory while using this deployment model. The same challenge password set in the prerequisite should be configured in the JAMF.
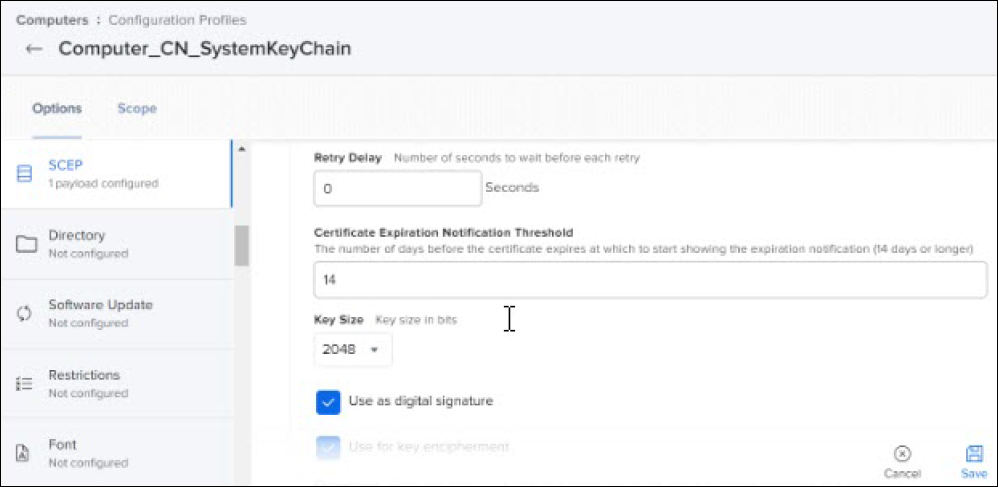
- In the Retry Delay field, enter a desired value (in seconds).
- In the Certificate Expiration Notification Threshold field, enter the number of days before the certificate expiration at which a notification will start displaying.
- From the Key Size dropdown, select value 2048.
-
Select the checkboxes Use as digital signature
and Use for key encipherment.
-
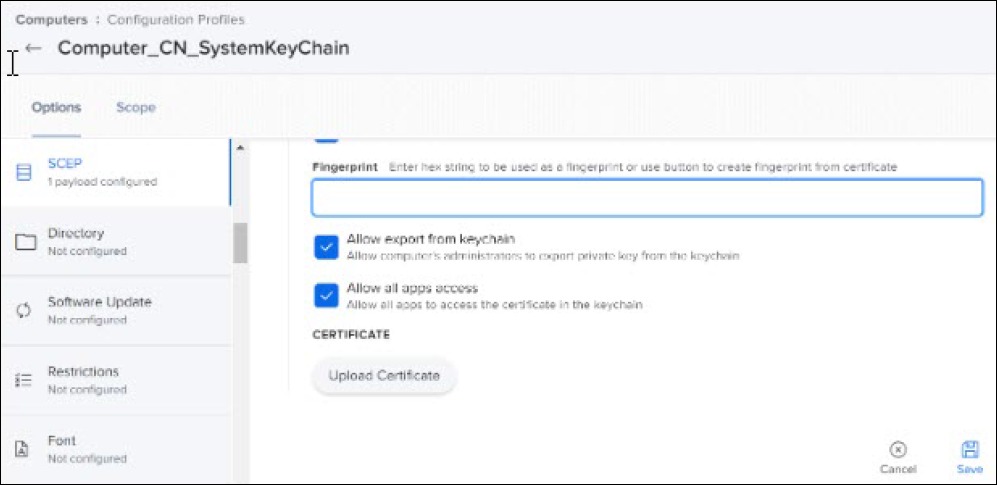
In the Fingerprint field, enter the hex string
to be used as a fingerprint.

- Select the checkboxes Allow export from keychain and Allow all apps access.
- Click Save.
Initiating the Enrollment from a Device
This section provides details of testing the Jamf cloud configuration performed in the previous section. It is recommended to open the JamfPro Enrollment URL using a Safari browser, as other browsers are not capable of identifying the received configuration profile and installation to the machine. Follow the instructions shown in the MacOS screen.
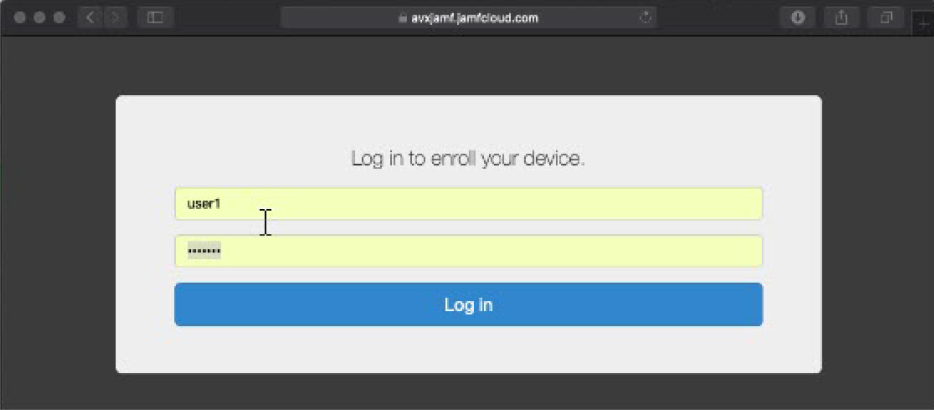
- Enter the URL, for example - https://avxjamf.jamfcloud.com/enroll/ in the Safari browser.
-
Enter a valid username and password.
-
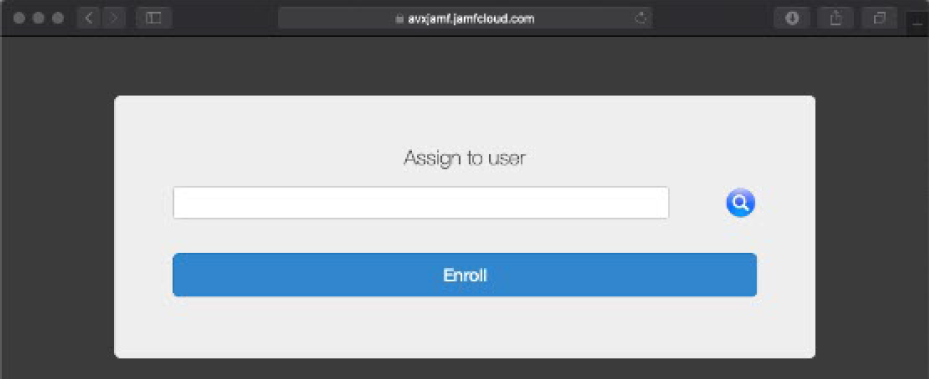
Leave the Assign to user field empty and click
Enroll.
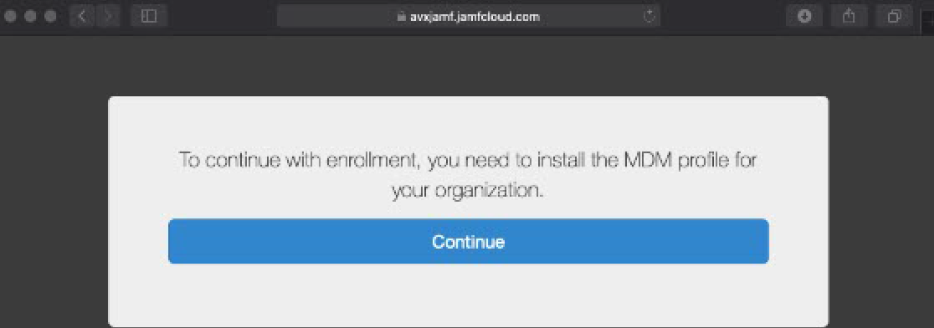
-
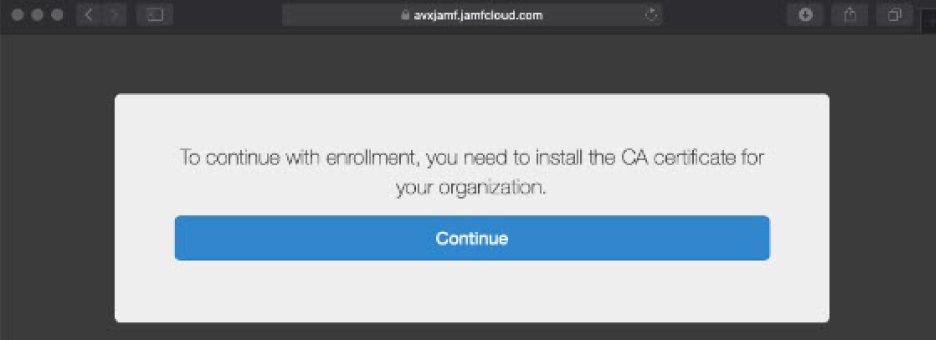
To continue with the enrollment (installation of CA certificate), click
Continue.
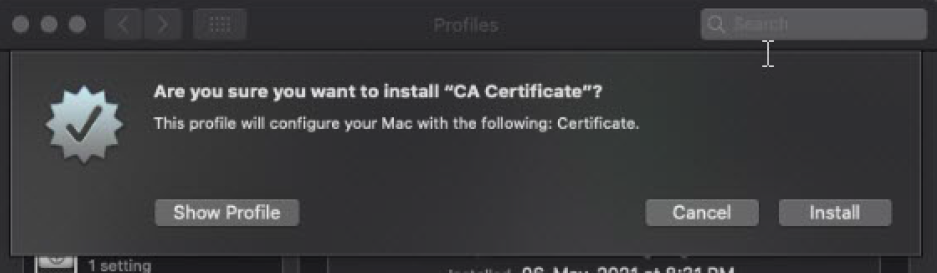
-
To confirm installation of the CA Certificate, click
Install.
-
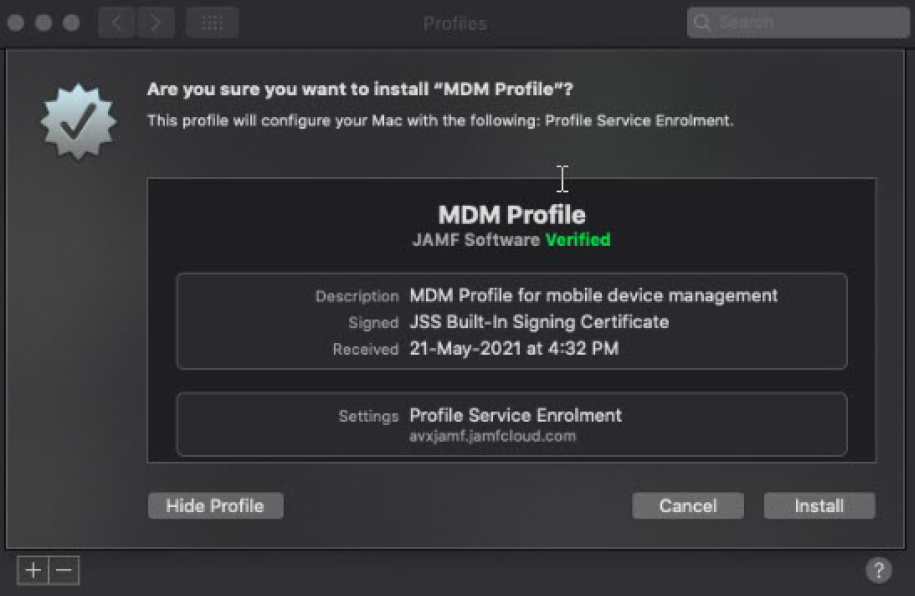
To continue with the enrollment (installation of the MDM profile),
click Continue.
-
To confirm installation of the MDM Profile, click Install, and enter
the valid credentials to carry out the installation.
- After the installation is complete, the following message is displayed – “The enrollment process is completed.”
- Wait for approximately one minute for the installation of the Profile and Certificate. (Profile contains SCEP configuration and during the installation process, the device directly sends a SCEP request to the AppVIewX Server.)
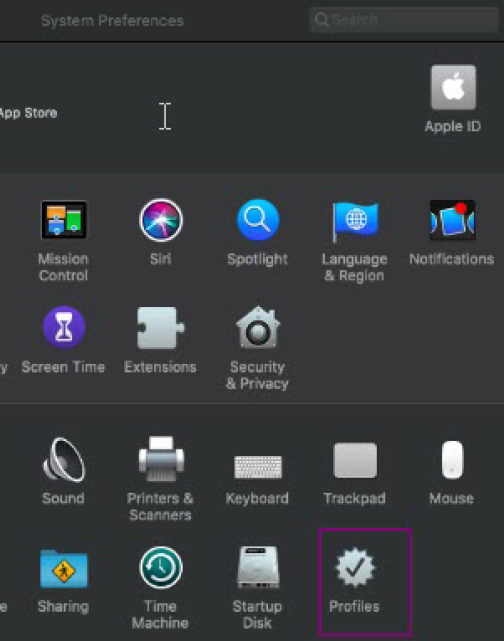
-
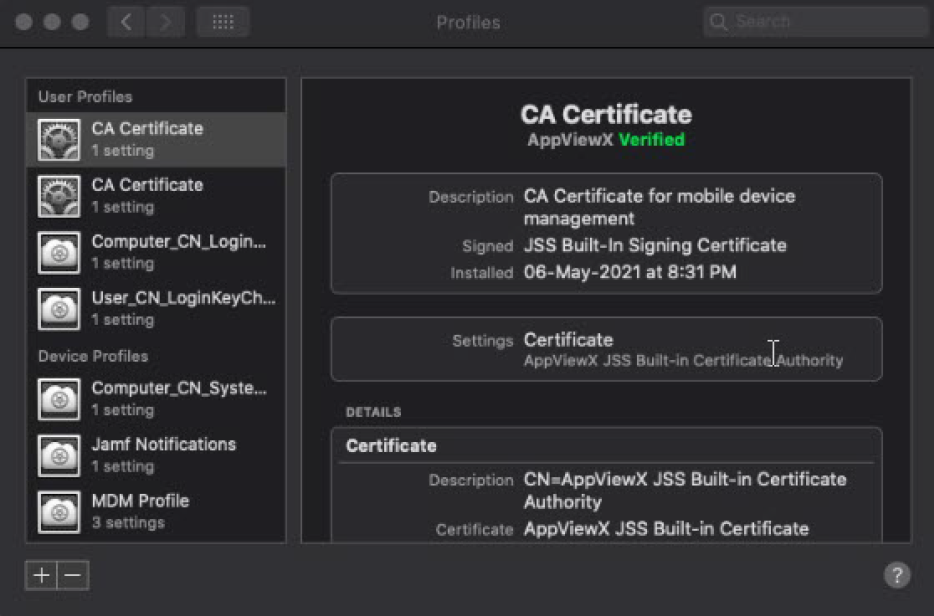
After the installation, the profiles can be verified by clicking
System Preferences >
Profile. All the installed profiles must be
visible.
 Note: Deleting the MDM profile deletes all the information from the Profiles. A fresh enroll may be tried later.
 -
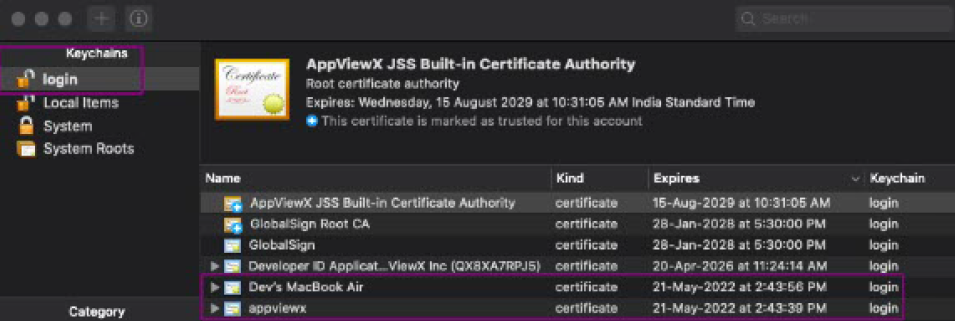
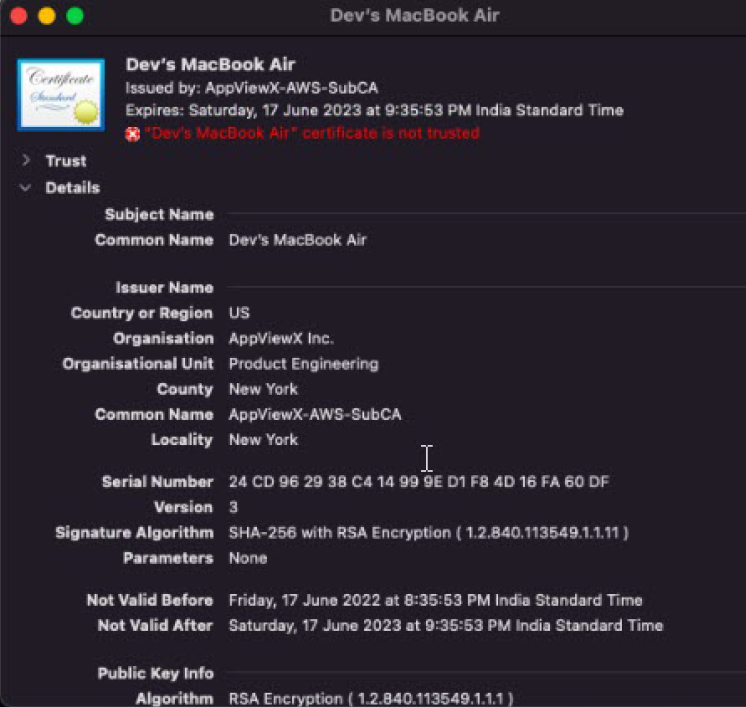
To verify the certificate, navigate to Keychains
(User/System) and validate the certificates that were Installed for each
configuration profiles with the respective CN Name.

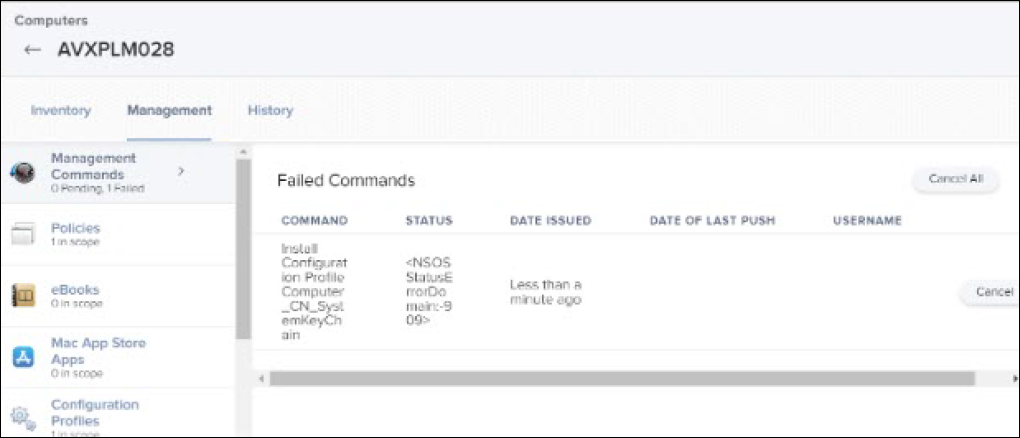
Troubleshooting
References
| # | Topic | URL |
|---|---|---|
| 1 | About Jamf | What is Jamf? |
| 2 | Jamf Documentation | Jamf Pro Documentation |
| 3 | About SCEP | Simple Certificate Enrollment Protocol Explained |
| 4 | Mobile Device Configuration Profiles | Mobile Device Configuration Profiles |