Push Tasks
- Navigate to the Workflow page in the Automation module and click Create New.
-
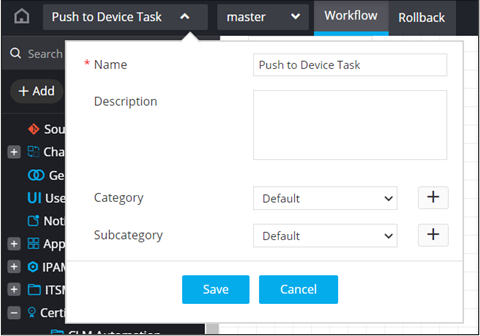
Enter a Name for the workflow and click Save.
-
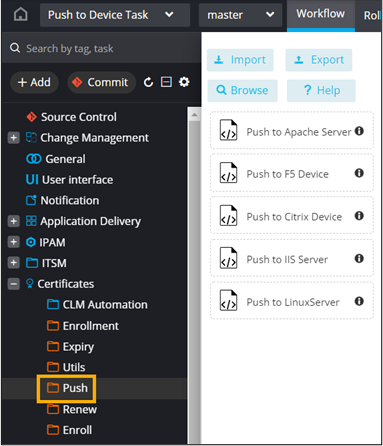
From the Certificates folder, click Push.
The following tasks for pushing certificates are available in the Push folder:
- Push to Apache Server
- Push to F5 device
- Push to Citrix Device
- Push to IIS Server
- Push to Linux Server
-
From the Push folder, drag and drop any of the Push tasks. For example,
the Push to Linux Server task.
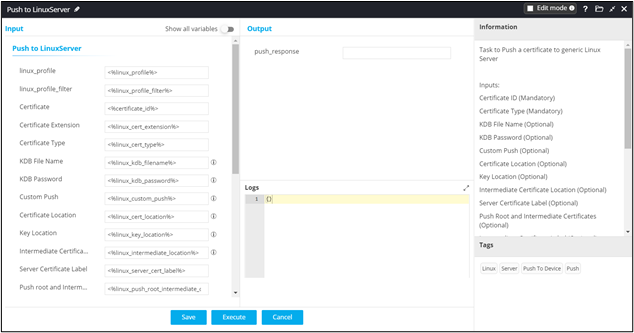
- Click Save.
-
To auto-generate a form for this workflow, click Form above the Start
task.

-
Click
 above the Push to LinuxServer task to
auto-populate the form fields.
above the Push to LinuxServer task to
auto-populate the form fields.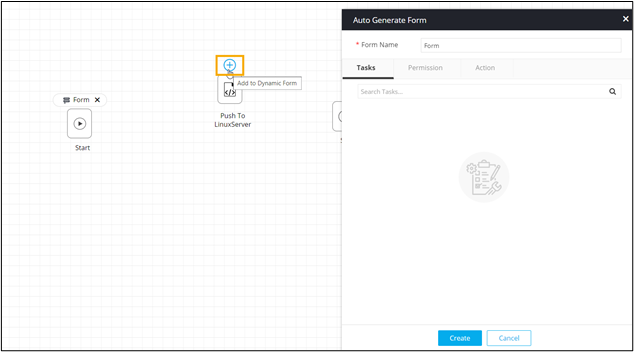
- Select the fields required in the input form.
- Provide a Form Name and click Create.
- To view and download the certificate in a holistic view, from the Utils folder, drag and drop the View and Download Certificate prebuilt task.
-
To get a preview of the user input form, connect all the workflow tasks and
click Preview.
User Inputs form when the Push to LinuxServer task is selected is displayed.
 Note: The fields displayed in the User Inputs form will vary depending on the Push task selected from the Push folder while designing the workflow.
Table 1. Field Description for the User Inputs form Field Description *Certificate Category Select the Certificate Profile from the following options: - Server
- Client
- Code Signing
Note: Server is the default selection.*Certificate Group Select the Certificate Group from the options available in the dropdown. *Certificate Authority Select the Certificate Authority from the options available in the dropdown. The following CAs are supported: - DigiCert
- Entrust
- EJBCA
- Microsoft Enterprise
- AppViewX
*CA Account Select the CA Account from the options available in the dropdown. Note: This field is populated based on the Certificate Authority selected.*Auto Renewal Select the required radio button to enable/disable Auto Renewal. Note: Default selection is set to Off. Renew Before (Days) Enter the number of days in the Renew Before (days) field. For example, if you enter 5, then the renewal request will be triggered 5 days prior to the expiry date. Note: This field is displayed only when the Auto Renewal field is enabled. Description Add a description for the workflow, if required. *Common Name Enter the Fully Qualified Domain Name (FQDN) of the server for which certificate is requested. Subject Alternative Name Select the Subject Alternative Name from the options available in the dropdown. DNS Enter a valid DNS if you select the DNS option in the SAN field. IP Address Enter a valid IP Address if you select the IP Address option in the SAN field. Organization Enter the name of the organization. Organization Unit Enter the name of the organization unit. Locality Enter the name of the locality in which the organization is situated. State Enter the name of the state in which the organization is located. Country Enter the name of the country in which the organization is located. Zip Code Enter the Zip code in which the organization is located. Email Address Enter the Email Address of the organization. *Validity Unit Select the Validity Unit from the options available in the dropdown. *Validity Value Enter the Validity Value based on the Validity Unit selected. Challenge Password Configure the Challenge Password to protect the certificate. *Hash Function Select the Hash Function from the options available in the dropdown. *Key Type Select the Key Type from the options available in the dropdown. Note: To retrieve the types of keys that can be availed, click .
.*Bit Length Select the Bit Length from the options available in the dropdown. Attribute Select the Attribute from the options available in the dropdown. Attribute Value Enter the Attribute Value based on the Attribute selected. All Asterisk (*) marked fields are mandatory. -
To add this attribute to the Certificate Attributes grid, click
 .
.
-
To edit the value of a particular attribute, select the attribute in the grid
and click
 .
.
-
Enter the new value for the attribute in the Value field and click
again to update
the value.
-
To delete a certificate attribute, select the attribute in the grid and click
 .
.
-
To maximize the Certificate Attributes grid, from the top right corner
of the grid, click
 .
.
- To search for a particular attribute in the grid, type the keyword(s) in the search field.
-
Click Next.
Certificate created successfully.
-
To download the certificate, at the View and Download Certificate stage,
hover your mouse over
 and from the options displayed, click
Download Certificate.
and from the options displayed, click
Download Certificate.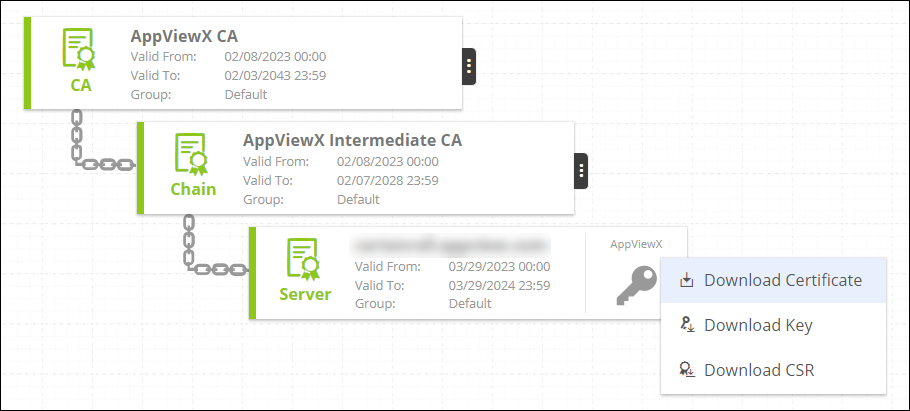
-
Hover your mouse over
 to view the Certificate
status.
to view the Certificate
status.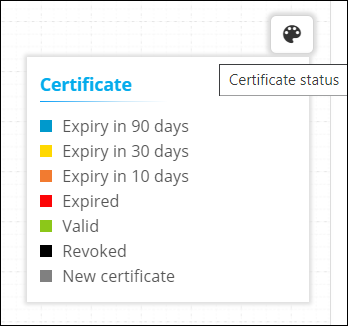 Note: For more information on how to design custom workflows, refer to the Automation User Guide.