Defining a Hook and using it within a Workflow 
- Go to the Hooks Inventory.
-
On the Workflow > Hooks Inventory page, from the command bar on
the top right corner of the screen, click
 (Add) icon.
-
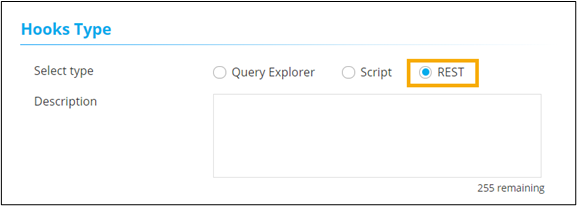
On the Workflow > Hooks Inventory > Add page, under
Hooks Type select REST and enter a Description for the
hook.
-
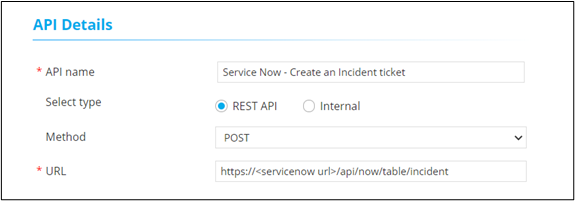
In the API Details section, enter or select the required field
information as shown in the image below.
- Click Save.
- Design a workflow.
- From the User Interface section, drag and drop a Form task.
- Under the Form builder tab, define the necessary form fields.
- Under the Hooks tab, select the Hook type as REST.
- From the Hooks Inventory dropdown, select the API name as defined before.
-
From the Field ID dropdown, select the field against which the hook
should be mapped.
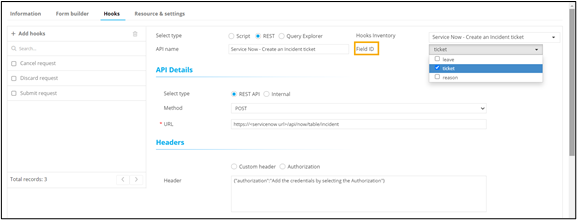
- Click Add.
-
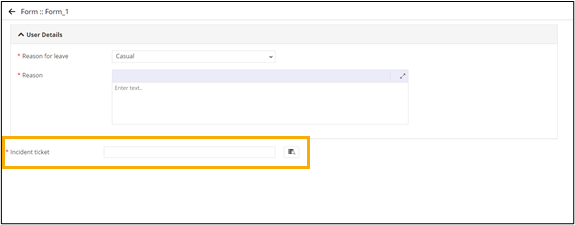
Under the Form Builder tab, click
 (View) icon.
A preview of the form shows the hook added to the form field.
(View) icon.
A preview of the form shows the hook added to the form field.