Setting up the AppViewX Cloud Connector using a Virtual Image for an On-Prem Deployment
-
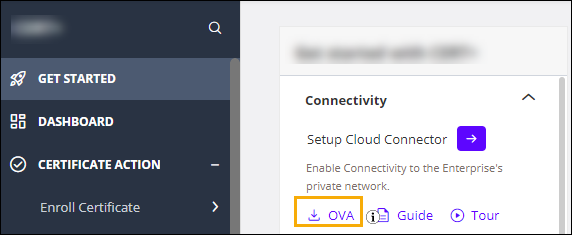
To download the release package in the OVA format, from the respective
AppViewX's product line landing page, under GET STARTED menu >
Connectivity section, click
 .
.
- Log in to the vmware client.
- From the Navigation pane on the left, right click Virtual Machines.
-
Click Create/Register VM.
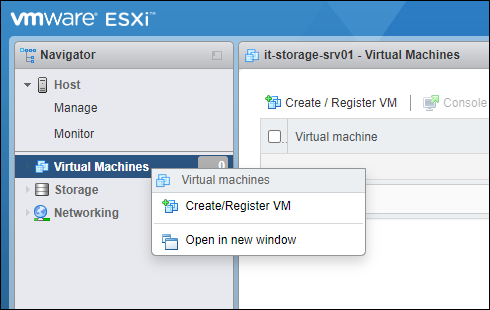 The New Virtual machine window is displayed.
 - From the navigation pane in the left, select Select creation type.
-
In the Select creation type window, select the Deploy a
virtual machine from an OVA or OVF file option.
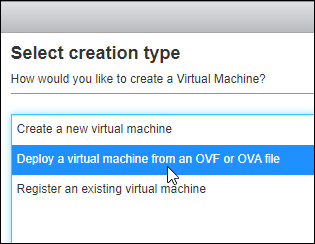
- Click Next.
-
In the Select OVF and VMDK files window:
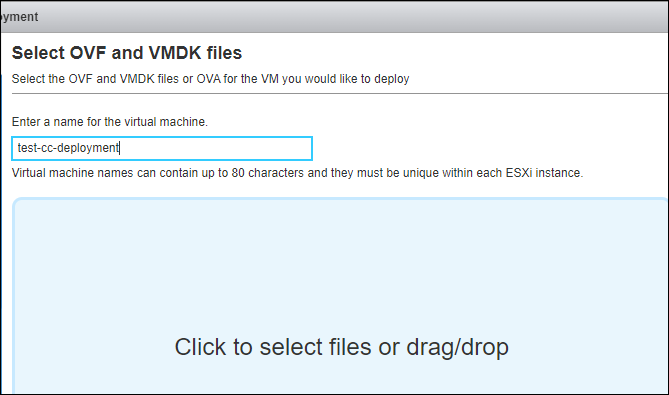
- Click Next.
-
In the Select storage window, from the available options, select a
datastore for storing the virtual machine's files and all of its virtual
disks.
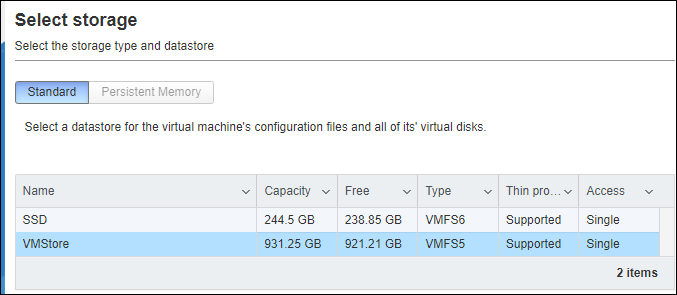
- Click Next.
-
In the Deployment options window:
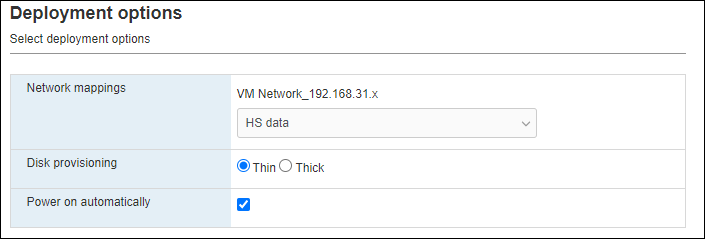
- Select the network mapping.
- Select the disk provisioning required.
- Select the Power on automatically checkbox.
- Click Next.
-
In the Ready to complete window, review your settings.
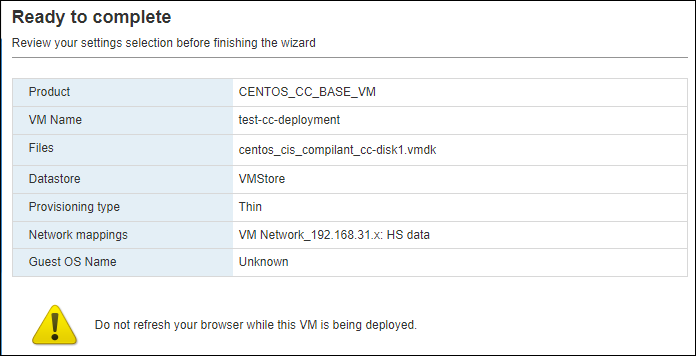
-
Click Finish.
- The progress of the OVA deployment is shown in the Recent Tasks
section.


- On successful completion of the OVA deployment, the new virtual machine
is displayed in the Virtual Machines inventory. For each virtual
machine in the inventory, the following details are displayed:

- The progress of the OVA deployment is shown in the Recent Tasks
section.
-
From the Virtual Machines inventory, click the virtual machine just
added.
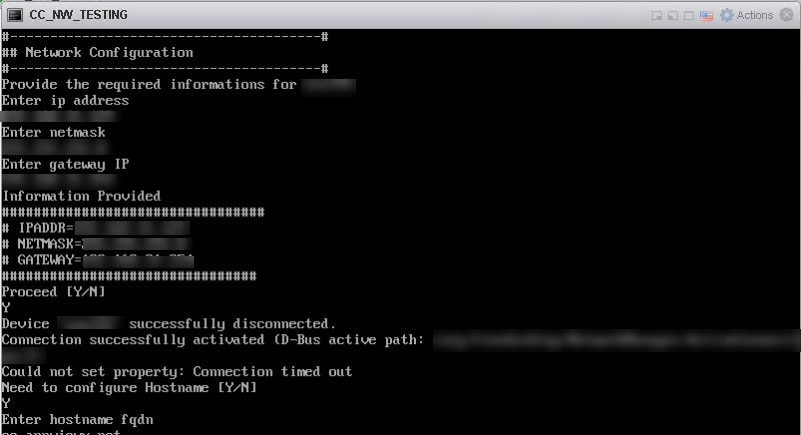
The terminal window for the virtual machine is displayed. The script for configuring the network IP is executed automatically.
-
To configure the IP address, when prompted, enter the required values for the
following requested parameters:
============================================
IPADDR                =  XXX.XXX.XXX.XXX
GATEWAY               =  XXX.XXX.XXX.XXX
NAMESERVER            =  XXX.XXX.XXX.XXX
HOSTNAME WITH FQDN    =  server1.example.com
HOST SHORTNAME        =  server1
================================
For example, refer to the sample screenshot below:
- To configure the hostname and the DNS, when prompted, press Y. If you prefer to configure the hostname and DNS manually, to skip this step, press N.
-
To configure an NTP server(s):
-
When prompted Do you want to configure ntpd server (default public
server), enter Y.
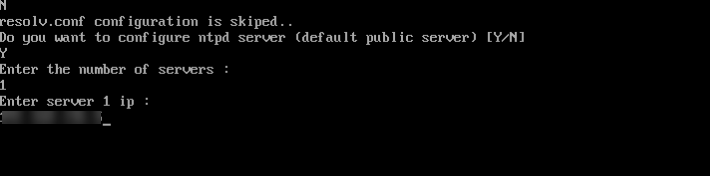
- Enter the number of NTP servers to be configured.
- For the number of servers entered above, enter the IP address of each NTP server on a new line.
- To update the ntp.conf file with the IP addresses provided above, press Y.
After the execution of this step, if the cloud connector does not exist on this host machine, the following prompt is displayed: Would you like to opt for automated installation of the cloud connector? (y/n):.Note:- Proceeding with the cloud connector installation at this point will require you to enter the tenant ID and master key for the installation manually (you will not be able to copy the details and paste them in response to the prompt).
- By default, the Standalone mode of CC installation is followed, which requires sudo privileges.
-
When prompted Do you want to configure ntpd server (default public
server), enter Y.
-
To install the AppViewX cloud connector at this point, press y and then
press Enter.
Note: If you enter n here (that is, you choose to not go ahead with the installation here), skip steps 21 to 25. You will be reprompted for the automated installation after you login to the VM as the appviewx user.
-
When prompted Please enter your AppViewX Cloud tenant name or ID, enter
the required details.
Internet connectivity on the host machine is validated. The installation proceeds only if the host machine has internet access.Note: If internet access is unavailable, you will be prompted to proceed with installation using a proxy. Enter y and for instructions on proceeding with the installation with a proxy, click here.
-
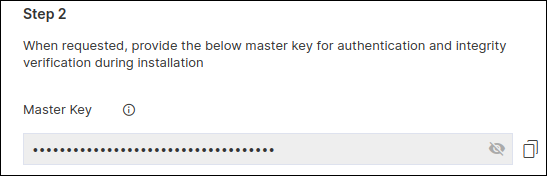
When prompted to Please provide the master key, enter the required
details.
To retrieve the master key:
-
Go to
 (Menu) > Platform >
Connectivity > Cloud Connector.
The Settings :: Cloud Connector inventory page is displayed.
(Menu) > Platform >
Connectivity > Cloud Connector.
The Settings :: Cloud Connector inventory page is displayed. -
From the Automated Cloud Connector Setup window, under Step
2, copy the Master Key.
-
Go to
-
When prompted to Please enter Datacenter, enter the name of the data
center on which this cloud connector will be deployed.
The following prompt is displayed:

AppViewX offers the following two modes for installing the cloud connector:
- Standard (default): This installation mode will, by default,
trigger the prerequisite check and then automatically enable only the
basic cloud connector features including the auto enrollment gateways
for certificate management and excluding advanced features such as
managing F5 devices, receiving syslogs from endpoints, and device
management for SSH+. Note: To enable these advanced features after the installation is done, use the avxctl command line tool and run
./avxctl enable –helpto see the syntax and possible values. For example, to enable SSH, use the command./avxctl --ssh.Important: Enabling these advanced features will cause a downtime of 3-5 minutes, because the cloud connector will restart. - Advanced: Along with checking prerequisites and enabling the
basic cloud connector features, this installation mode will display
prompts for you to choose which of the above listed advanced features
you want to enable for the cloud connector. Important: Enabling these advanced features will cause a downtime of 3-5 minutes, because the cloud connector will restart.
- Standard (default): This installation mode will, by default,
trigger the prerequisite check and then automatically enable only the
basic cloud connector features including the auto enrollment gateways
for certificate management and excluding advanced features such as
managing F5 devices, receiving syslogs from endpoints, and device
management for SSH+.
- Read the descriptions for the standard and advanced modes, and enter your choice. (Enter 1 for standard mode and 2 for advanced mode.) If you’ve selected 1, the cloud connector is installed with its basic features and, on successful completion of the setup, a corresponding instance of this cloud connector is displayed in the inventory. Here, skip step 25.
-
Note: Enabling auto-enrollment protocols is recommended only if the cloud connector is being installed in a demilitarized zone (DMZ) or devices in a restricted environment (that disables them from connecting to the <tenant>-aep directly.When prompted to enable auto-enrollment protocols, enter y and enter the protocol name(s) you want to enable. For instructions on enabling auto-enrollment protocols, click here.Note: By default, only the AppViewX certificate is enabled for auto-enrollment. To enable custom certificate for auto-enrollment:
- Execute the command
 ./avxctl upgrade
                                gateway-cert
. - When prompted, enter the location of the custom certificate.
On successful completion of the setup, a corresponding instance of this cloud connector is displayed in the inventory.Note: The cloud connector installation on a OVA-based host machine will not prompt you to select if you want to manage F5 Big-IP devices. However, after the cloud connector has been installed you can copy the iControl jar and axis jar in the deps/external_libs folder and restart the starter and platform pods (click here for instructions), to enable this feature. - Execute the command
-
After the script is executed, when prompted, login to the VM as the appviewx
user, using the credentials shared by AppViewX's customer support team.
Note: Root user access is required for maintaining the OS configuration and for patching security updates. Since direct root access is not provided, you can:
- Login as the appviewx user.
- Switch to the root user by executing the command
sudo
                                    -i
.
Note: It is recommended to change the default credentials after the first login.If the cloud connector has not been installed already, you will be reprompted to proceed with the installation. -
When prompted Would you like to opt for automated installation of the cloud
connector? (y/n):, enter y.
If you enter n here (that is, you choose to not go ahead with the installation here), skip step 27. You will be prompted again for the automated installation every time you login again to the VM as the appviewx user (until the cloud connector is installed).
- Repeat steps 21 to 24 above.
- When prompted Are you sure you want to continue connecting, press y and then press Enter.
- Login to the host machine on which the OVA has been deployed.
-
If the Cloud Connector has been installed, go to step 39 to approve the
cloud connector installation.
If the AppViewX Cloud Connector has not been installed on the host machine till this point, the following prompt will be displayed again: Would you like to opt for automated installation of the cloud connector? (y/n):
- Enter y.
-
When prompted Please enter your AppViewX Cloud tenant name or ID, enter
the required details.
Internet connectivity on the host machine is validated. The installation proceeds only if the host machine has internet access.Note: If internet access is unavailable, you will be prompted to proceed with installation using a proxy. Enter y and for instructions on proceeding with the installation with a proxy, click here.
-
When prompted to Please provide the master key, enter the required
details.
To retrieve the master key:
-
Go to (Menu) > Platform >
Connectivity > Cloud Connector.
The Settings :: Cloud Connector inventory page is displayed.
-
From the Automated Cloud Connector Setup window, under Step
2, copy the Master Key.
-
Go to
-
Paste the master key in the terminal window and press Enter.
The cloud connector installation script will check for the prerequisites and trigger the cloud connector installation.
When the cloud connector instance is successfully installed, a corresponding entry will be listed in the cloud connector inventory.
-
When prompted, Please enter Datacenter, enter the name of the data
center on which this cloud connector will be deployed. The following prompt is
displayed:
 AppViewX offers the following two modes for installing the cloud connector:
- Standard (default): This installation mode will, by default, automatically enable only the basic cloud connector features including the auto enrollment gateways for certificate management and excluding advanced features such as managing F5 devices, receiving syslogs from endpoints, and device management for SSH+.
- Advanced: Along with enabling the basic cloud connector features, this installation mode will display prompts for you to choose which of the above listed advanced features you want to enable for the cloud connector.
-
Read the descriptions for the standard and advanced modes, and enter your
choice. (Enter 1 for standard mode and 2 for advanced mode.)
If you’ve selected 1, the cloud connector is installed with its basic features and, on successful completion of the setup, a corresponding instance of this cloud connector is displayed in the inventory. Here, skip step 39. If you’ve selected 2, you will be prompted to enable auto-enrollment protocols.
-
Note: This prompt is displayed only for the advanced installation modeNote: Enabling auto-enrollment protocols is recommended only if the cloud connector is being installed in a demilitarized zone (DMZ) or devices in a restricted environment (that disables them from connecting to the <tenant>-aep directly.When prompted to enable auto-enrollment protocols, enter y. If you’ve entered y, enter the required protocol name(s). .Note: By default, only the AppViewX certificate is enabled for auto-enrollment. To enable custom certificate for auto-enrollment:
- Execute the command
 ./avxctl upgrade
                                gateway-cert
. - When prompted, enter the location of the custom certificate.
On successful completion of the setup, a corresponding instance of this cloud connector is displayed in the inventory.Note: The cloud connector installation on a OVA-based host machine will not prompt you to select if you want to manage F5 Big-IP devices. However, after the cloud connector has been installed you can copy the iControl jar and axis jar in the deps/external_libs folder and restart the starter and platform pods (click here for instructions), to enable this feature. - Execute the command
-
To approve the cloud connector installation:
-
Go to (Menu) > Platform >
Connectivity > Cloud Connector.
The Settings :: Cloud Connector inventory page is displayed.
Troubleshooting: If the AppViewX Cloud Connector instance has been approved but is not moved to the Running state, you can check the pod status and/or restart the pod(s), as required. -
Go to