Setting up the AppViewX Cloud Connector using a Virtual Image on AWS
- Relay your requirements to your assigned AppViewX Solution Architect and finalize a deployment model.
- Share your AWS account number and region with your Solution Architect. The
Solution Architect will use these details to create a custom AMI based on
your account and region.
When the AppViewX AMI is successfully shared with your customer account, AppViewX will notify you of this development via email.
- From your AppViewX Onboarding Engineer, get the default password for the appviewx user.
To install the AppViewX Cloud Connector on AWS, you will need a virtual machine that is preconfigured for the operating system and software stack prerequisites.AWS uses AMI to create pre-configured EC2 instances as per AppViewX standards and requirements.
To create an EC2 instance using the AppViewX AMI:
-
Login to the AWS Management Console and go to EC2 > Images >
AMIs.
The Amazon Machine Images (AMIs) page is displayed.
-
On the Amazon Machine Images (AMIs) page, from the Owned by me
dropdown list, select Private images.
All AMIs with visibility set to private are listed. This list will also have the AMI that is created and shared by AppViewX for your requirements.
- From this list, select the checkbox for the AMI shared by AppViewX.
-
Click Launch instance from AMI.
The EC2 > Instances > Launch an instance page is displayed.
-
Enter the Name and tags to be associated with this EC2 instance.
Note: The Application and OS Images (Amazon Machine Images) section will show the configuration details of the AppViewX AMI.
-
For the master node, select the following hardware configuration:

-
To securely connect to the EC2 instance, in the Key pair (login)
section:
- To use an existing key pair, from the Key pair name dropdown list, select the key pair you want to use.
OR- To create a new key pair, Click Create new key pair.
- In the Network settings section, under Firewall (security groups), as required, create a new security group or select an existing security group.
- If you select Select existing security group in the previous step, from the Common security groups dropdown list, select the required security group.
-
From the bottom-right corner of the screen, click Launch instance.
The Launching instance page is displayed, which shows you the progress of the launch. As soon as the launch is initiated, you will get a success message.
- Under Success, click Launch log to review the instance details.
- From the page name (EC2 > Instances > Launch an instance), click Instances to go back to the previous page.
- From the list of instances, select the AWS instance just created.
-
To login to this AWS instance using the key pair .pem file:
After the execution of this step, a script is executed to validate if the cloud connector exists on this host machine and the following prompt is displayed: Would you like to opt for automated installation of the cloud connector? (y/n):.Note: Proceeding with the cloud connector installation at this point will require you to enter the tenant ID and master key for the installation manually (you will not be able to copy the details and paste them in response to the prompt). It is, therefore, recommended to not opt for the installation at this point in the deployment process.
To install the AppViewX cloud connector at this point, press y and then press Enter.
-
To install the AppViewX cloud connector at this point, enter y.
Note: If you enter n here (that is, you choose to not go ahead with the installation here), skip steps 16 to 20. You will be reprompted for the automated installation after you login to the VM as the appviewx user.
-
When prompted Please enter your AppViewX Cloud tenant name or ID, enter
the required details.
Internet connectivity on the host machine is validated. The installation proceeds only if the host machine has internet access.Note: If internet access is unavailable, you will be prompted to proceed with installation using a proxy. Enter y and for instructions on proceeding with the installation with a proxy, click here.
-
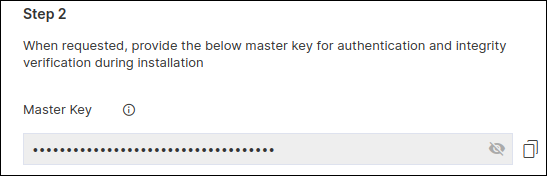
When prompted to Please provide the master key, enter the required
details.
To retrieve the master key:
-
Go to
 (Menu) > Platform >
Connectivity > Cloud Connector.
The Settings :: Cloud Connector inventory page is displayed.
(Menu) > Platform >
Connectivity > Cloud Connector.
The Settings :: Cloud Connector inventory page is displayed. -
From the Automated Cloud Connector Setup window, under Step
2, copy the Master Key.
The cloud connector installation script will check for the prerequisites and trigger the cloud connector installation.When the cloud connector instance is successfully installed, a corresponding entry will be listed in the cloud connector inventory.
-
Go to
- When prompted, Please enter Datacenter, enter the name of the data center on which this cloud connector will be deployed.
-
Note: Enabling auto-enrollment protocols is recommended only if the cloud connector is being installed in a demilitarized zone (DMZ) or devices in a restricted environment (that disables them from connecting to the <tenant>-aep directly.When prompted to enable auto-enrollment protocols, enter y and enter the protocol name(s) you want to enable. For instructions on enabling auto-enrollment protocols, click here.Note: By default, only the AppViewX certificate is enabled for auto-enrollment. To enable custom certificate for auto-enrollment:
- Execute the command
 ./avxctl upgrade
                                gateway-cert
. - When prompted, enter the location of the custom certificate.
On successful completion of the setup, a corresponding instance of this cloud connector is displayed in the inventory.Note: The cloud connector installation on a OVA-based host machine will not prompt you to select if you want to manage F5 Big-IP devices. However, after the cloud connector has been installed you can copy the iControl jar in the deps/external_libs folder (click here for instructions) and restart the starter and platform pods (click here for instructions), to enable this feature.Note: (Optional, required only for password authentication) In order to successfully execute the installation, AppViewX needs to run a script for which authentication via the .pem file needs to be bypassed. To do this, execute the following commands:sudo sed -i 's/.*PasswordAuthentication.*/PasswordAuthentication yes/g' /etc/ssh/sshd_configsudo systemctl restart sshd - Execute the command
-
To approve the cloud connector installation:
-
Go to (Menu) > Platform >
Connectivity > Cloud Connector.
The Settings :: Cloud Connector inventory page is displayed.
Troubleshooting: If the AppViewX Cloud Connector instance has been approved but is not moved to the Running state, you can check the pod status and/or restart the pod(s), as required. -
Go to