Creating a VIP with Incident Ticket 
Note: Before designing the workflow, ensure that you have
configured an instance to integrate with the ITSM vendor. For more information,
refer to the section on ITSM Vendor
Configuration
To create a VIP with Incident ticket:
- Design a new workflow.
-
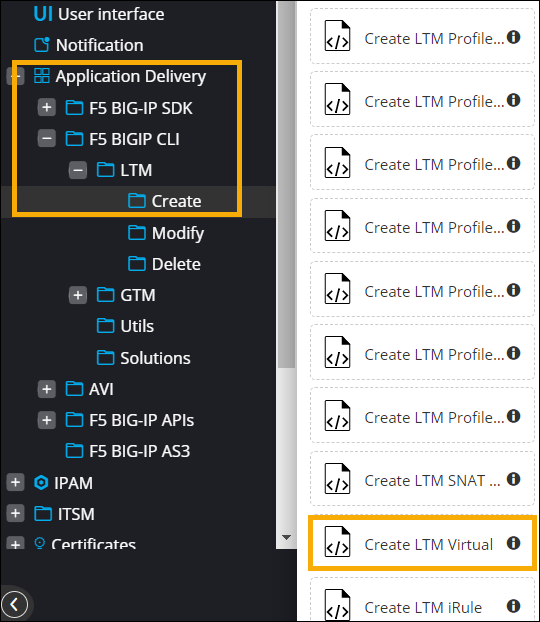
To create a virtual LTM server, from the Application Delivery > F5
BIG-IP CLI Commands > LTM > Virtual folder, drag and
drop the prebuilt Create LTM Virtual task.
 The Create LTM Virtual window (Citizen mode) shows the Input variables required for this task.
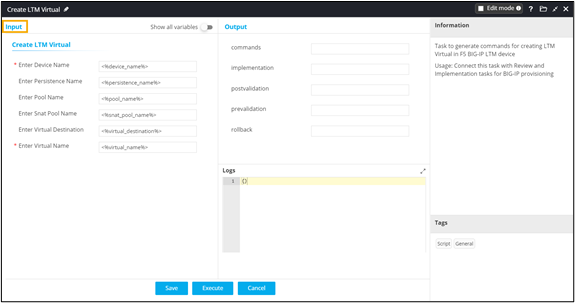
- To view or edit the task configurations, in the Create LTM Virtual window, from the top right corner, select the Edit mode checkbox.
- Click Save.
-
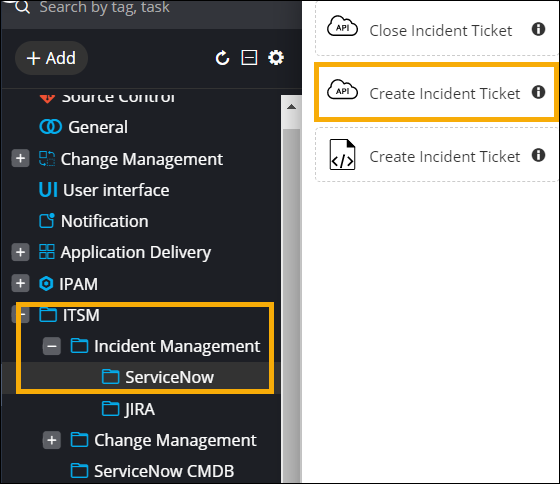
From the ITSM > Incident Management > ServiceNow
folder, drag and drop the Create Incident Ticket task.
-
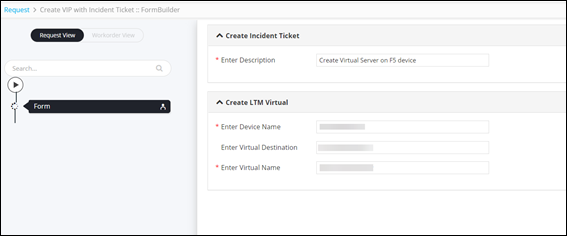
In the ServiceNow - Create Incident Ticket window, enter the
Input variables required to create the Incident ticket.

- Click Save.
- From the User Interface section in the left menu, drag and drop the Review task.
- Click Save.
- From the General section in the left menu, drag and drop the Prevalidation task.
- Click Save.
- From the General section in the left menu, drag and drop the Implementation task.
- Click Save.
- From the General section in the left menu, drag and drop the Postvalidation task.
- Click Save.
- Auto generate self-service form for this workflow.
- Connect the workflow tasks.
-
To add a rollback workflow, from the menu on the top, click Rollback.
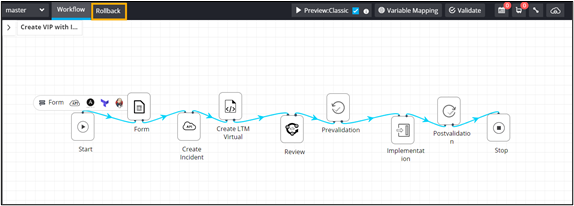
- From the General section in the left menu, drag and drop the Rollback task.
- Click Save.
-
Connect the rollback
workflow tasks and enable the workflow.
Note: No values are passed in the Review, Prevalidaton, Implementation, Postvalidation, and Rollback tasks, since these tasks are already mapped to the Create LTM Virtual task as output .
-
Trigger the workflow.
The workflow execution page is displayed with the workflow inputs requested at the first stage.
-
Enter the input details in the form.
-
Click Next.
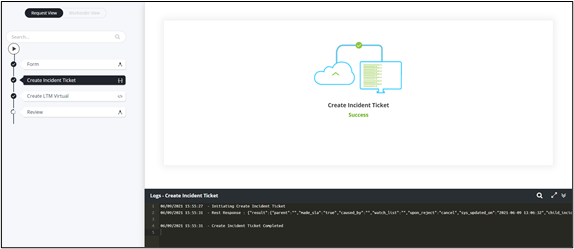
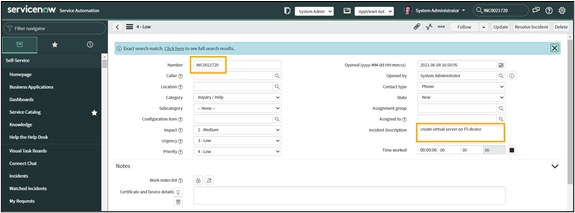
Incident Ticket is created on ServiceNow.
- At the Review stage, to execute the implementation, prevalidation, rollback, and postvalidation commands, click Submit.
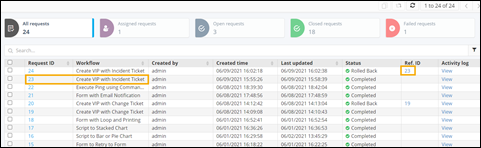
- To execute the rollback workflow, on the Request :: All page, select the checkbox next to the workflow Request ID.
-
From the upper right corner of the screen, click
 (Rollback) icon.
Rollback request to delete the virtual server that was created, is executed successfully.
(Rollback) icon.
Rollback request to delete the virtual server that was created, is executed successfully.
-
To view the request ID of the rollback workflow, navigate to the Request :: All page.
Rollback workflow request displays the Ref. ID of the workflow for which rollback was initiated.