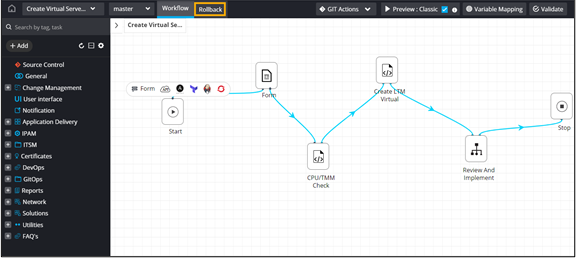
Adding a Rollback Workflow 
- Design a workflow to create a LTM virtual server on F5 BIG-IP with CPU/TMM check.
-
In the design workspace, from the menu on the top, click
Rollback.
-
From the Utils folder in the left menu, drag and drop the Review and
Rollback workflow.
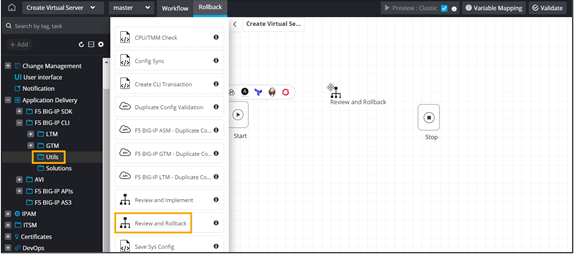
- Connect the workflow tasks and enable the workflow.
-
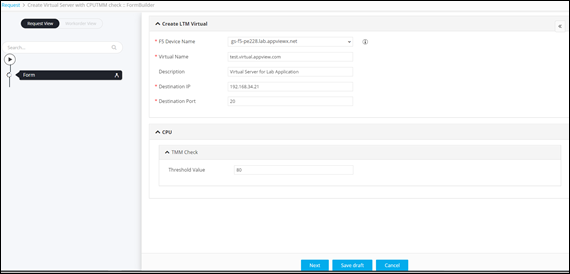
Trigger the workflow.
The workflow execution page is displayed with the workflow inputs requested at the first stage.
-
Enter the details in the input form.
-
At the Review stage, click Submit.
The workflow is executed successfully.
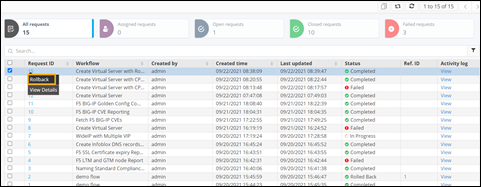
- To trigger the rollback workflow, on the Request :: All page, right-click on the Request ID of the workflow.
-
From the options displayed, select Rollback.
 Tip: You can also select the workflow and click
 (Rollback) icon from the command bar in the top right corner of the
screen.
(Rollback) icon from the command bar in the top right corner of the
screen. -
In the Rollback pop-up window, click Yes and select Rollback
type as Request.
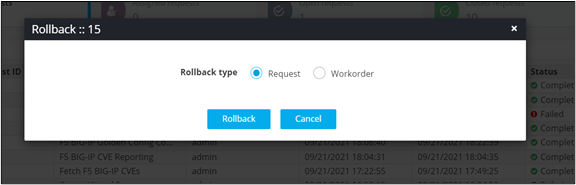
- Click Rollback.
-
At the Review stage, click Submit.
Rollback completed.
