Managing the Catalogs
-
On the Request :: View/Run
page, from the top right corner of the page, click Manage Catalog.
The Manage Catalog window is displayed.
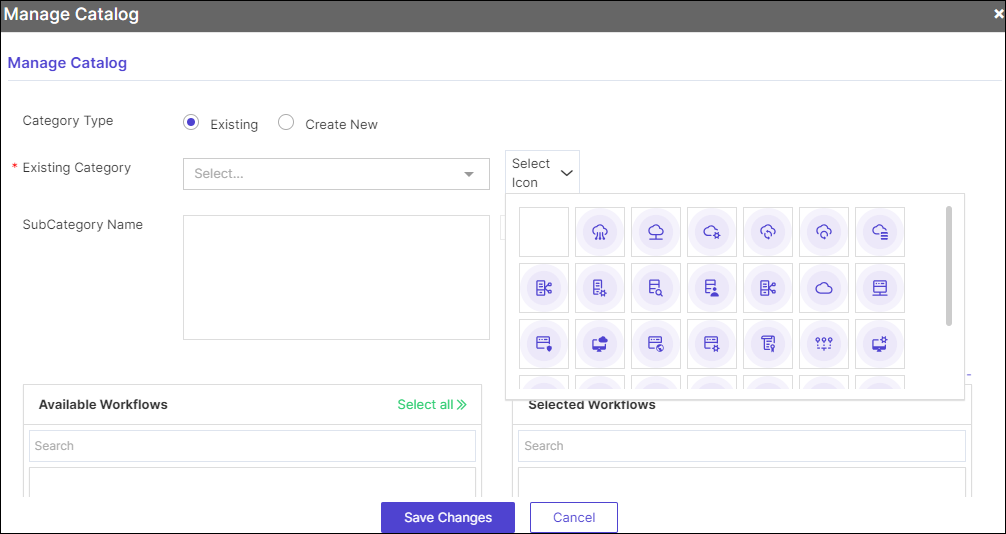
- To modify the existing workflow categories, under Category Type, select the Existing option.
-
To create a new category, under Category Type, select the Create
New option.
Table 1. Options and Descriptions for Manage Catalogs Option Description Category Type Select the Category Type as: - Existing: Selecting this option allows you to select the category of workflows from the options available in the Existing Category dropdown.
- Create New: Selecting this option allows you to create a new category of workflows.
*Existing Category Select the category of workflows from the options displayed in the dropdown. Note: If the Create New option is selected in the Category Type field, then this field becomes a text box and allows you to type a new category name.Select Icon Select an icon for the workflow card from the options available in the dropdown. SubCategory Name This field is auto-populated when you select the Existing Category option in the Category Type field. 
Allows you to add more subcategories of workflows. * : Mandatory fields -
To add more workflows to a subcategory, select the subcategory in the
SubCategory Name field and click
 next to the workflows to be added.
-
To move a workflow out of the selected workflows, click
 next to the workflow under Selected
Workflows.
next to the workflow under Selected
Workflows. 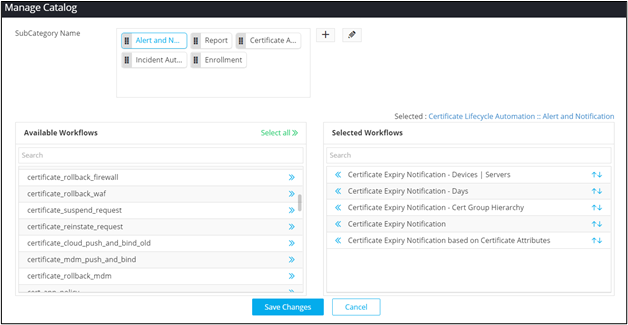
-
To modify the order in which the workflows are displayed within the
subcategory, click
 .
.
- Click Save Changes.