Creating Root CA
The complimentary CA can be deleted and re-created as required.
To create root CA:
-
Go to
 .
The CA Inventory page appears.
.
The CA Inventory page appears. -
Click +Create CA on the top-right corner of the
page.
The Create CA page is displayed.
-
Enter the fields as described in the table.
Table 1. Field Description for PKIaaS Management page Field Description *CA Name Provide a friendly name for reference with no special characters except dash (-) and underscore (_). Description Provide a description for the CA. The maximum character limit is 500. Special characters that are not supported include ', ", ;, <, >, &, $, |, #, \, `. Tier Select the CA tier. The available options are: - PQC Ready CA: Available only when the CA account was created using AppViewX PKIaaS Native CA. Enables post-quantum cryptography (PQC) and composite crypto model options. See Creating Certificate Authority.
- Standard CA: Available for standard PKI initialization. Uses classical cryptography and requires a region selection.
Note: The PQC Ready CA tier will be available only if you have created a CA account using the AppViewX PKIaaS Native CA as explained in Creating Certificate Authority.* Region (Standard CA only)
Note: This field is displayed when Tier = Standard CA.Select the geographic region where the CA will be hosted. The dropdown list is populated with the available regions. For example, us-east1 (South Carolina).Certificate Authority Type Note: This field is displayed when Tier = PQC Ready CA.Select the type of CA to create Root CA.Crypto Model Select the cryptographic model that defines the type of algorithms used by this Certificate Authority hierarchy. It determines whether the CA uses traditional algorithms, quantum‑resistant algorithms, or a combination of both. - Classical Cryptography: Uses widely adopted algorithms such as RSA and ECC. Suitable for current, non‑quantum‑resistant environments and existing PKI deployments. This option is available for all CA types.
- Post‑Quantum Cryptography (PQC): Uses quantum‑resistant algorithms designed to protect against future quantum computing threats. Recommended for long‑term security and crypto‑agile deployments. This option is available only when the selected CA is PQC or Composite.
- Composite Cryptography (Hybrid Classical + PQC): Combines classical and post‑quantum algorithms in a single certificate to ensure backward compatibility while enabling quantum resistance. Both Classical and PQC key types are displayed in separate fields. This option is available only when the selected CA is Composite.
*Template (PQC Ready CA only)
Note: This field is displayed when Tier = PQC Ready CA.Select a certificate template from the dropdown list. The template defines the key usage, extensions, and cryptographic parameters applied to the CA certificate.*Valid for Select the number of years to CA expiry. Configure CA Subject DN Details *CA Common Name Enter the root CA subject name. *Organization Enter the organization name owning the CA. Organization Unit Enter the business unit for CA operations. City Enter the city name. State Enter the state name. Country Enter the country of the organization. Configure CA Key Size and Algorithm The following table describes all fields in the Configure CA Key Size and Algorithm section. Where a field behaves differently per Crypto Model, the behavior is noted within the description.
Note:- Classical: Supports traditional key types (RSA, EC, DSA). Padding field is shown.
- PQC: Supports only post-quantum key types: FALCON, DILITHIUM, and SPHINCSPLUS. Padding field is not shown. Bit Length and Hash Function values are constrained to those supported by the selected PQC algorithm.
- Composite: Combines a PQC and a classical algorithm in a single certificate. Key Type is replaced by two separate fields: PQC Key Type and Classical Key Type. Padding applies to the classical component only.
CSR Generation Select where the private key and CSR are generated: - AppViewX: Keys are generated and managed within AppViewX (including HashiCorp Vault integration).
- HSM: Keys are generated on a Hardware
Security Module. When selected, additional Device
and Key Handler Name fields appear.Note: For PQC and Composite crypto models, the HSM option is not supported.
Use Existing Key Note: This field is displayed only when CSR Generation = HSM.Select this option if you want to use an existing key from HSM.*Device Note: This field is displayed only when CSR Generation = HSM.Select a configured device from the dropdown list. This list is retrieved from the HSM configured under the platform.*Key Handler Name Note: This field is displayed only when CSR Generation = HSM.You can either create the new key in HSM by providing the reference name or use an existing key handler name (alias/label name) in HSM by running the following command:
Click Validate button:pkcs11-tool --module /path/to/pkcs11.so --list-objects- If validation is successful, then a message, Key is available in the HSM, is displayed.
- If validation is unsuccessful, then a message, Key is not available in the HSM, is displayed.
- If the key provided is not supported by the CA being created, then a message, The algorithm for this key is not supported for CA creation, is displayed.
* Key Type Select the key algorithm for the CA. The options available depend on the Crypto Model selected:
- Classical: RSA, EC and DSA variants. Example:
RSA. - PQC: PQC-supported algorithms only:
- FALCON: Lattice-based signature scheme optimized for compact signatures.
- DILITHIUM: Lattice-based scheme (CRYSTALS-Dilithium / ML-DSA) with strong security guarantees.
- SPHINCSPLUS: Stateless hash-based scheme with conservative post-quantum security.
- Composite: Not shown. Replaced by the separate PQC Key Type and Classical Key Type fields below.
* PQC Key Type (Composite only)
Note: This field is displayed only when Crypto Model = Composite.Select the post-quantum algorithm for the PQC component of the composite key pair. Available options include:MLDSA44MLDSA65MLDSA87
(ML-DSA / CRYSTALS-Dilithium variants)
* Classical Key Type (Composite only)
Note: This field is displayed only when Crypto Model = Composite.Select the classical algorithm for the classical component of the composite key pair. Appears only when Crypto Model = Composite. Available options include RSA and ECC variants. Example:
RSA,ECDSA.* Padding Select the padding scheme for the RSA key component. Behavior varies by Crypto Model:
- Classical: Select
PKCS1orPSSbased on the selected Key Type. - Composite: Shown for the classical component
only. Select
PSSorPKCS1.
* Bit Length Select the key size in bits. Available values depend on the selected Key Type and Crypto Model:
- Classical: Standard RSA/ECC values. Example:
2048,30724096. - PQC: Values are constrained by the selected
PQC algorithm and are typically larger than
classical equivalents. Example:
7176,14344. - Composite: Applies to the classical
component. Example:
2048,4096.
* Hash Function Select the hashing algorithm used to sign the CA certificate. Available options depend on the Crypto Model:
- Classical: SHA-based functions. Example:
SHA256,SHA384,SHA512. - PQC: SHAKE-based functions constrained by the
selected PQC algorithm. Example:
SHAKE256. - Composite: Applies to the classical component
signature. Example:
SHA256,SHA384.
*Key Size and Algorithm Note: This field is displayed when Tier = Standard CA.Select the CA key size and algorithm from the dropdown list. By default, RSA_PKCS1_4096_SHA256 is selected.Configure CA Artifacts Path Length Constraint Note: This field is displayed when Tier = PQC Ready CA.Optional. Defines the maximum number of subordinate CA levels permitted below this CA in the PKI hierarchy. The default value is None (unlimited). Allowed values:0,1,2,3, orNone.This field can have any of these values: 0, 1, 2, 3, or none. For example, if it is set to 2, it means that only two intermediate CAs are allowed between the end-entity certificate and this CA certificate. None indicates unlimited.
CRL Publishing Note: This field is displayed when Tier = PQC Ready CA.Select this option to enable or disable CRL publishing using the CRL Publishing checkbox, which is enabled by default.Note: Ensure the selected template includes the cRLSign key usage. If not, a warning is displayed and CA creation is blocked until you update the template or disable CRL publishing.Policy ID Note: This field is displayed when Tier = Standard CA.Select the certificate policy ID to embed in the CA certificate's Certificate Policies extension. The dropdown lists the available policy identifiers. Example value:2.5.29.32.0(anyPolicy).Custodian Settings Custodian By default, the SaaS trial customer (logged in user) is added as the custodian. He/she will get the approval links via email for all the actions performed in the PKI hierarchy creation. Click Manage to add more custodians.
*: Mandatory fields -
Click Save.
A window with the summary of values entered appears.
-
Click Proceed to trigger the approval flow.
The newly created CA appears in the table with the approval status as Create - Approval Pending and the status as Awaiting Approval until all the necessary approvals are completed. If you want to abort the action, then click Abort.
An email from AppViewX is sent to all the active custodians for approving the CA.
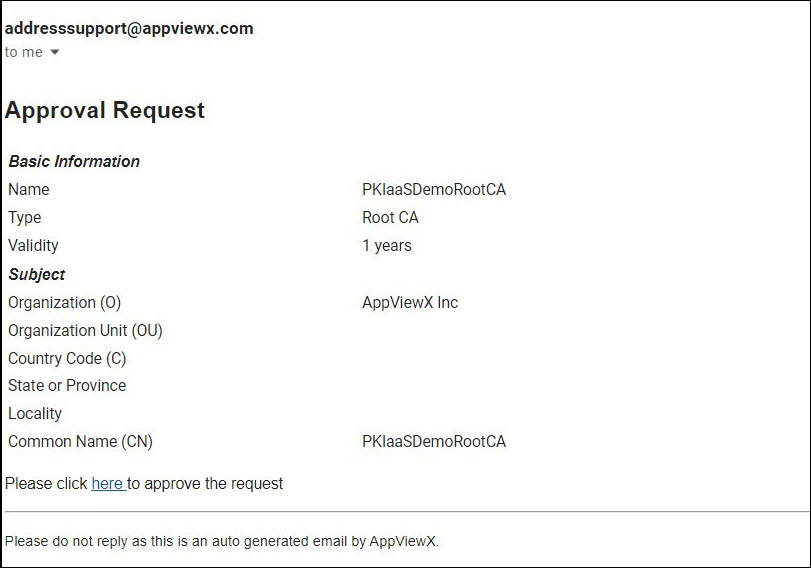
-
Click the here hyperlink in the email to be redirected to the AppViewX
login page.
On successfully logging in, the approval request is displayed with the Approve and Reject buttons.Tip: You can also approve by clicking the
 (Notification Center) on the top
right-hand-corner of the page.
(Notification Center) on the top
right-hand-corner of the page. -
Enter the comments and click Approve.
A confirmation popup window appears if you want to submit the request.
-
Click OK. Once the approval count reaches the minimum approval as set by
the quorum number, the custodian is approved.
The approval status changes to Create - Approved and the status to In Progress until the CA is created and is enabled.
-
Click the
 (Refresh) icon to see the status as
Active once the CA is activated. Click Resubmit if the action
fails for any reason.
Certificates can be issued from this CA. CRLs are generated for this CA.
(Refresh) icon to see the status as
Active once the CA is activated. Click Resubmit if the action
fails for any reason.
Certificates can be issued from this CA. CRLs are generated for this CA. -
[Optional] Click the Audit Log against the CA to view the audit log
details. You can also download the audit log by clicking the Download
button on the Audit Log view page. The audit log is exported in the .xls
format.
Note: Once the audit log is fully loaded, the Loading button will turn to View. Refresh the page to see the View button.
-
[Optional] Click the Approval Status column value link to check the
update on approvals.
Note:
- The PKI CA thus created cannot be modified and can be viewed from the page.
- You can enable, disable, and delete root CAs created with Standard CA while you can enable, disable, renew, revoke, and delete root CAs created with PQC Ready CA. See Actions.