Validation Authority
Prerequisites
- OCSP URL must be published in the AIA field of the certificate with the AppViewX OCSP server URL.
Plugins required:
- OCSP Server and OCSP Generator must be deployed for OCSP to work.
- For on-premise deployment, configure OCSP as explained here.
- You can select one or more certificates from the inventory and click Actions > Revocation Check to perform revocation validation. After successful validation, the certificate status is reflected through color-coding in the Common Name column.
CRL Profiles
Note: CRL routed via CC will
work only with the latest version of CC.
There are two CRL profiles
for:- Standard CA: Lists CRLs only from AppViewX CA (GCP-backed CA) with details such as CRLDP, issuer common name, linked OCSP, next update time, DC name, and connectivity.
- PQC Ready CA: Lists CRLs from AppViewX Native CA. This option is available only if at least one AppViewX Native CA has been created. Only then the system automatically creates a new OCSP responder for the AppViewX Native CA.
Note: Validation Authority no longer includes revoked,
expired, or deleted CA certificates in CRL profiles. These CAs are unavailable
for manual CRL publishing, CRL schedule configuration, and API-based CRL
publishing. Only active, valid CAs appear for CRL publishing and
scheduling.
CRL Scheduler
Note: This section is
applicable only for PQC ready CA.
The CRL scheduler ensures that CRLs
for root and subordinate CAs are automatically generated and updated at regular
intervals as defined by the CA's policies. The frequency of updates may depend
on the CA's configuration (e.g., daily, weekly, etc.). To set the CRL scheduler for Root CA:
-
Go to
 .
.
- Select the CRL tab. By default, this is selected.
-
Select PQC Ready CA. By default, this is
selected.
Note: The CRL Scheduler and Actions are available only for PQC Ready CA. Ensure that you have necessary role-based access controls and workflow access to publish CRL.
-
Enter the following details for Root CA.
Table 1. Fields for CRL Scheduler Field Description *Timezone Select a timezone from the dropdown list. The scheduler runs on the selected timezone. Starts on Select a start date and time by clicking the calendar. *Frequency Select the frequency as daily, weekly, or monthly. *Days of Week This field appears only for root CA. Select the days of the week you want the scheduler to run. *Overlap Period Select the overlap period in days or weeks. CRL validity overlap between two consecutive CRLs. *: Mandatory fields -
Enter the following details for Sub CA:
Table 2. Fields for CRL Scheduler Field Description *Timezone Select a timezone from the dropdown list. The scheduler runs on the selected timezone. Starts on Select a start date and time by clicking the calendar. *Frequency Select the frequency as daily, weekly, or monthly. *Overlap Period Select the overlap period in days or weeks. CRL validity overlap between two consecutive CRLs. *: Mandatory fields The created CA is displayed on the CRL home page as shown:
- Click Publish Now in Actions to trigger CRL issuance for the selected Native CA.
OCSP Profiles
GET
                    /ocsp/{base64-url-encoded-request}
. No additional configuration is
required to enable this functionality.Note: OCSP routed via CC
will work only with the latest version of CC.
You can create the following OCSP profile by going to PKI > Validation Authority > OCSP:
OCSP Signing: By default, an OCSP signing certificate
is created along with a new CA creation. Clicking this field lists all the valid
OCSP signing certificates available in the AppViewX PKIaaS inventory along with
common name, serial number, issuer common name, extended key usage, and
status.
Note: Only one OCSP signing certificate is
active at any given point of time.
- If you want to activate a selected OCSP signing certificate, you can do it
from Actions > OCSP Signing. The OCSP configuration is updated with
the selected certificate.Note: An OCSP signing certificate can be revoked only on deleting the CA. If an OCSP signing certificate is revoked or deleted from the CLM > Certificate Inventory > Server page, then the OCSP responder will not work. To remediate this action, you can create a new OCSP signing certificate by going to CLM > Certificate Action > Enroll Certificate and following the procedure explained in the Section, Creating OCSP Signing Certificate.
Configuring OCSP for On-Premise Deployment
-
Go to (Menu) icon > PKI > Validation
Authority.
By default, CRL is selected.
-
Click the OCSP tab and click PKIaaS from the dropdown
list as shown.
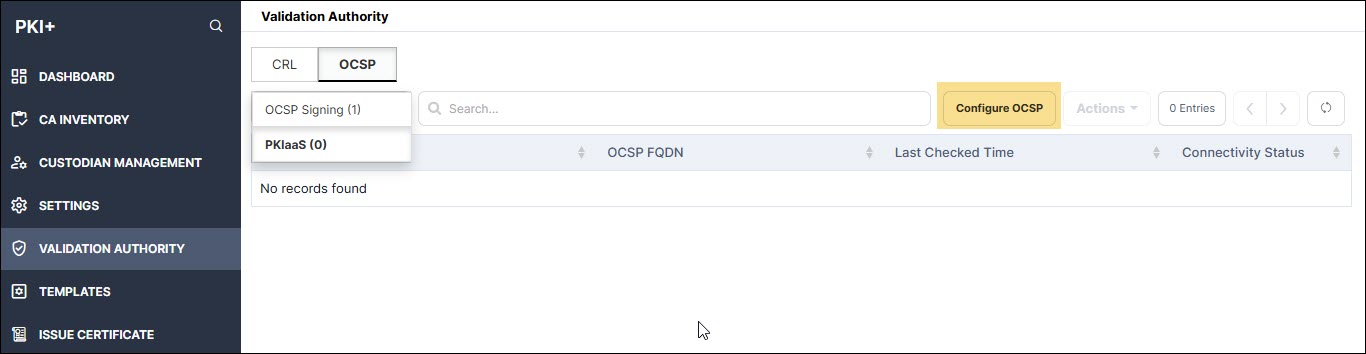
-
Click Configure OCSP.
The Configure OCSP - PKIaaS window is displayed.
-
Enter the following fields:
Table 3. Field Description for Configure OCSP - PKIaaS page Field Description *OCSP Name Provide a friendly name. *OCSP FQDN Enter the node domain name where OCSP plugin is hosted. *: Mandatory fields -
Click Add.
The entered information is displayed in the table.To troubleshoot OCSP responder with openSSL, see Section, Troubleshooting.
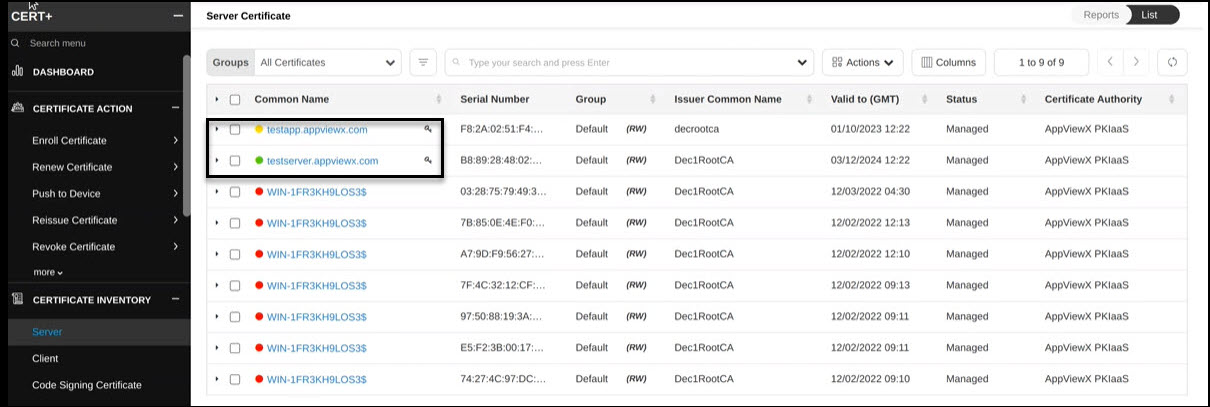
Creating OCSP Signing Certificate
To create an OCSP signing certificate:
-
Go to CLM > Certificate Action > Enroll Certificate.
The Enroll Certificate page is displayed.
- Select the Certificate Authority as AppViewX PKIaaS.
- Select the Certificate Profile as OcspSigning.
-
Fill out the other fields as explained in the Section, Adding/Enrolling Certificate.
The OCSP signing certificate appears on the CLM > Certificate Inventory > Server page as shown with a key symbol beside the common name.
Verifying OCSP via HTTP GET
-
Create OCSP request.
openssl ocsp -issuer issuer.pem -cert certificate.pem -reqout ocsp_request.der -no_nonce
-
URL-safe Base64 encode the request.
OCSP_REQUEST=$(base64 -w 0 ocsp_request.der | tr '+/' '-_' | tr -d '=')
-
Send HTTP GET request.
curl -o ocsp_response.der "http://<ocsp-host>:<port>/ocsp/${OCSP_REQUEST}"
-
Parse the response.
openssl ocsp -respin ocsp_response.der -text
Restriction: Deletion of Active OCSP Signing Certificates
If a certificate is actively used for OCSP signing, the delete operation is blocked and an error message is displayed.
Before deleting the certificate, ensure one of the following actions:
- Activate a different OCSP certificate under the PKI Validation Authority.
- Remove the certificate assignment from all associated OCSP responders.