Custodian Management
Custodians in AppViewX PKI+
 (Menu) icon
> PKI+ > Custodian Management with the following privileges under
RBAC roles and resources.
(Menu) icon
> PKI+ > Custodian Management with the following privileges under
RBAC roles and resources.- Roles automation > service request full
- PKI+ > view all (optional)
- Resources > workflow studio, workflow request > PKIaaS, approval_request
Key Ceremony Process
The first custodian is auto-approved and the approval flow gets triggered after adding the second custodian. On adding the second custodian, the individual receives a notification stating Email Verification - Pending. Once the email verification is completed, an approval link is sent to the first custodian. Upon approval, the second custodian transitions to the active state.
Onboarding Custodians
Prerequisite
On-prem users need to configure the SMTP server for Custodian Management by clicking the link provided on the Getting Started with PKI+ Web page for instructions.
To onboard custodians:
-
Go to (Menu) icon > PKI+ > Custodian
Management.
-
Enter the following fields:
Table 1. Field Description for Custodian Management page Field Description *Quorum Value By default, the quorum value is configured to 51%. This value signifies the minimum number of approvals needed for tasks such as adding or removing custodians and approving the creation of a certificate authority (CA). For instance, if there are three custodians, the minimum approval required is rounded off to two. In case of six custodians, the minimum approval required is four. *Approval Link Validity By default, the approval link is valid for 30 minutes. Minimum value is 10 minutes while maximum value is 7 days.
Note: Fields marked with red asterisk (*) are mandatory. - Click Save.
-
Add custodians by entering the following information:
Table 2. Field Description for Custodian Management page Field Description *Username Select from the list of usernames. Important: SSO users must log in to AppViewX at least once for their names to appear in the dropdown list.*Email ID This field is auto-populated on selection of a username. This email address of the custodian is where the approval link and notification messages are sent. *First Name The first name of the custodian being added. If this is not auto-populated, then type the first name. Important: Custodian must have login access to AppViewX.*Last Name The last name of the custodian being added. If this is not auto-populated, then type the last name. Note: Fields marked with red asterisk (*) are mandatory. -
Click Add.
Note: If the custodian being added is not part of the AppViewX users, then the following confirmation screen appears. Click Save and Continue to proceed as an SSO user.Important:
- If any of the approvals is in the pending state, then no new actions on the CA or the Custodian Management pages are allowed until the current one is either approved, rejected, or aborted.
- At least two custodians must be added to perform the M(N) approvals in PKI.
Table 3. Action Status Description and Required Action Action Status Status Description Required Action Email Verification - Pending Approval Pending The custodian's email verification is pending approval and is not active. Note: If you want to abort the action, click Abort. Any workflow that is triggered and is in progress is killed from the Request page prior to triggering any further actions.The newly added custodian receives a notification email. Click the here hyperlink to be directed to the AppViewX login page. On successful login, users are directed to the approval page. Users can also approve the request by going to Menu > Requests > All requests. Tip: You can click the (Notification
Center) on the top right-hand-corner of the
page to verify the email
address.
(Notification
Center) on the top right-hand-corner of the
page to verify the email
address.Create - Approval Pending Approval Pending The custodian has been added but is awaiting approval from active custodians. Active custodians must click the here hyperlink in the email to be redirected to the AppViewX login page. On successful login, users are directed to the approval page. User can also approve the request by going to Menu > Requests > All requests. Tip: You can click the(Notification
Center) on the top right-hand-corner of the
page to add the custodian to the custodian
group.Create - Approved Active The custodian has been approved and added successfully. - Email Verification - Rejected Inactive The custodian has been rejected. On rejecting a request, a confirmation popup window appears if the requester wants to submit the request. Click OK to resubmit. - To add consecutive custodians, follow the aforesaid steps. Successful addition of custodians depends on the approval of active custodians per the quorum value set.
-
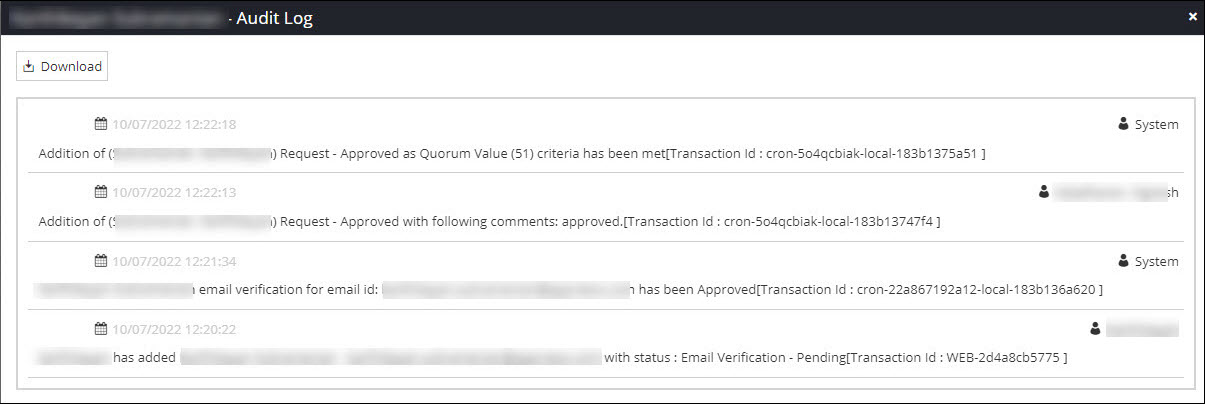
[Optional] Click Audit Log against each custodian for more
information about the request and the response count along with comments, if
any, from other approvers. You can also download the audit log by clicking
the Download button on the Audit Log view page and exporting it in
the .xls format. Once the audit log is fully loaded, the Loading
button will turn to View. Refresh the page to see the View
button.
Deleting Custodians
To delete custodians:
-
Go to (Menu) icon > PKI+ > Custodian
Management.
The Custodian Management page appears.
-
Click the
 (Delete) icon against the custodian you
want to delete.
A deletion mail is sent to all active custodians. The approval status changes to Delete - Approval Pending.
(Delete) icon against the custodian you
want to delete.
A deletion mail is sent to all active custodians. The approval status changes to Delete - Approval Pending. -
Click Approve to delete the custodian.
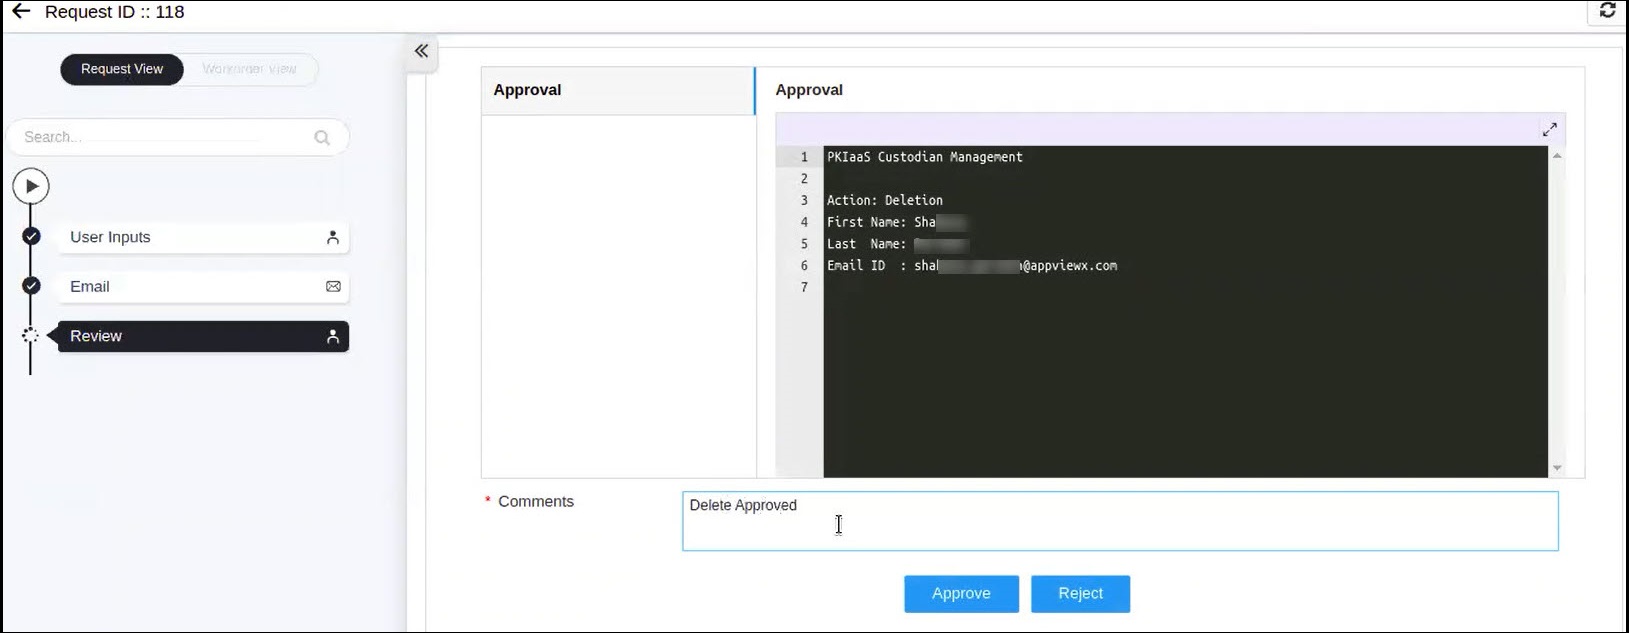 A confirmation popup window appears.
 -
Click OK to confirm.
Once the approval count meet the minimum approval required by the quorum number, the custodian is deleted from the table. On successful approval, the approval status changes to Delete - Approved and the status changes to Inactive. If the deletion request is rejected, then the approval status changes to Delete - Rejected and the status remains as Active.