Enablement for Cloud Connector IPv6
Prerequisites
- The virtual machine where the installation is performed must be IPv6-enabled.
- All existing prerequisites applicable to IPv4 installations must also be satisfied.
Installation Flow
- There are no changes to the existing installation flow. During the Cloud
Connector installation process, the installer automatically detects IPv6
availability on the virtual machine using the command
. Based on this detection, the user is prompted to choose between an IPv4 or IPv6 environment, as shown below:ip -6 addr | grep inet6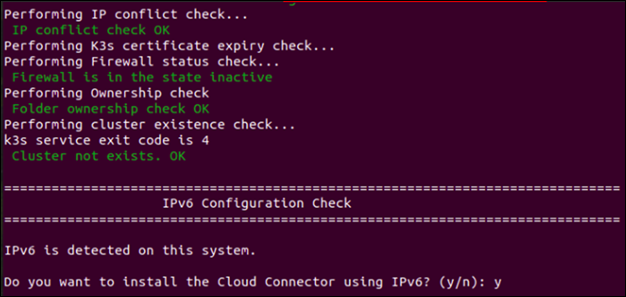 Note: Once the prerequisite check is completed, the installation process verifies the IPv6 configuration on the virtual machine.
 - If the user chooses to proceed with an IPv6-based installation, they can
respond with y to the prompt. If they prefer to continue with an
IPv4-based installation, they can respond with n. When n is
selected, the Cloud Connector is installed in IPv4 mode.
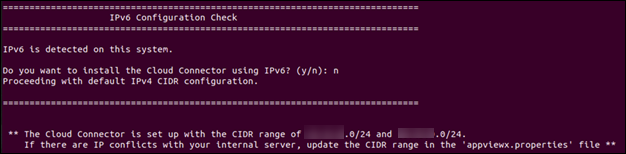 Note: The installation will be processed with the IPv4
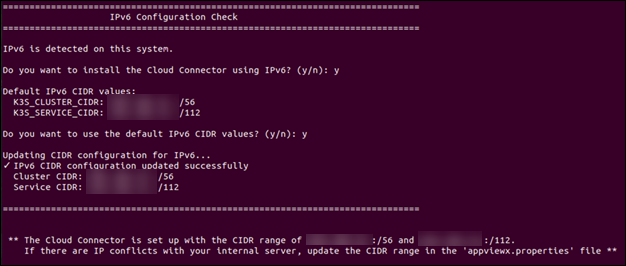
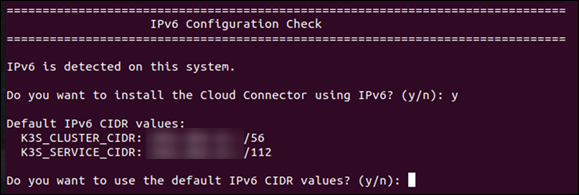
 - If the user selects y, the installation process displays the default
IPv6 CIDRs to be used and prompts the user to confirm whether they would
like to proceed with these default values.
- If the default CIDRs conflict with existing network configurations in the
customer environment, the user can select n and specify custom CIDRs
for the installation. The installer then validates the provided values to
ensure they are in the correct IPv6 CIDR format before continuing with the
installation.
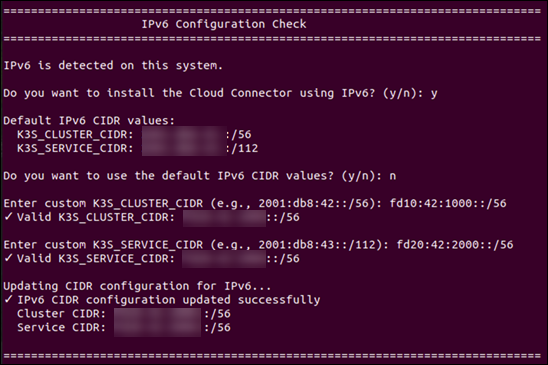 Note: The screenshot below shows an example of providing custom IPv6 CIDR values during installation.
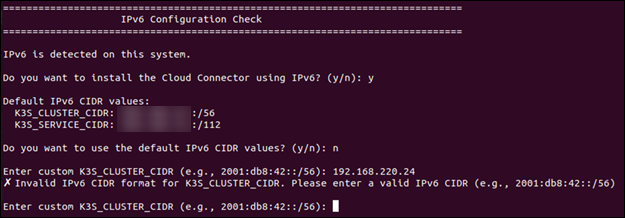
 - If the provided custom CIDRs are invalid, the installer displays an error
and prompts the user to enter valid IPv6 CIDR values.
- If the default CIDRs are not in use, the user can respond with “y”,
and the installation will proceed with the default IPv6 CIDRs.