Updating the Renewal Validity of Active Certificates
You can now specify a custom validity period for
the
next generated
server,
client, or code-signing certificates prior to
the
parent certificate's next renewal or
regeneration. This custom validity will be applied during the upcoming renewal or
regeneration. This action is possible only if the certificate group is set to RW
(read-write).
Note: Re-enrollment will continue to use the
validity period defined in the policy.
Updating the Renewal Validity for Individual Certificates
-
Go to
 (Menu) >
CLM > Certificate
Inventory and select a certificate type.
For example, to update the renewal validity of a server certificate, select Certificate Inventory > Server.The certificate inventory for the selected certificate type is displayed.
(Menu) >
CLM > Certificate
Inventory and select a certificate type.
For example, to update the renewal validity of a server certificate, select Certificate Inventory > Server.The certificate inventory for the selected certificate type is displayed. -
From the inventory, to go to the holistic view of the certificate you want
to renew the validity, click its Common Name.
The holistic view of the selected certificate is displayed.
-
Click the
 (More) icon and from the
menu options displayed, select Renewed Cert
Properties.
(More) icon and from the
menu options displayed, select Renewed Cert
Properties.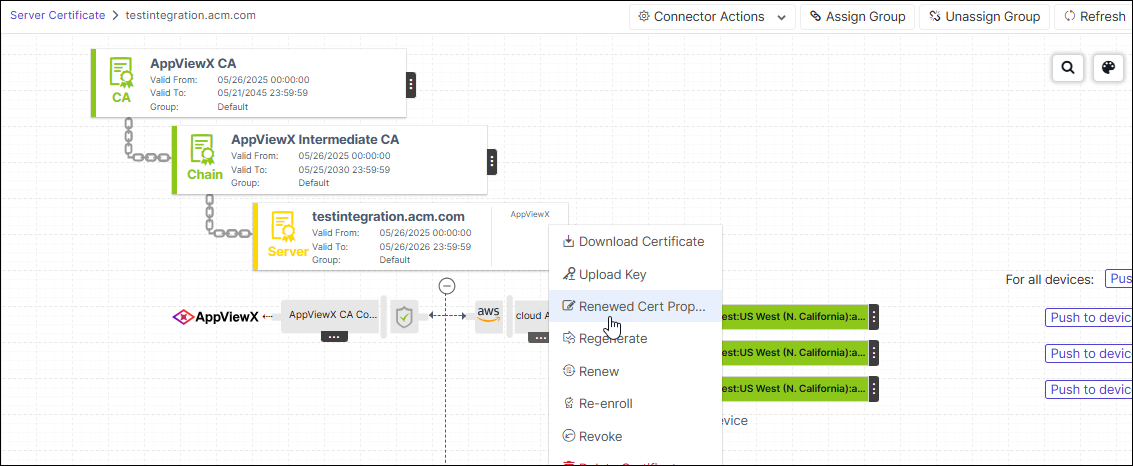 The Renewed Cert Properties dialog box is displayed.
 -
In the Renewed Cert Properties dialog box:
Bulk Updating the Renewal Validity
-
Go to (Menu) >
CLM > Certificate
Inventory and select a certificate type.
For example, to update the renewal validity of a server certificate, select Certificate Inventory > Server.The certificate inventory for the selected certificate type is displayed.
- From the certificate inventory, select the check boxes corresponding to all the certificates for which you want to update the renewal validity.
-
From the Actions dropdown menu, select Renewed Cert
Properties.
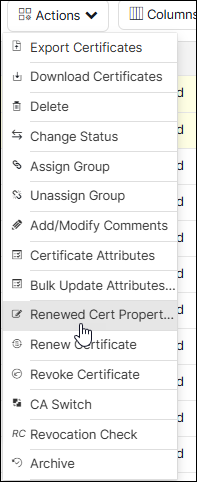 The Renewed Cert Properties dialog box is displayed.
 -
In the Renewed Cert Properties dialog box: