Enrollment and Re-Enrollment from Policy Engine
Note: To
enroll a certificate from Policy Engine, ensure Workflow Engine = Policy Engine
is set in Workflow Settings under .
Enrolling Certificates
Prerequisites
- Ensure the CA account is configured in AppViewX.
- An enrollment policy must exist with the existing CA template.
- The user must have RW permission to the group that is mapped to the respective policy.
To enroll a new certificate
-
Go to
 (Menu) icon > Policy Engine > POLICY MANAGEMENT >
Policies.
The Policy Inventory page is displayed.
(Menu) icon > Policy Engine > POLICY MANAGEMENT >
Policies.
The Policy Inventory page is displayed. -
On the Policy Inventory page, click + Create Policy.
The Create Policy popup window is displayed.
- Select Managed Certificate Policy from the Policy Type dropdown.
-
Enter the following details to configure the policy.
Field Description *Policy Name Enter a policy name. It can be alphanumeric and can contain underscore (_), dash (-), or space. Description Enter the description for the policy. *Select a Tag Select an existing tag from the dropdown or create a new one. Note: Selecting the appropriate policy type allows you to group policies logically, simplifying organization and management based on specific criteria.*Fields marked with red asterisk (*) symbol are mandatory. -
Click Configure Policy.
Once the policy is created successfully, a confirmation message will appear, and you will be directed to the Action page.
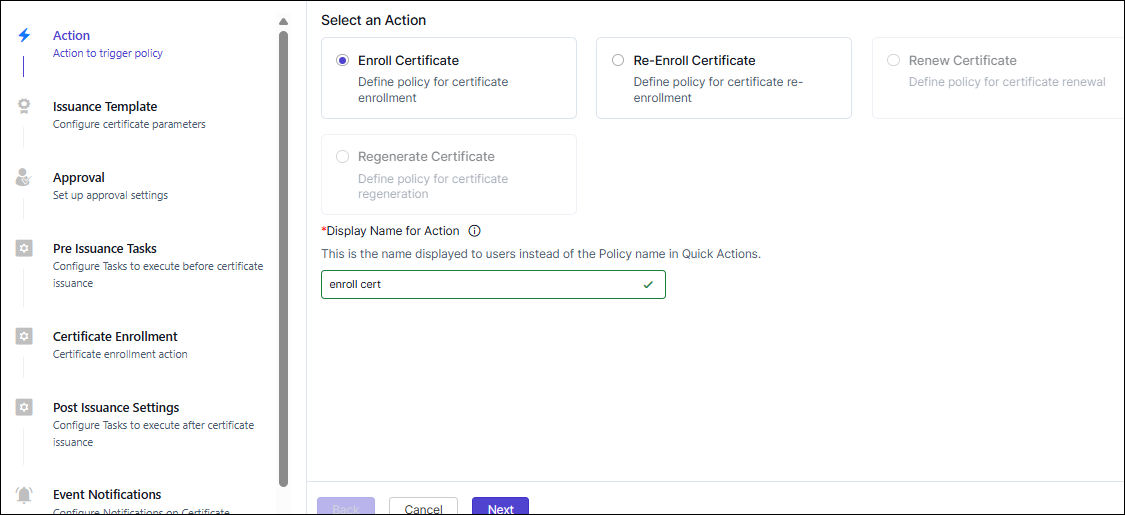
- Select Enroll Certificate option (default).
- Enter an action name in the Display Name for Action text box. The action name can be alphanumeric and can contain underscore (_), dash (-), or space.
-
Click Next.
The Issuance Template page is displayed. This page displays the certificate issuance templates for the configured CA settings appearing on the right panel of the page.
- Select a template for the CA you want to enroll the certificate. The certificate issuance template is loaded.
-
Enter field information as described here.
Note: When selecting multiple values for certain fields, you can set one value as default by clicking the Set as Default button against the value. The default value is indicated with a star against it
 .
. - [Optional] Click the Add Custom Field button to add more custom fields in Certificate Attributes.
- Click Next to go to the Approval page.
- Turn on the Auto Approve toggle button to skip approval. To add new approval level, click the Add New Approval Level link.
- Click Next to go to the Pre-Issuance Tasks page.
- [Optional] Define additional tasks that run after main action completes by clicking any of the tasks appearing on the right panel or simply click Next to go to the Certificate Enrollment page.
- Click Next to go to the Post Issuance Settings page.
- [Optional] Define additional tasks that run after main action completes by clicking any of the tasks appearing on the right panel or simply click Next to go to the Event Notifications page.
-
[Optional] Define additional tasks that run after main action completes by
clicking any of the tasks appearing on the right panel or simply click
Finish.
The Submit Policy window is displayed with a message, Are you sure you want to submit the policy?
-
Click Confirm to save the policy or click Save and Enable
Policy to activate the policy.
The configured policy is displayed with the Status toggle button enabled as shown. Saved policies will have the Status toggle button disabled.
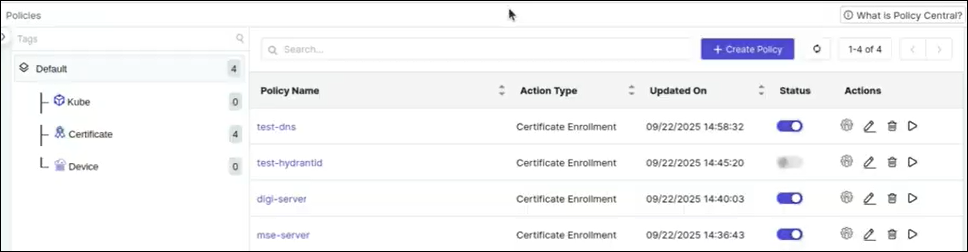 You can edit, delete, or execute the policy by clicking any of the icons in the Actions column.Note: To edit or delete a policy, you need to first disable the status.
 -
To execute the policy, click
 (Execute Policy) icon in the Actions column.
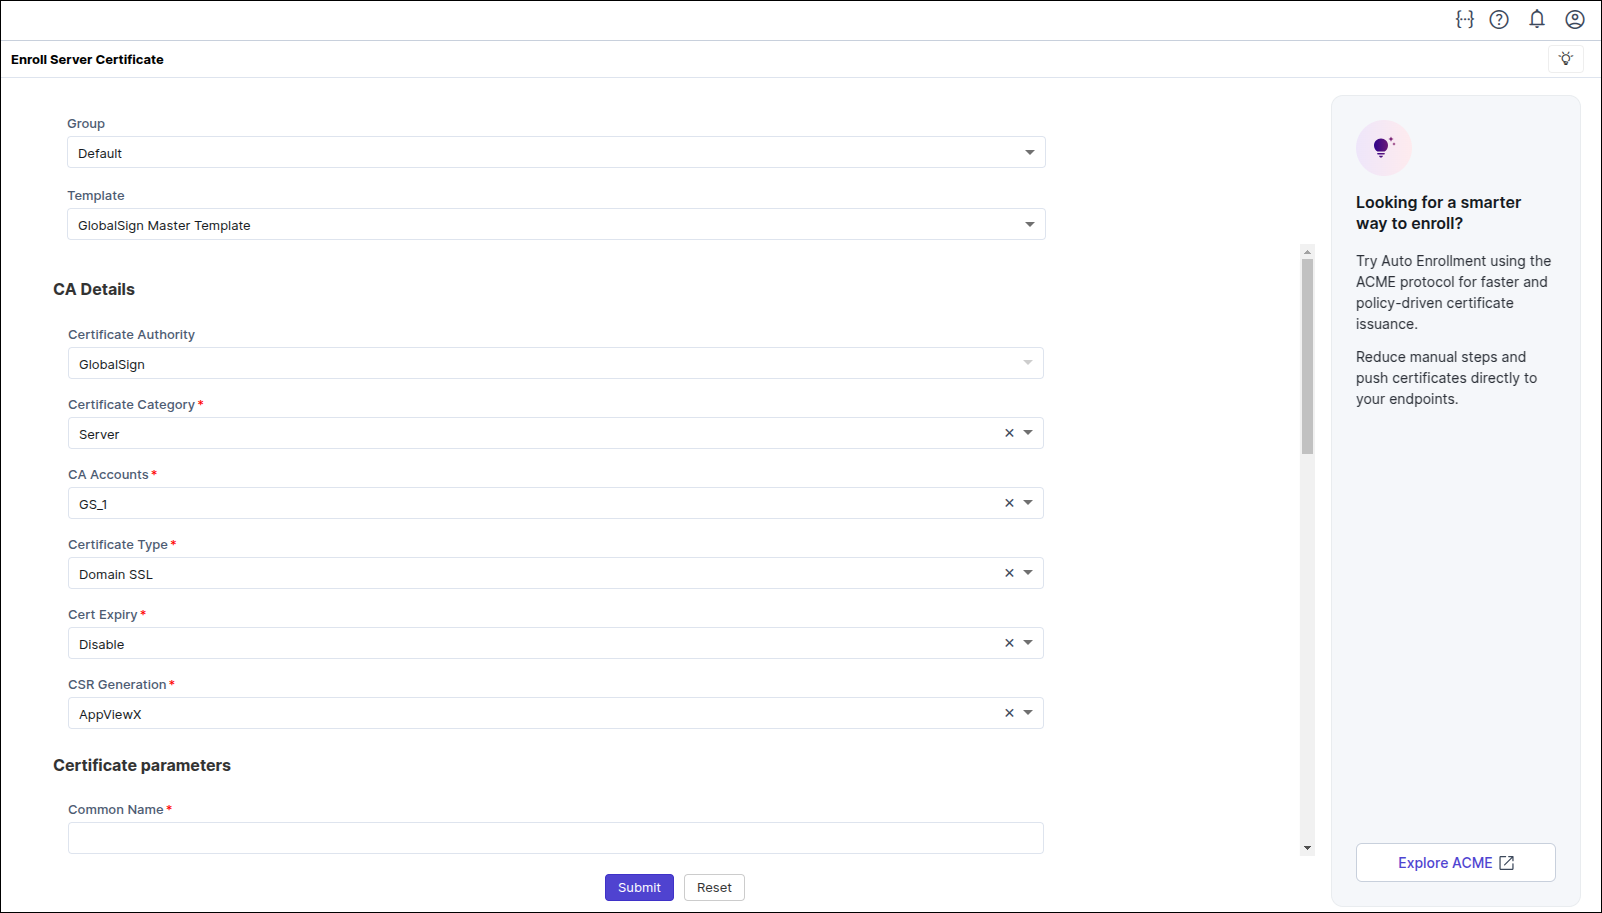
The enrollment template, which is configured according to the CA template in the policy, is displayed, prompting you to fill the mandatory fields.
(Execute Policy) icon in the Actions column.
The enrollment template, which is configured according to the CA template in the policy, is displayed, prompting you to fill the mandatory fields. -
Fill the mandatory fields and click Submit.
A message, Certificate enrollment request submitted with ID: XXX, appears.The new enrollment request can be viewed under Policy Requests. You can also view it from CERT+ > CERTIFICATE INVENTORY > Server as shown.
-
Go to POLICY MANAGEMENT > Policy Requests to check the status of the
enrollment request.
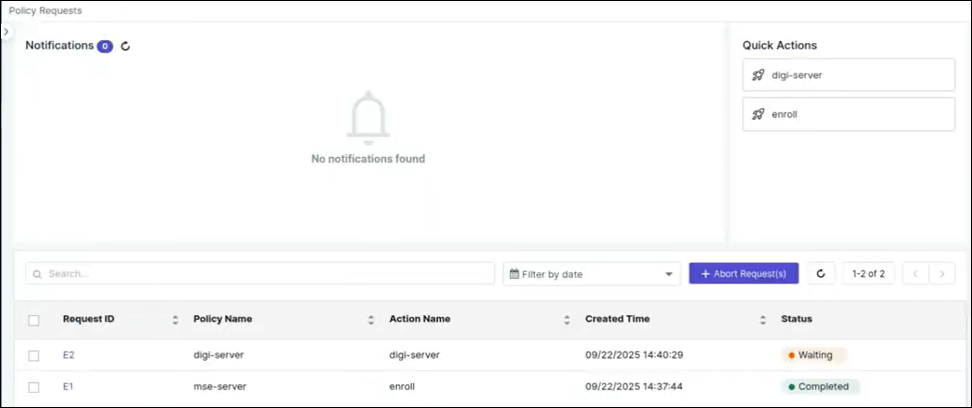 Once the certificate enrollment is successful, the Status changes to Completed. If it fails, check the message in Enroll Certificate, address it and then click Retry. Click the Request ID link to open a staged execution log view as shown.
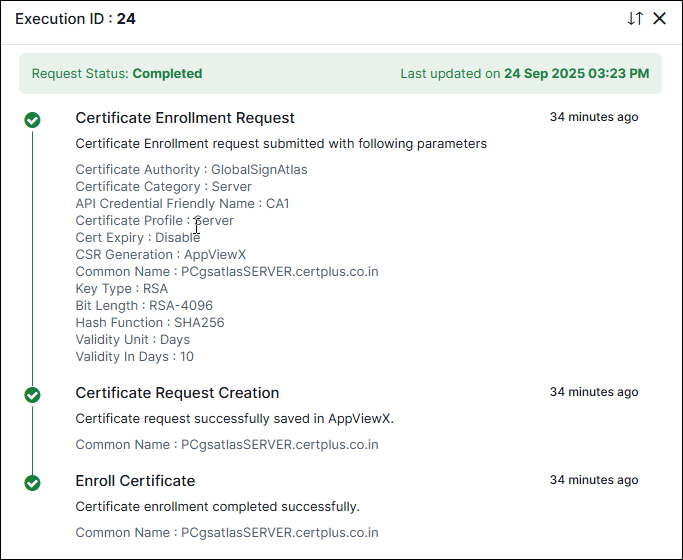
Re-Enrolling Certificates
Prerequisites
- Ensure the CA account is configured in AppViewX.
- A default re-enrollment policy must exist with the existing CA template.
- The user must have RW permission to the group that is mapped to the respective policy.
To re-enroll a certificate
-
Go to
(Menu) icon > Policy Engine > POLICY MANAGEMENT >
Policies.
The Policy Inventory page is displayed.
-
On the Policy Inventory page, click + Create Policy.
The Create Policy popup window is displayed.
- Select Managed Certificate Policy from the Policy Type dropdown.
-
Enter the following details to configure the policy.
Field Description *Policy Name Enter a policy name. It can be alphanumeric and can contain underscore (_), dash (-), or space. Description Enter description of the policy. *Select a Tag Select an existing tag from the dropdown or create a new one. Note: Selecting the appropriate policy type allows you to group policies logically, simplifying organization and management based on specific criteria.*Fields marked with red asterisk (*) symbol are mandatory. -
Click Configure Policy.
Once the policy is created successfully, a confirmation message will appear, and you will be directed to the Action page.
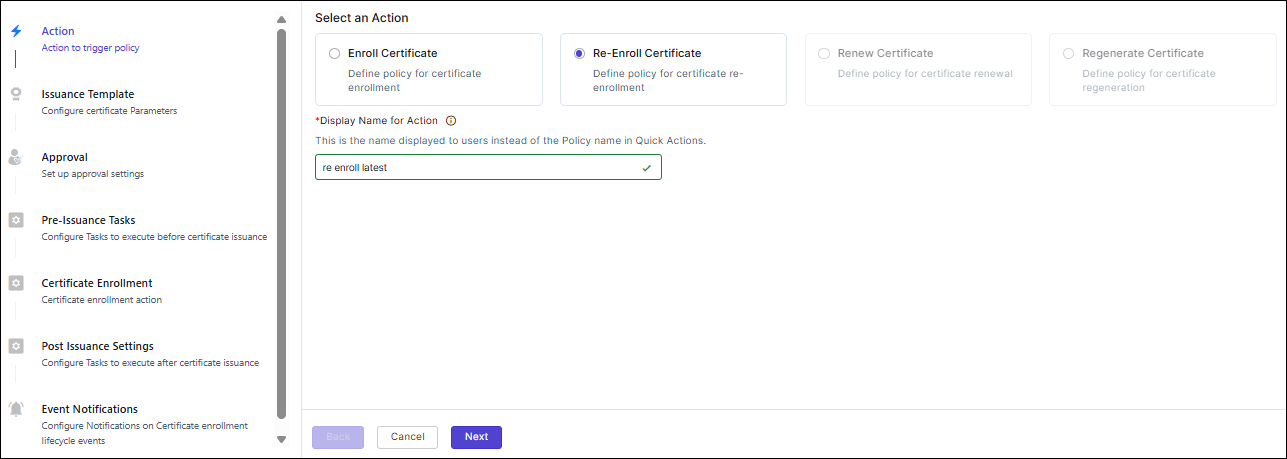
- Select Re-Enroll Certificate option.
- Enter an action name in the Display Name for Action text box. The action name can be alphanumeric and can contain underscore (_), dash (-), or space.
-
Click Next.
The Issuance Template page is displayed. This page displays the certificate issuance templates for the configured CA settings appearing on the right panel of the page.Note:
The Default Re-Enrollment Policy is system-generated with pre-defined configurations.
- Select a template for the CA you want to re-enroll the certificate. The certificate issuance template is loaded. The
-
Enter the fields in the Certificate Parameters section.
Note:
- Default settings for re-enrollment are:
- Certificate Validity: 200 days
- Key Type: RSA
- Key Size: 2048
- Key/CSR Generation Location: AppViewX
- Inherited fields from existing certificate being
re-enrolled:
- Issuing CA vendor, account, Division (For Digicert)
- Certificate type (server, client, etc.)
- Subject DN and SAN values
- All certificates configured for re-enrollment post upgrade are automatically mapped to this Default Re-Enrollment Policy.
- When selecting multiple values for certain fields, you can set
one value as default by clicking the Set as Default
button against the value. The default value is indicated with a
star against it .
- Default settings for re-enrollment are:
- [Optional] Click the Add Custom Field button to add more custom fields in Certificate Attributes.
- Click Next to go to the Approval page.
- Turn on the Auto Approve toggle button to skip approval. To add new approval level, click the Add New Approval Level link.
- Click Next to go to the Pre-Issuance Tasks page.
- [Optional] Define additional tasks that run after main action completes by clicking any of the tasks appearing on the right panel or simply click Next to go to the Certificate Enrollment page.
- Click Next to go to the Post Issuance Settings page.
- [Optional] Define additional tasks that run after main action completes by clicking any of the tasks appearing on the right panel or simply click Next to go to the Event Notifications page.
-
[Optional] Define additional tasks that run after main action completes by
clicking any of the tasks appearing on the right panel or simply click
Finish.
The Submit Policy window is displayed with a message, Are you sure you want to submit the policy?
-
Click Confirm to save the policy or click Save and Enable
Policy to activate the policy.
The configured policy is displayed with the Status toggle button enabled as shown. Saved policies will have the Status toggle button disabled.
 You can edit, delete, or execute the policy by clicking any of the icons in the Actions column.Note: To edit or delete a policy, you need to first disable the status.
 -
To execute the policy, click
(Execute Policy) icon in the Actions column.
The re-enrollment template, which is configured according to the CA template in the policy, is displayed, prompting you to fill the mandatory fields.
-
Fill the mandatory fields and click Submit.
A message, Certificate re-enrollment request submitted with ID: XXX, appears.
The new re-enrollment request can be viewed under Policy Requests. You can also view it from CERT+ > CERTIFICATE INVENTORY > Server .
-
Go to POLICY MANAGEMENT > Policy Requests to check the status of the
re-enrollment request.
Once the certificate re-enrollment is successful, the Status changes to Completed. If it fails, check the message in Re-Enroll Certificate, address it and then click Retry. Click the Request ID link to open a staged execution log view.