Signing Up for the Free Trial via the AWS Marketplace
Step 1: Accessing the AWS Marketplace Sign Up Page
- Navigate to the AWS Marketplace page.
- Sign into your account or create your account if you are new to AWS Marketplace.
-
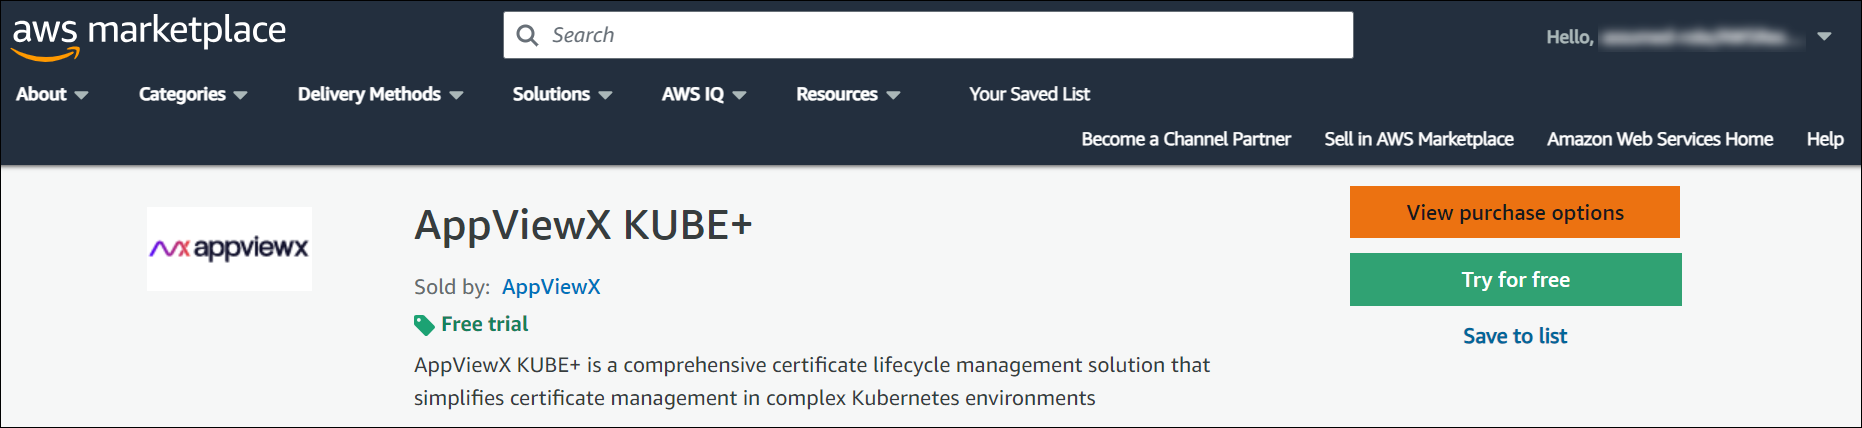
Search for AppViewX KUBE+ in the search bar and select it from the search
result.
The AppViewX KUBE+ page is displayed.
-
In case you have a private offer from AppViewX, it will be listed on top of
the next page. Make sure you select the private offer and not the public
offers.
In case you are here for the first time and do not have a private offer listed, select Try for free option.
-
Select the desired Contract options.
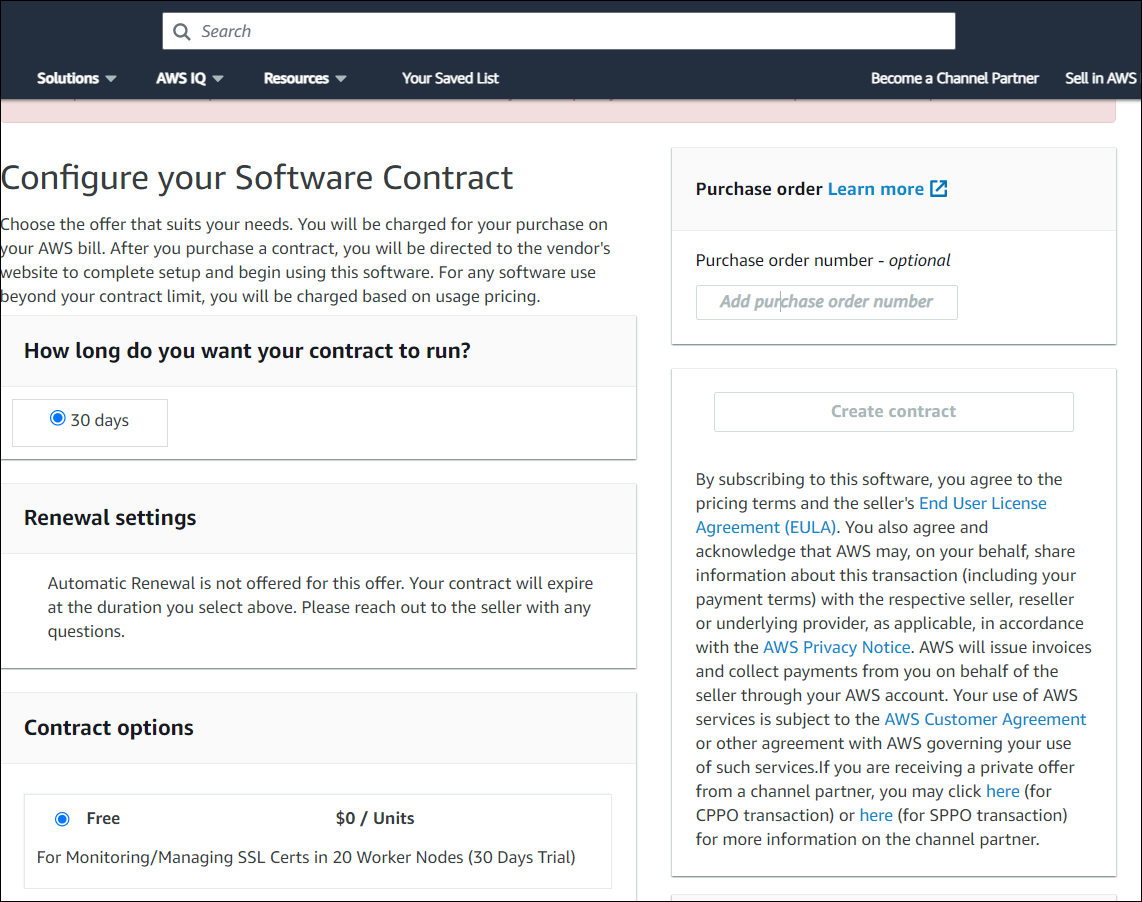
-
Click Create contract to create the contract for AppViewX
KUBE+.
A confirmation dialog box is displayed.
-
In the confirmation dialog box, click Setup your account to complete
the signup.
You will be redirected to the AppViewX SaaS registration page.
Step 2: Filling the Sign Up Form
-
To get started with your free trail, enter the following details:
Field Description First Name* Enter your first name. Last name* Enter your last name. Business Email* Enter your business email address. Company Name* Enter your company name. Enter Custom Domain* By default, the company name is auto-filled. Enter a custom domain if you want to.
Select Service Region* The service region is where your SaaS account will be set up and localized. You cannot migrate data between regions. Select from one of the service regions:-
US (Americas)
-
EMEA
-
APAC
Select Country* Select the country from the dropdown list. Note:- Fields marked with the asterisk (*) symbol are mandatory.
- If you are creating a free or trial account, there are email restrictions put in place for security reasons. Email addresses from Gmail.com, Outlook.com, Yahoo.com, and other personalized email addresses are restricted and may not be used for trial account creation purposes.
-
- From the What are you trying to solve list, select the corresponding checkboxes for your requirements.
- To acknowledge that you have read and reviewed AppViewX's Terms of Service and their Privacy Policy, select the By checking this box, I acknowledge... checkbox.
-
Click Get Started.
The message Thank you for signing up for the free trial! You will receive an email from us shortly is displayed.
Step 3: Verifying your Email
On clicking Get Started, you will get a verification email to your
registered email address. Click Verify Email Address to get your SaaS
account set-up. 
Note:
Wait for a couple of minutes until your email address is successfully
verified. - If you do not see the email in your inbox, then check the Junk/Spam folder. Whitelist the email address so you receive all AppViewX emails in your inbox.
- Confirm your email address within 48hours.
Step 4: Logging in to your SaaS Account
-
Navigate to the login URL.
The login page is displayed.
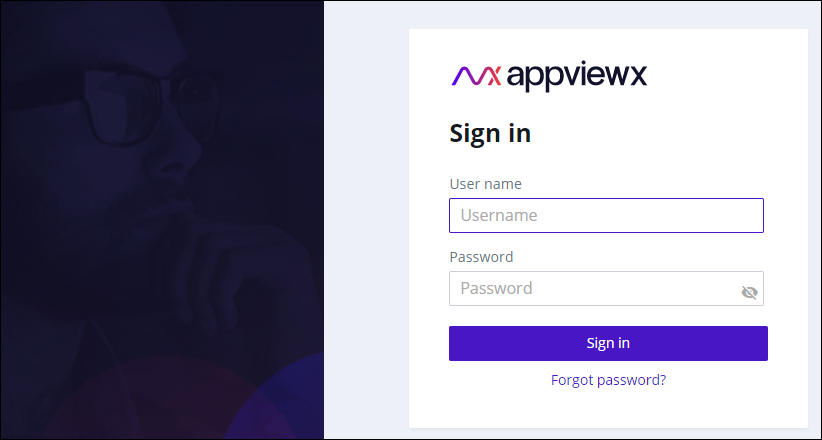
-
From the welcome email, login using the credentials provided.
On successful login, the OTP verification screen is displayed. You will receive the OTP on your registered email address.
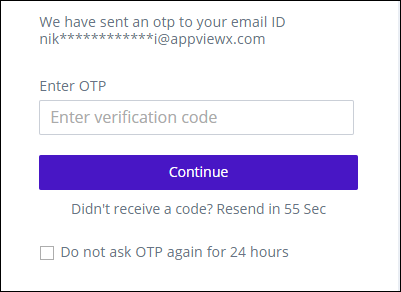
-
Enter the OTP received.
On entering the correct OTP, the Change password screen is displayed.
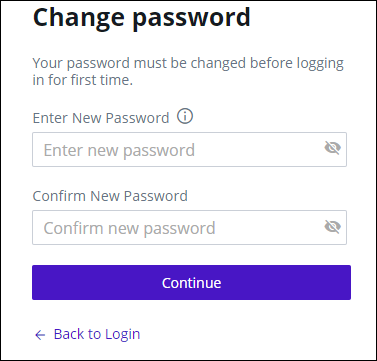
-
Enter and reenter your new password in the Enter New Password and
Confirm New Password fields respectively.
Note: The password must:
- Have at least one uppercase character
- Have at least one lowercase character
- Have one special character such as ~!@#$^&*_-+=|()
- Have minimum of 6 characters and maximum of 24 characters
- Not contain user name
- Not contain more than 3 same characters continuously, for example, aaa
- Not contain blank space
-
Click Continue.
A message notifying successful password change is displayed.
You will be redirected to the login page again.
- Sign in with your new credentials.
- In the OTP Verification screen, enter the OTP received on your registered email and click Continue.
-
On the Terms of Service screen, select the I accept the terms and
conditions checkbox and click Continue.
The AppViewX Platform landing page is displayed.
-
To try a product, click Try Now to start your 30-day trial of the
product.
You will be redirected to the GET STARTED page of the selected product.Note: The 30-day trial period starts from the day you receive the welcome email. The trial period can be extended by 60 more days (which makes the trial duration 90 days). For more details on how you can extend your trial, please reach out to AppViewX Support.
Step 5: Setting up the AppViewX Cloud Connector
- Using the Automated Script
For instructions on setting up the AppViewX Cloud Consumer using the Automated Script, click here.
- Using AppViewX User Interface
For instructions on setting up the AppViewX Cloud Consumer using AppViewX User Interface, click here.
Step 6: Getting Started with AppViewX SaaS
You can access the complete AppViewX documentation here.