Provisioning DNS Records
To add DNS records to your hosted zones:
-
From the Domain Lifecycle section, click Add DNS Records.
The workflow execution page is displayed in a new tab with the workflow inputs requested at the first stage.
-
In the Requester Details section, in the Team DL field, enter the
email addresses to which the domain registration email should be sent.
Note: Multiple email addresses must be entered as comma-separated values. The field information for the first two fields will be fetched automatically from the logged in user information.
- In the DNS Details section, in the Search Domain field, enter search text/keywords for searching domains.
-
Click Search Domains.
The values in the next fields in the DNS Details section will be populated based on the information provided in the above fields.
-
Enter or select the required field information in the remaining fields in the
DNS Details section.
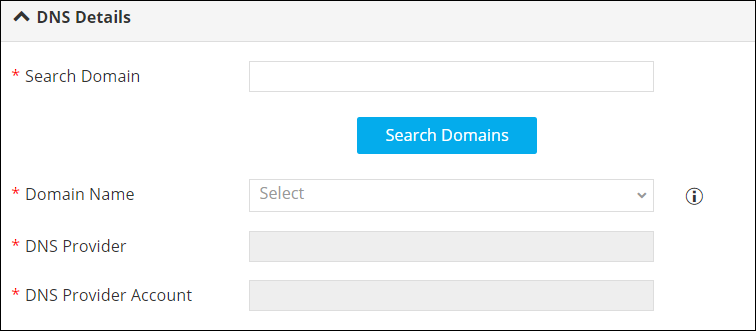
The following table describes the field information required here:
Field Description *Domain Name Select the Domain Name from the options available in the dropdown list, to create the record.
Note: The values in this field will be fetched based on the domain name search results.*DNS Provider Select the DNS provider from the options available in the dropdown. Note: The value(s) in this field will be fetched based on the domain name (TLD). For example, you can configure the TLD settings such that if the domain name selected is .net, the DNS Provider field will display Akamai or if the domain name selected is .org, then the DNS Provider field will display UltraDNS and so on.*DNS Provider Account Select the DNS provider account from the options available in the dropdown. *: Mandatory fields -
In the Record Details section, enter or select the required field
information.
Note: The fields displayed in this section will change depending on the Record Type selected.
-
To add the selected record details to the Record Details grid, click the
 (Add) icon.
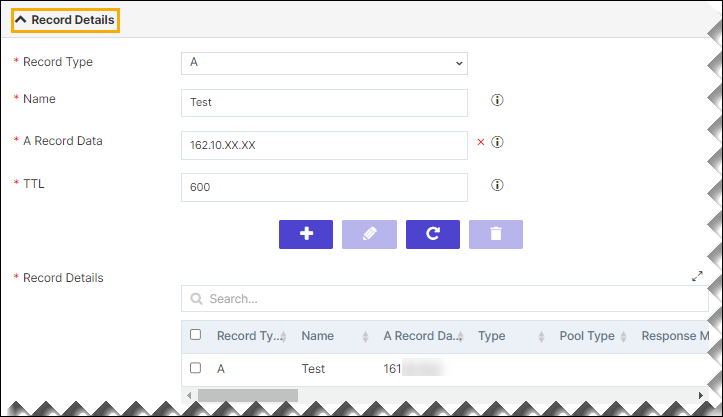
-
To edit the record details in the Record Details grid, select the row,
modify the details, and click the
 (Pencil) icon.
-
To delete a record detail, select the row to be deleted in the grid and click
the
 (Delete) icon.
-
To maximize the Record Details grid, from the top right corner of the
grid, click the
 (Expand) icon.
- To search for a particular profile/application in the grid, type the keyword(s) in the search field.
- Click Submit.
-
At the Zone Creation stage of workflow execution, verify the information
displayed and click Submit.
DNS Record is created successfully.