Easy Certificate Provisioning
To trigger this workflow:
-
From the Certificate Lifecycle Automation window, under the
Enrollment category, hover your mouse over the Easy Certificate
Provisioning workflow and click
 .
Tip: You can also search for the workflow by typing the workflow name in the search bar.The workflow execution page is displayed with the workflow inputs requested at the first stage.
.
Tip: You can also search for the workflow by typing the workflow name in the search bar.The workflow execution page is displayed with the workflow inputs requested at the first stage. -
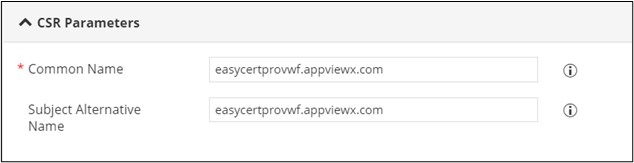
Under the CSR Parameters section, enter the Common Name.
Note: This is a mandatory field.
-
Under the CSR Parameters section, enter the Subject Alternative
Name.
-
Under the Device Details section, enter or select the requested field
information as described in the table below.
Table 1. Field description for Device Details section Field Description *Device Type Select the Device Type from the options available in the dropdown. *Vendor Select the Vendor from the options available in the dropdown. Note: The vendor list is populated based on the Device Type selected.*Device Select the Device from the options available in the dropdown. Note: The device list is populated based on the Vendor selected.Linux Actions Select the Linux Action from the options available in the dropdown. Note: This field is displayed only when you select Linux Server in the Vendor field.*Profile/Application Select the Profile/Application from the options available in the dropdown. Note: The Profile/Application list is populated based on the Device selected.*KDB Password Configure a password to access the KDB file. Note: This field is displayed only when you select Default in the Linux Actions field.*Push to Devices Add the selected profile/application to the grid as described below the table. All asterisk (*) marked fields are mandatory. -
To add the selected profile/application to the Push to Devices grid, click
 .
The profile/application is added to the Push to Devices grid.
.
The profile/application is added to the Push to Devices grid.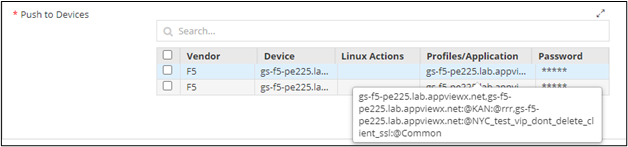 Note: If you select multiple profiles/applications, they will be displayed in the Push to Devices grid, under the Profiles/Applications column as comma-separated values.
Table 2. Actions available in the Push to Devices grid Action Description 
Allows you to edit the device details. You can do this by selecting the attribute in the grid, click ,
enter the new value for the attribute, and click
again.
Allows you to delete a profile/application. 
Allows you to maximize the Push to Devices grid. Search bar Allows you to search for a profile/application in the grid. -
Click Submit.
AppViewX certificate is created and pushed to the selected device. At the Summary stage of workflow execution, a Push to Device Status grid is displayed, which can be downloaded by clicking
 from
the top right corner of the screen.
from
the top right corner of the screen. -
To download the certificate, at the View | Download Certificate stage,
hover your mouse over
 and from the options displayed, click Download
Certificate.
and from the options displayed, click Download
Certificate.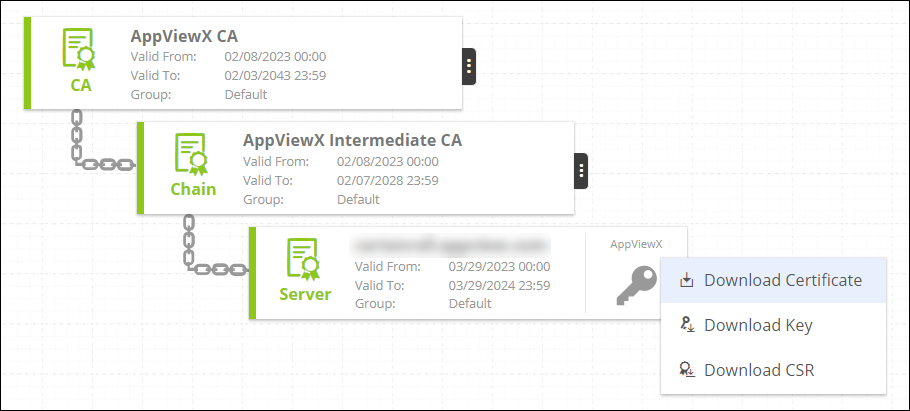
-
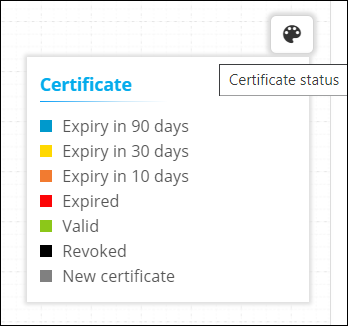
Hover your mouse over
 to view the Certificate status.