
Accessing Signing Inventory
Learn how to navigate to the Signing Inventory page, manage signing records, and perform actions such as Download, Export, Delete, and Bulk Delete.
-
Navigate to the Signing Inventory page:
Go to .
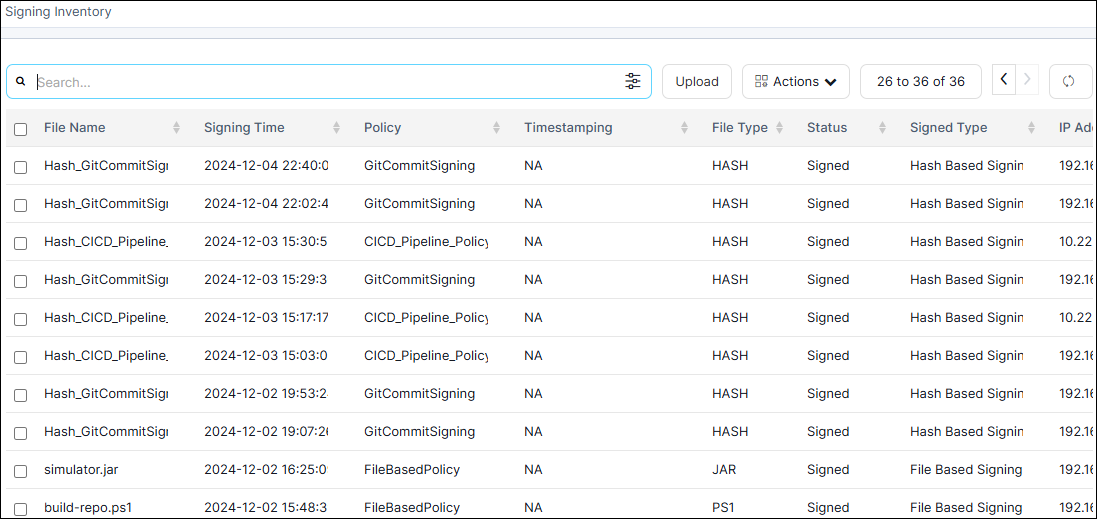 The Signing Inventory page is displayed listing existing signing operations, along with a top command bar containing search, filter, upload, and action controls.
 - To perform actions on inventory files, select one or more entries (if required), or click the Actions dropdown menu on the top right command bar.
-
From the Actions dropdown menu, select one of the
following available options:
-
Download: Downloads the selected inventory file(s) or signed artifacts to your local machine.
-
Export: Exports the signing inventory records and metadata to an external file format.
-
Delete: Deletes the specific selected signing record(s) and associated metadata from the inventory.
-
Bulk Delete: Initiates a bulk deletion of all obsolete or completed signing records matching the currently applied inventory filters.
Important:- Bulk deletion applies strictly to signing operations with a status of Signed or Failed. In-progress or pending signing operations are excluded from deletion.
- The Bulk Delete option can be used when you want to bulk delete the code signing records from the inventory by applying the relevent filters. If clicked when no records match, a validation message is displayed.
- Deleting an entry is permanent. Once removed, it cannot be recovered.
-
-
If you select Bulk Delete, proceed with the confirmation
steps:
-
Additionally, you can upload a new file to the signing inventory:
